
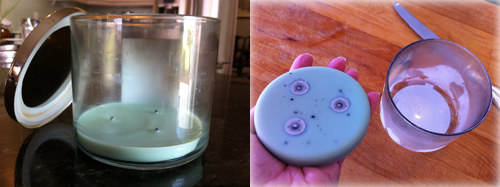
I have ruined my love of expensive candles. Not to say that I don’t like candles – I do. I really enjoy them. Problem is, the cost. I like those $20-$25 candles that smell so good. You know the ones. Recently, I burned up yet another $20 wonder and thought, ugh, ‘I’m throwing away another lovely glass jar'(not to mention that I literally burned up a twenty!). We don’t have glass recycling here and that makes it worse. So I sat it aside and enjoyed the smell with the lid off anyway, until I’d decide to toss it.
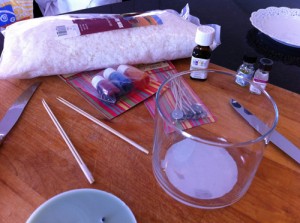
In the meantime, I found myself at a place called Hobby Lobby wandering aimlessly. I’d driven my Mom to an eye Dr. appointment and had time to kill – a dangerous thing for me. The store is really big – like Home Depot big. Most of the middle isn’t hobby related at all, but that didn’t stop me from looking. In the back I went looking for canning jars (don’t, they’re expensive!) and with them were candle jars. Hmm, never thought of making a candle. Around the corner, you guessed it, candle making supplies….on sale! Well, that did it – I have to try this. For $13.50, I was out the door.
The next day me and my Michael’s Crafts coupon were out picking up a metal melting pot, because the nice lady on the YouTube video said it was a good investment. OK, if they’re too expensive I’ll just get an old pan at the Goodwill and have fun. But turns out it cost a whopping $8.00, had nice tall sides and a pouring lip. Later, I used it to store all the candle stuff in. Now to put it to use.
Step 1 and 2: Get the old candle jar prepped. I’m sure there are a dozen warnings against doing this – none of which I’ve actually read. Let’s get the old wax out first – just put it in the freezer. The old wax disc pops right out. Martha taught me that years ago – thank you Martha. Clean the jar out with some glass cleaner and be nice and peel that label off (but not the warning label on the bottom – I need lots of warnings).
Step 3: Gather the goodies. You’ll need wax (I chose soy wax to be trendy and healthy-like), wicks, color and scent.They didn’t have the scent I wanted at the store and I knew I keep lemon oil at home. Although, I did need some spearmint oil. Off to the cake department. Note ‘oil’ – not extract. There’s a huge difference. And I’m sure there’s yet another ignored warning in there about using oils you can eat instead of the tiny vials on display.
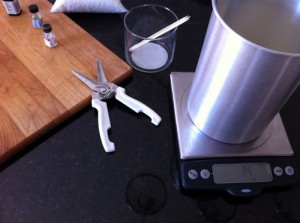
Step 4: Weigh out the wax. It’s a 14.5oz candle jar – so I’m guessing 14 oz will do.
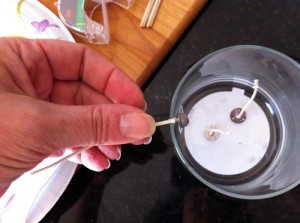
Step 5: (I know at this point we’ve lost Donna – too many steps!) Set your wicks with some hot glue, or those little ‘glue dots’ they sell.
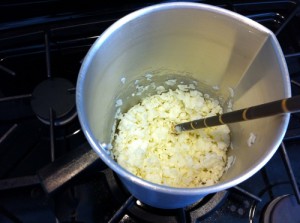
Step 6: Get that wax melting. I used an old paint stick/dowel as not to splash. Oooo, hot molten wax and skin – not a good combo!
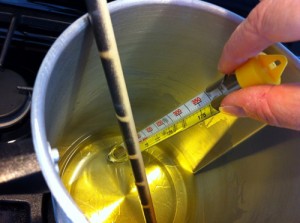
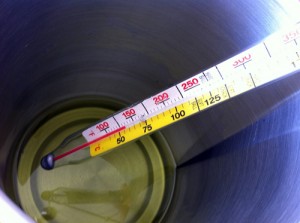
Step 7: Doesn’t look like much – get it up to 185deg. Yes, that’s my candy thermometer – I’ll clean it later.
Step 8: Let it it start to cool down and add your color and scent. A few drops of lemon and mint – yummy! The soy is already a creamy yellow so a few drops of blue and one or two of yellow worked fine.
Step 9: I used these skewer sticks to hold the wicks upright. No fancy ‘wick holders’ needed here. Pour in the liquid. And wait – and wait – and wait. Ok, maybe not that long. Go clean up.

Do not – I repeat DO NOT pour anything down the drain – unless you’re married to a plumber and really want a divorce. Warm the pot a bit and wipe it out with a paper towel. Then you can wash it with hot soapy water.
Step 10: A couple hours later it’s cool. Trim the wicks and admire – but don’t light it until tomorrow. Yes, it’s still warm inside.
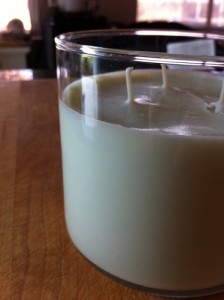
Done: …and the next day… Look at that – a candle. Then my husband shows up and sniffs – “Oooh, I like yours better than the old one – it smelled a bit like a urinal cake.” What??!!! (since I have very little frame of reference to the scent of a urinal cake…I’m going to trust him on this) I like my candle with it’s soothing greeny color, and lemony, minty smell. (very unlike a urnial cake I’m hoping)
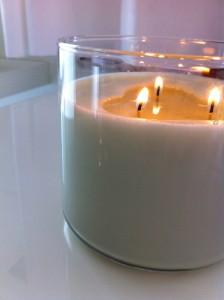
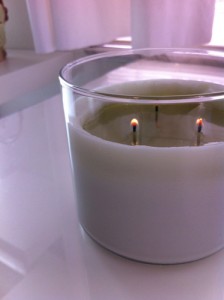
Later: The soy wax burns forever – this is hours later in the afternoon (yes I need different wicks next time). And no smoke or soot. Even if it wasn’t a perfect experiment – I’m going to keep refining this and maybe they’ll turn up as Christmas gifts.
The cost, what like, $5 bucks! Now I know how that guy that owns the candle company has all that money!!! I’m thinking I shouldn’t have showed you how to do this cause I need to make candles…I’m obviously in the wrong business!
Michelle @ www.badzoot.com
The candles are a good idea, everyone loves candles.