Easy Envelope Style Pillow Covers

Easy Envelope Style Pillow Covers

I’ve posted about easy peasy pillow covers in the past.  But thought I’d revisit the subject.  

Just because.

This project is so simple, anyone can do it. Seriously.  The hardest part is calculating what size to cut the fabric. And I’ve done that for you!

If you have a sewing machine that sews straight seams, a pair of scissors, a tape measure and some pins you can spruce up your decor with some happy pillows at very little cost.

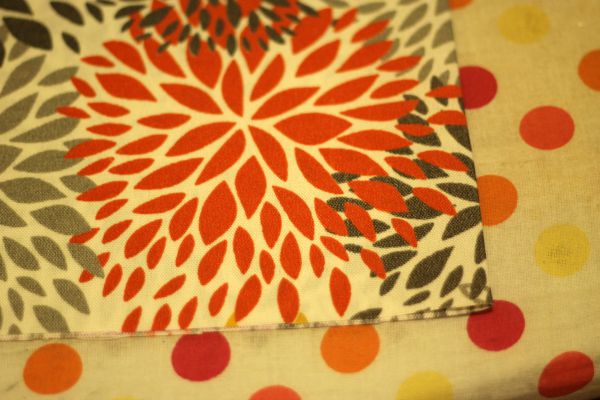
I have a bunch of pillows at home in a bunch of different sizes.  Some of them were really ugly in their previous lives. But with a little bit of sewing and fun fabric, they have been reincarnated.  

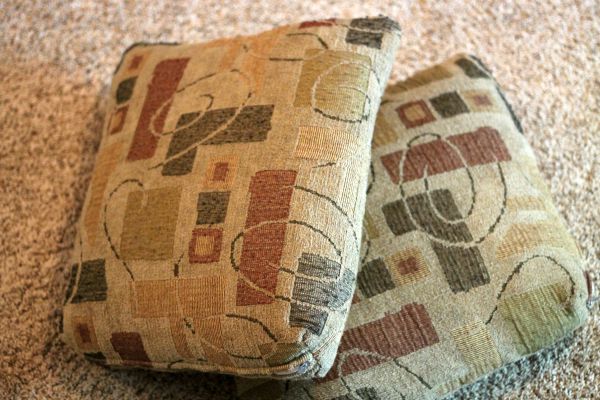
So while I was at Lauri’s, I asked if I could give a couple of her old pillows a chance of being loved again.

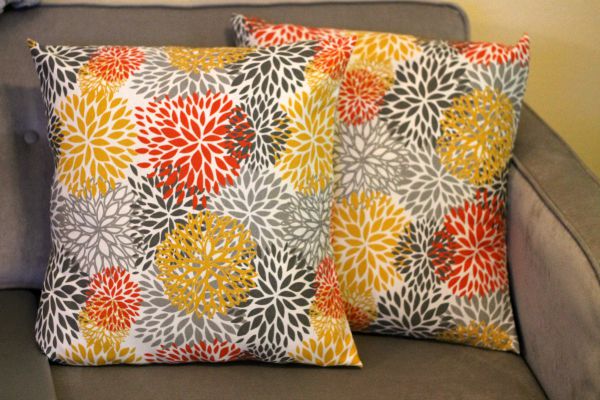
I think these probably came with a sofa.  (Admit it, you have some of these pillows stored away because you can’t bear throwing them out.  Pillow forms are expensive!)

pillows

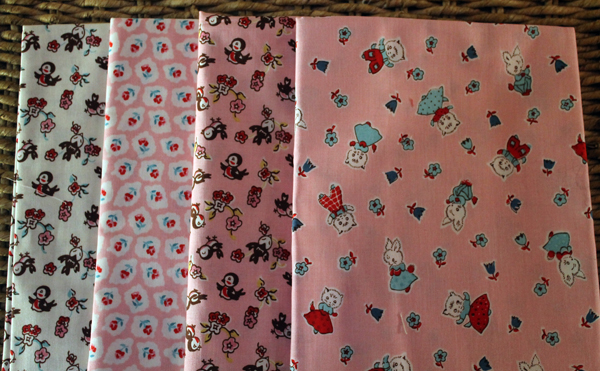
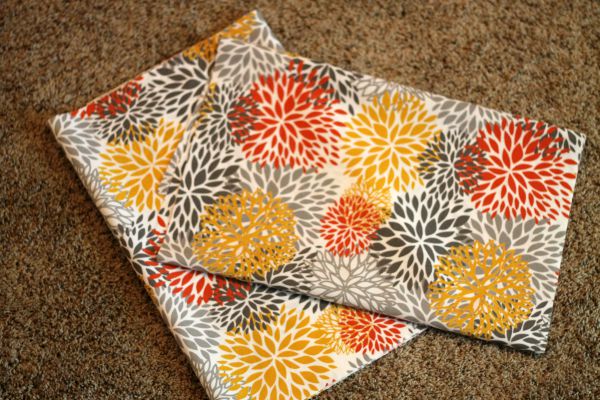
Lauri put new orange curtains in the playroom.  The walls are yellow.  So I wanted to recover the pillows in a fun fabric that would bring those two bright colors together.

These are 20″ square pillows but are a little out of shape. I would usually add 1″ for seam allowances but I wanted to make the pillow covers a little smaller so they would pull the pillow back into shape.  (Kind of like I wear my jeans too tight so all those out of shape places will get tucked in–but who am I fooling?)

So these instructions are for a very tight 20″ pillow cover.

I’m making two pillows so I bought 1 1/4 yards of 54″ wide material.

I cut my fabric 20″ wide by 48″ long.  This gives plenty of coverage for the envelope style back.  

Easy Envelope Style Pillow Covers

Now I’d like to tell you how I feel about ironing.

Hate it.  Hate it.  HATE IT!

But I iron every step of the way when I’m sewing.  I recently watch a video on sewing a pouf and the blogger said that she never irons.  Only “finger presses” her sewing projects. I’m not that good.  I iron to get a nice accurate seam and I use it for a short cut to mark centers and folds.  So I do it.  (But I seldom iron my clothes–hey I live in Florida, t shirts and shorts. That’s it.)

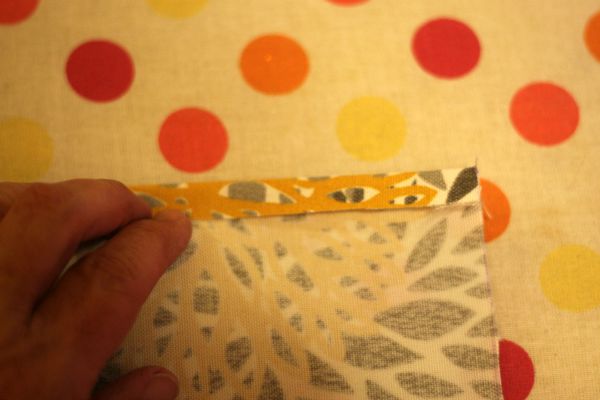
So I press under 1/2″ and then another 2″ on each short end. And then stitch.

Easy Envelope Style Pillow Covers

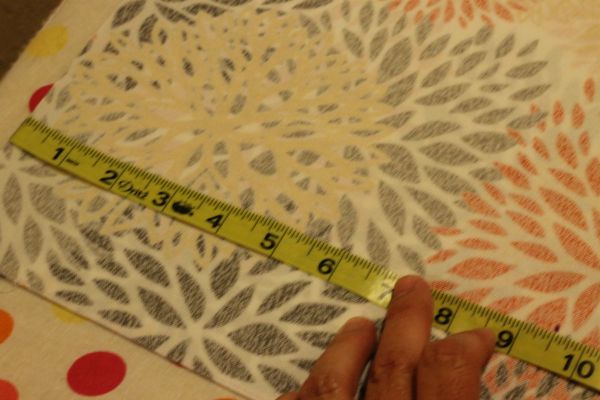
To mark the center of the piece,fold the fabric in half and press.

Easy Envelope Style Pillow Covers

This is the center of the front of the pillow. Measure 9 1/2″ from fold and mark on each side in the top and bottom seam areas.  (I used a sewing marker that washes out and even has a handy eraser to remove the mark. But as long as you mark within the 1/2″ seam–which I didn’t do in this photo–you can use any kind of marker)

Easy Envelope Style Pillow Covers

Fold and press on the markings.

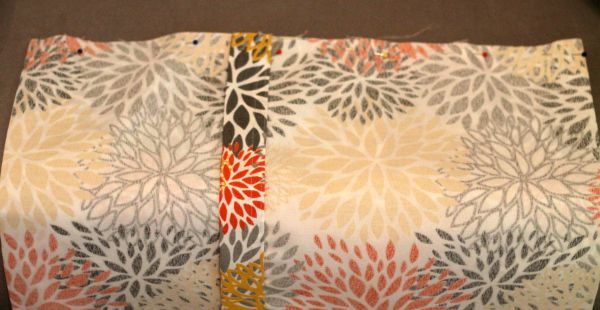
Fold the sides together on the pressed seams.  

Pin top and bottom.

Easy Envelope Style Pillow Covers

Stitch top and bottom 1/2″ from edge.

Clip corners

Easy Envelope Style Pillow Covers

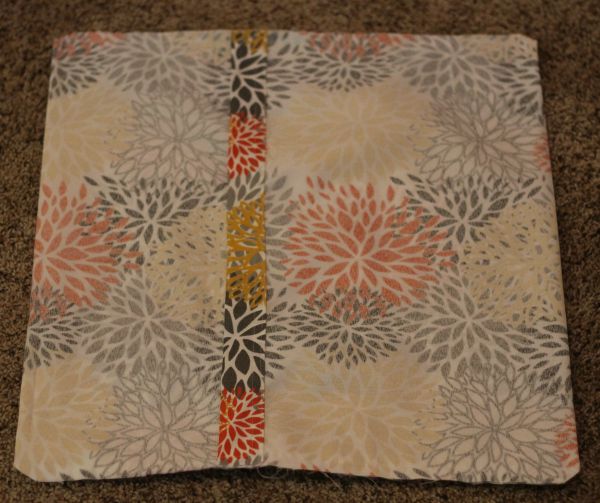
Turn right side out.

Stuff those pillows in!

Easy Envelope Style Pillow Covers
What a difference!

Done!

Now go find some of your old ugly pillows and make them beautiful!

YOU CAN DO IT!

My latest quilt projects

Last December I said to myself, I should make a goal of one new quilt a month.

Then I said to myself, are you crazy?  So, I scraped that goal for something more realistic. Like making quilts for all eight grandkids.  

Got Riley’s denim quilt finished and delivered in April.  

Riley Quilt

I made Piper’s “heart of my heart” quilt last summer…

Piper

Addy and Kendall both asked me to make them quilts last month.  Maybe Christmas gifts?

And I have started the next quilt for a grandchild.

My latest idea is a “heart and nine-patch”.

I pulled these from pInterest…

Hearts and 9 patch
This one came from Amish Country Lanes. Click on the photo and you’ll go to the webpage.
Hearts and 9-patch quilt
And this one is from Almost-Amish.

I’m changing the pattern up with embroidered hearts rather than appliqued.

heart patch
My first attempt to make patches with embroidery on my new sewing machine! (The blue lines will wash out)

Here’s some of the fabric for the “nine-patch” blocks. I also have a brown and white gingham and a brown and cream dot.  Wanted to mix a pink and white gingham in but haven’t found one I like yet.

Milk sugar and flowers fabric
This quilt will obviously be going to a little girl!  The fabric is Penny Rose Milk Sugar and Flower from Riley Blake.

The pieces will each be 2″.  I wanted them small so I could “fussy-cut” those sweet little kitties, bunnies and birdies. This will make a 6″ nine-patch block.

I’ve already got all the embroidered heart blocks finished.  Next step is cutting out and sewing together all those little 2″ bits.  

I’ll give you an update, hopefully soon!

A Mermaid’s Tail

If you follow me on Pinterest, you might have noticed a board for “Things that Piper wants me to make her”.  My 4-year-old granddaughter LOVES Pinterest.  We spend “quality” time going through all the pins for mermaids, assorted softies, and cat-themed pillows.  

So when we came across the pin for this mermaid tail, she really thought I should make it for her.  

Mermaid Tail Pattern
Just click on the photo and you should go directly to the tutorial!


The website, Grosgrain, has the tutorial and pattern for the tail.  Typically I follow the instructions the first time I make a project then tweak it to my satisfaction on the next effort.

I followed this pattern pretty closely but I had to make a few changes.

First, I didn’t use the Soft N Comfy fabric she suggests because somewhere in the tutorial she also calls it Minky.  I love Minky.  But without a walking foot on the sewing machine, it’s the devil to sew.  It’s VERY slippery.  And I’m borrowing my daughter-in-law’s machine for this project and it doesn’t have a walking foot.  So I bought an anti-pill fleece that was on sale at Jo-anne’s instead.

Fleece is soft, very forgiving, and doesn’t fray.  So soft, that as soon as I pulled the fabric out of the bag to show Piper and Adley, they laid right down on it and rolled around. Fleece also washes nicely so I let them have a little party.

fleece

fleece

Second, I don’t have a printer here, so I wasn’t able to use any of the patterns that came with the tutorial.  I just drew the fins on a newspaper and used it for my pattern.

pattern

lots of pins
While fleece isn’t as slippery as minky, it still likes to move. When I work with slippery fabric I use a LOT of pins.

The final big change was that I did not hand sew the waist fin onto the tail. When I’m making anything for a kid, I try to do all machine sewing.  It’s a LOT sturdier. I even double stitched all of the seams.  Anything I make for Piper is well-loved and well-used.  

I sewed the waist fin into the inside of the mermaid tail then turned it to the right side.

A Mermaid's Tail
Here I’m sewing the waist fin onto the inside of the tail.

I then attempted to stitch the waist fin to right side of the tail and broke the needle.  Whoops! The sewing machine I’m using is very powerful so I was really surprised it couldn’t get through all those layers.  So I had to do a little hand stitching just so the waist fin would stay on the right side and not flip back to the inside.

And how did Piper like it?

A Mermaid's Tail, A very long tail!

A Mermaid's Tail

A Mermaid's Tail

A Mermaid's Tail
I think that’s a happy face!