
I just finished the shopping tote I was making for my daughter-in-law to sell at her Fall Festival that I mentioned last week. Which means I didn’t have time to write up a tutorial explaining the size or those pockets or any of the fun stuff I added.
But here it is….
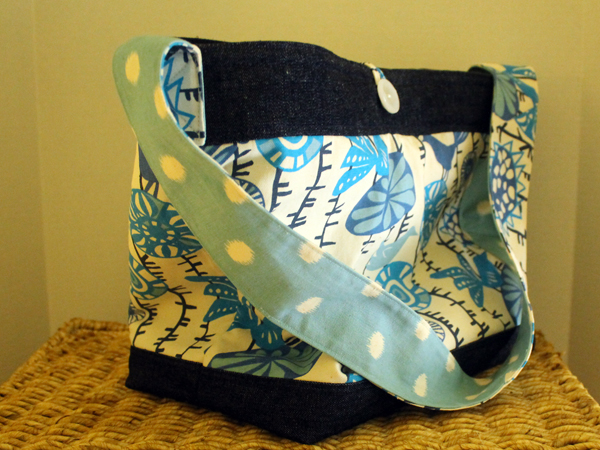
Yeah, you’ve seen that fabric before. And I still have enough for a couple more bags. I wasn’t planning on using this fabric but I messed up the first tote I made and didn’t want to go to the local fabric store and get more. “Local” for me is a 35 minute drive. Add the return trip and the hour I spend browsing–half a day is gone! And I had a deadline–which, by the way was Saturday and I missed it! I’ll be making a drive to Tampa to deliver the bag today.
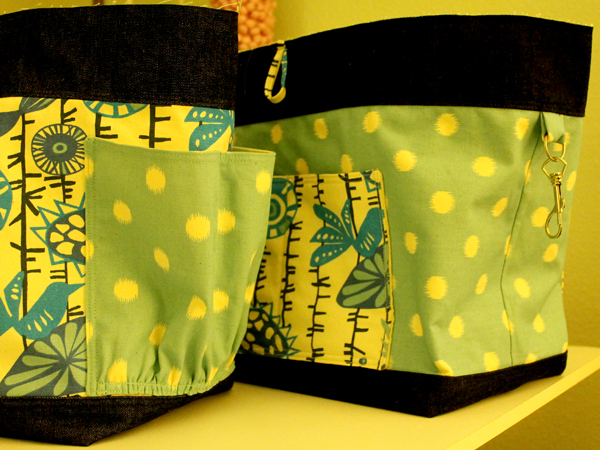
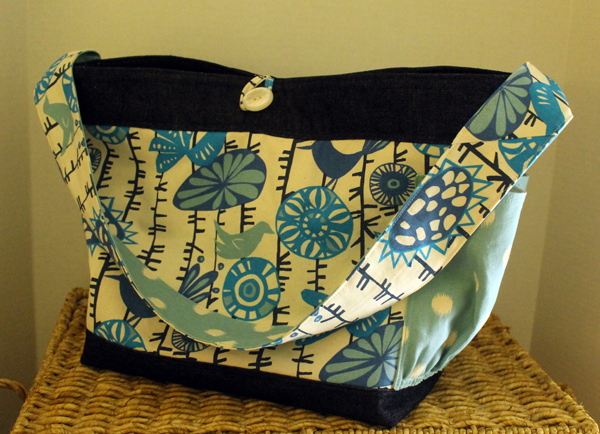
The outside of the bag has two water bottle pockets and a toggle with button for closure. I used three fabrics–two coordinating from Premier Prints that I got from Fabric.com and a dark blue denim–plus muslin to line the pockets.
Here’s the inside of the totel There’s a key snap, phone pockets and a big pocket for your iPad. I actually made the phone pockets bigger than usual since I saw the iPhone 6 and that sucker is huge!
 While I’m not doing the tutorial for the bag, I thought I might explain “boxed corners”.
Know what that is? Boxed corners make the bottom of the bag nice and square. Well, square probably isn’t the right word since this is a rectangle but you probably get the idea.
I used to do a different method and when I first stumbled across “boxed corners” on some anonymous blog, I found it a wee bit confusing. So I practiced and checked out a lot of different blogs and now it’s really easy-peasy. And they are very useful for totes, baskets, and even cushions.
So here’s the quick and easy and hopefully not as confusing explanation…..
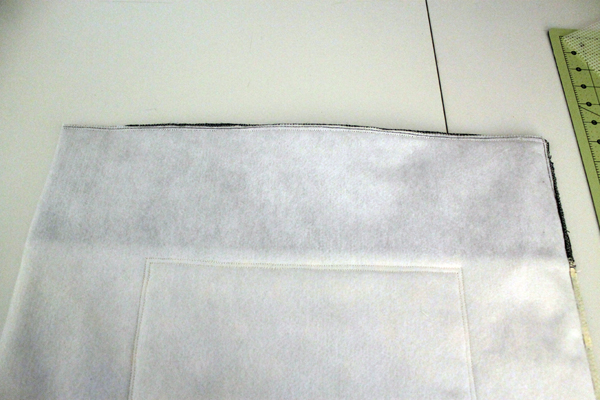
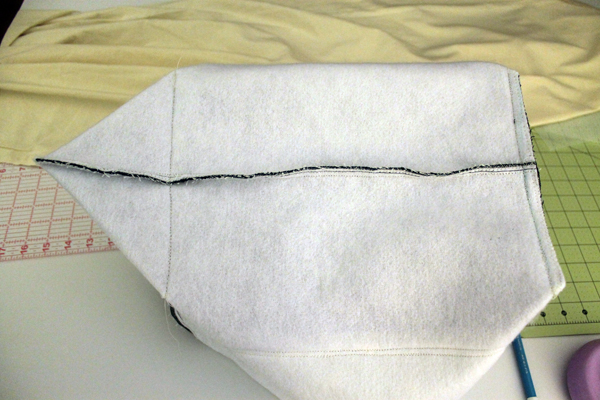
I have a big rectangle lined with fleece, 41″ x 17″, I brought the two 17″ ends together and using 1/2″ seams sewed the one side and bottom. So now it’s 20″ wide by 17″ tall.
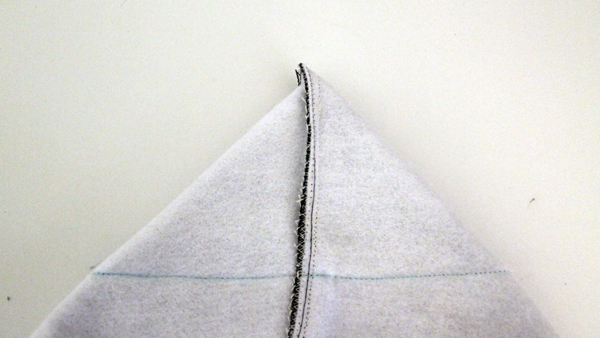
Now it’s time to box the corners. I’m doing the corner that’s in the upper right of the above picture. Pick up the fabric and kind of tug that corner apart. Put the side seam on top of the bottom seam.
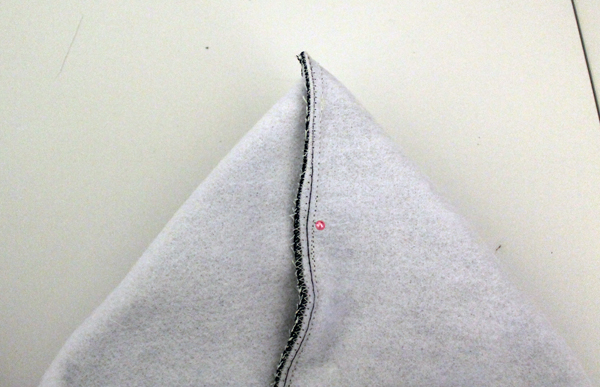
The “box” I am making is 8″ wide. So I measure down four inches (half of the 8″ box) from the tip and then measure from side to side. Should be 8″. Make sure that the seams are lined up exactly–very important. After I do the pinning I peek inside the box to make sure the seams are actually lined up.

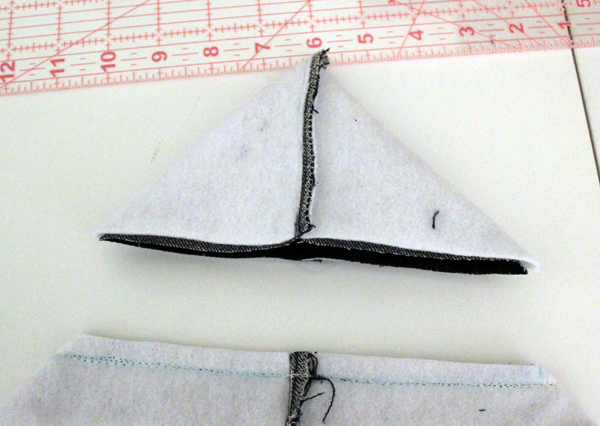
Mark the sewing line.
And sew on the line. I usually sew it twice for extra durability.
Then cut that point off. I zig zag the raw edge.
 Do the same for the other side. And that’s it!
Here’s another look at the shopping tote I made.
And eventually in one of these posts, I’ll let you know exactly how to figure out all the dimensions you need to calculate to get the exact size that you want your tote to be. Do you remember when you told your Algebra teacher that you will never use those formulas in real life? Well, this is an equation that I figured out and it works for all sizes of totes, boxes, and baskets. And I’m going to add that Algebra was one of my favorite subjects. Seriously.
More to come!
Wow – you make that look so easy ! I love the Algebra comment. I can’t tell you how many times I’ve been cooking and pointed out to the kids that “I’m using fractions and RATIOS HERE, People !!…” Which isn’t algebra, but it’s math with an everyday application. I’ll be marking that upcoming post to show the kids as well.
Yeah, calculators are great but you have to understand how formulas work to use them!
Thanks for your help. I am trying to get back into a little sewing—mostly crafts, etc. hope to find instructions from you for different sized bags.
Hi Martha! Thanks for your comment. I have moved most of my sewing tutorials over to my other blog, DesignsByKTGreen.com. You can click on this link and go right to my page with the instructions for several different totes, bags, and boxes. I’m working on a new design right now and hopefully will be posting about that in March!
Kathy
Can you explain how some of the height is lost when you box the bottom. How is it decreased, including the part the seam plays. I really want to understand how the algebra works.
Hi Barbra, You are going to lose the seam allowance and 1/2 the boxing on each side.
For instance, I’m making a bunch of easy-peasy pouches to tuck small gifts in. A good way to get rid of some of my small pieces of fabric. I use a 1/4″ seam allowance and am boxing them for a 2″ bottom. Each side will be shorted by 1 1/4″. So the pouch sides started at 6 1/4″ but now they are 5″ tall.
Same way with the larger bag you commented on. Each side will lose 1/2″ for the seam allowance and 4″ for the boxed bottom. So you need to consider that you will lose 4 1/2″.
I can’t tell if you have side seams or not. Can you please advise. I’m trying to use your calculations but I have seams on both sizes of my bag. Would the calculations vary.
The bag in this post is made with one long piece of fabric. 41″ x 17″ If you are using two pieces of fabric you would need to add for the seam allowances. So you would need two 21″ x 17″ pieces.
I have a more detailed post on my sewing website. https://designsbyktgreen.com/basic-boxed-bottom-bag-part-1/
Hope I answered your question. Thanks for reading my blog!