
I’m ready to start a new project. With new fabric. And this is a big project. I bought these lovelies from Premier Prints at fabric.com. Of course, I waited for them to be on sale!
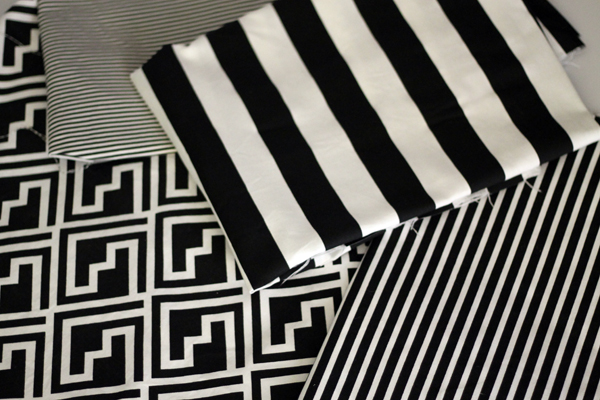
Black and white is not my typical color scheme, blue is my usual choice. But I had some inspiration which I’ll share in a later post.
I’m making cushions and pillows and moving furniture, patching and touching up walls. Maybe some new art. Terry’s in the middle of it, too. All fun updates but a little time-consuming.
I needed some matching piping for my fancy schmancy new projects and thought I’d try a fancy schmancy new method. And make you suffer through it with me.
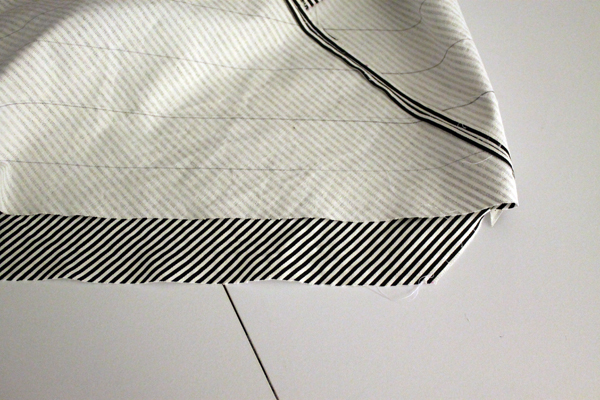
Here’s the finished product:
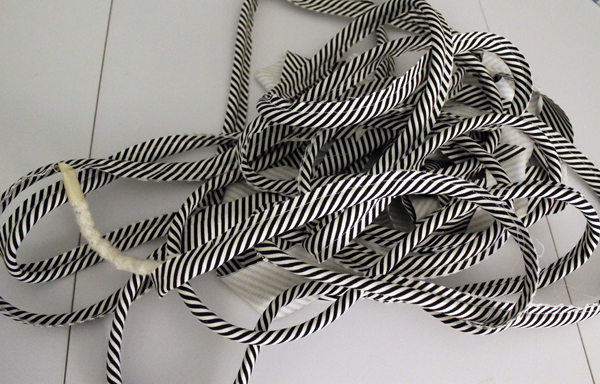
And here comes my disclaimer, I didn’t realize how bad some of the following photos were until I was all finished with the piping so I couldn’t recreate them. The black and white pinstripe fabric I was using was kind of wacko. Even when I was cutting it out it made me a little dizzy. So I apologize for the picture quality. I normally wouldn’t use bad pics but I really wanted to share this piping method. Next time I make piping, I’ll get better pictures and create a PDF.
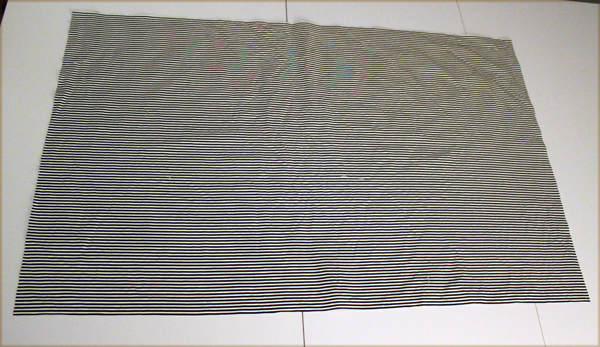
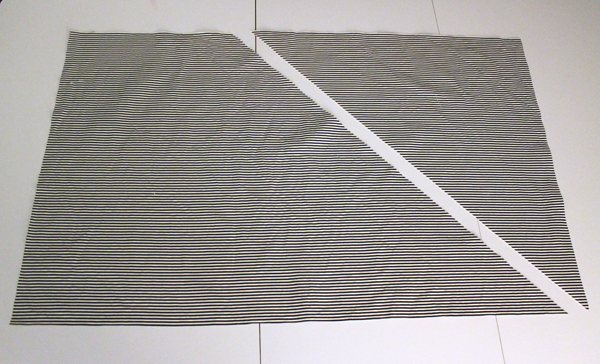
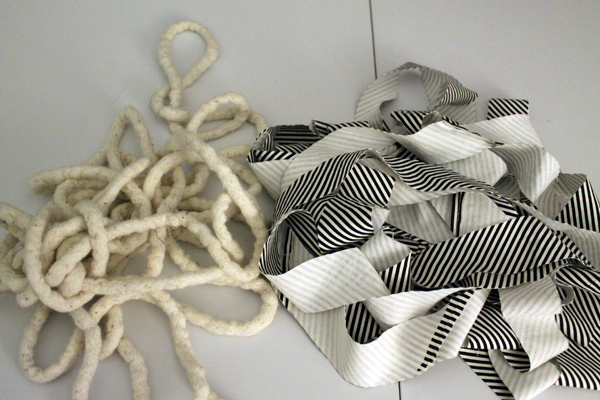
First I cut a piece of fabric 37” x 24” but you can use any size you want. The bigger the rectangle, the more piping you can make. But that little piece made something like 14 yards of piping. How much more could you need?
Fold down the top right corner to square off. I pressed this fold and then cut along the pressed fold.
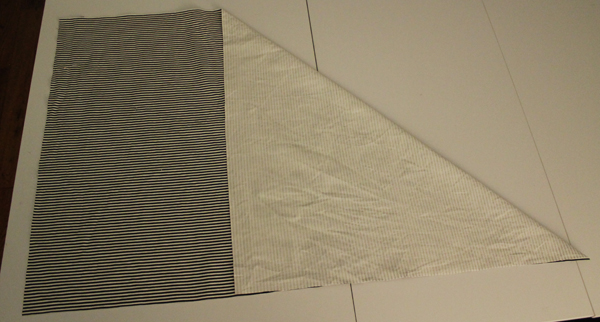
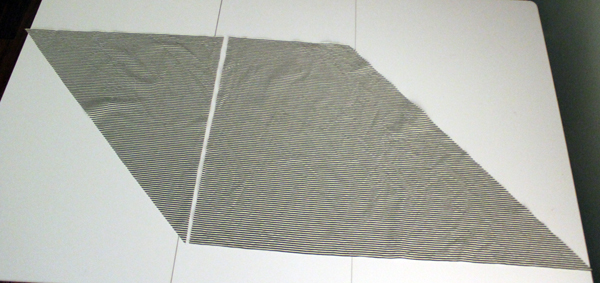
Take the triangle that was just cut off to the other side of the fabric, forming a parallelogram. (fancy schmancy word!) Sew with right sides together with ¼” seam. Press the seam open.
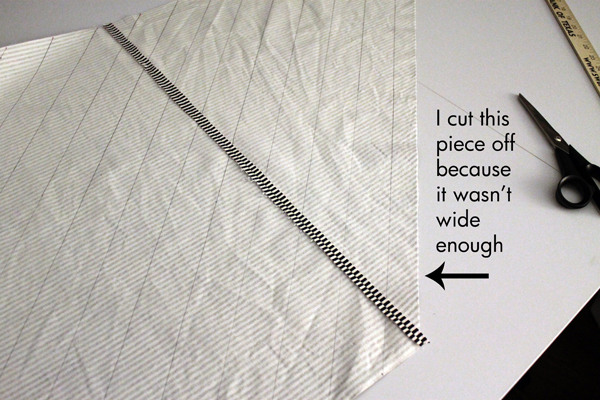
Decide how wide you want your strips to be. I used 2 1/2″ widths*. Starting at the top corner, mark the top of the fabric every 2 1/2″ section. Then do the same with the bottom, starting at the bottom corner.
* Here’s a little update. This width really isn’t wide enough. When I was sewing the piping I realized that the strips were only 1 3/4″. After pondering this for awhile I realized that diagonally the strips were 2 1/2″ but horizontally they were 1 1/2″. I was really surprised at the difference. I can still use the piping but the seam allowance is much smaller than I would like so I’ll have to be extra careful when I add the piping to the sewing projects. The width would be better at 3 1/4″ to get a good seam allowance.
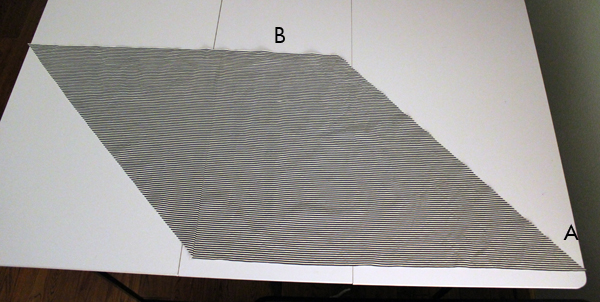
Draw lines from the top mark to the bottom mark. Connecting the first on the top with the first on the bottom.

I had a piece on the end that was less than 2 1/2″ inches so I cut it off.
This is the confusing part. With the right sides together, pin the top and bottom, matching the corner on the bottom with the first mark on the top. Pin the entire edge together matching the marks.

Sew the seam. This will create a wonky tube. Press the seam open.
Start cutting–just follow the lines you marked earlier.
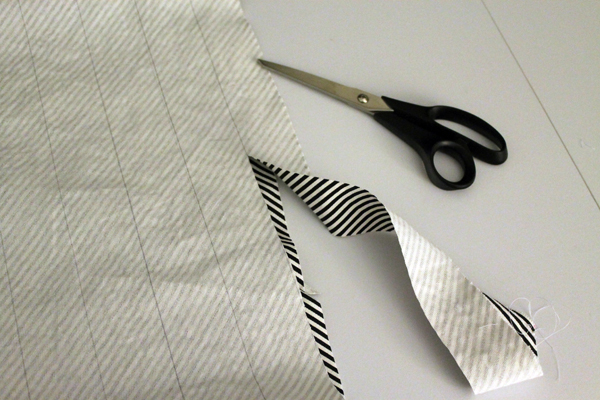
You’ll have one continuous strip of fabric.
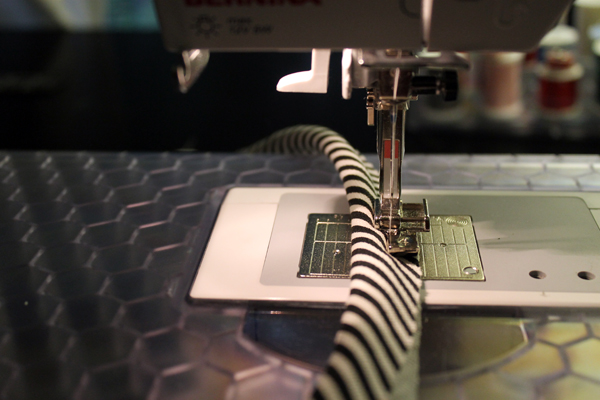
Fold the fabric around the piping. Use the zipper foot and sew as close to the piping as possible.
And that’s it!
Next week I’ll show you the first project with the custom piping!