
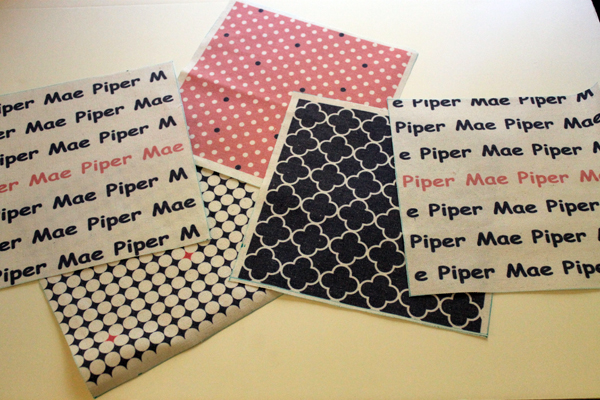
Okay, is this fabric adorable? There’s one panel there for each granddaughter. This was an offer from pickyourplum.com a couple months ago. I get an email from them everyday. It’s usually things I’m not interested in but I still look at the email. Once in awhile they have something special–like this fabric. And I haven’t seen them offer it again so I’m glad I bought it when I did, even though I had no idea what I would do with it.
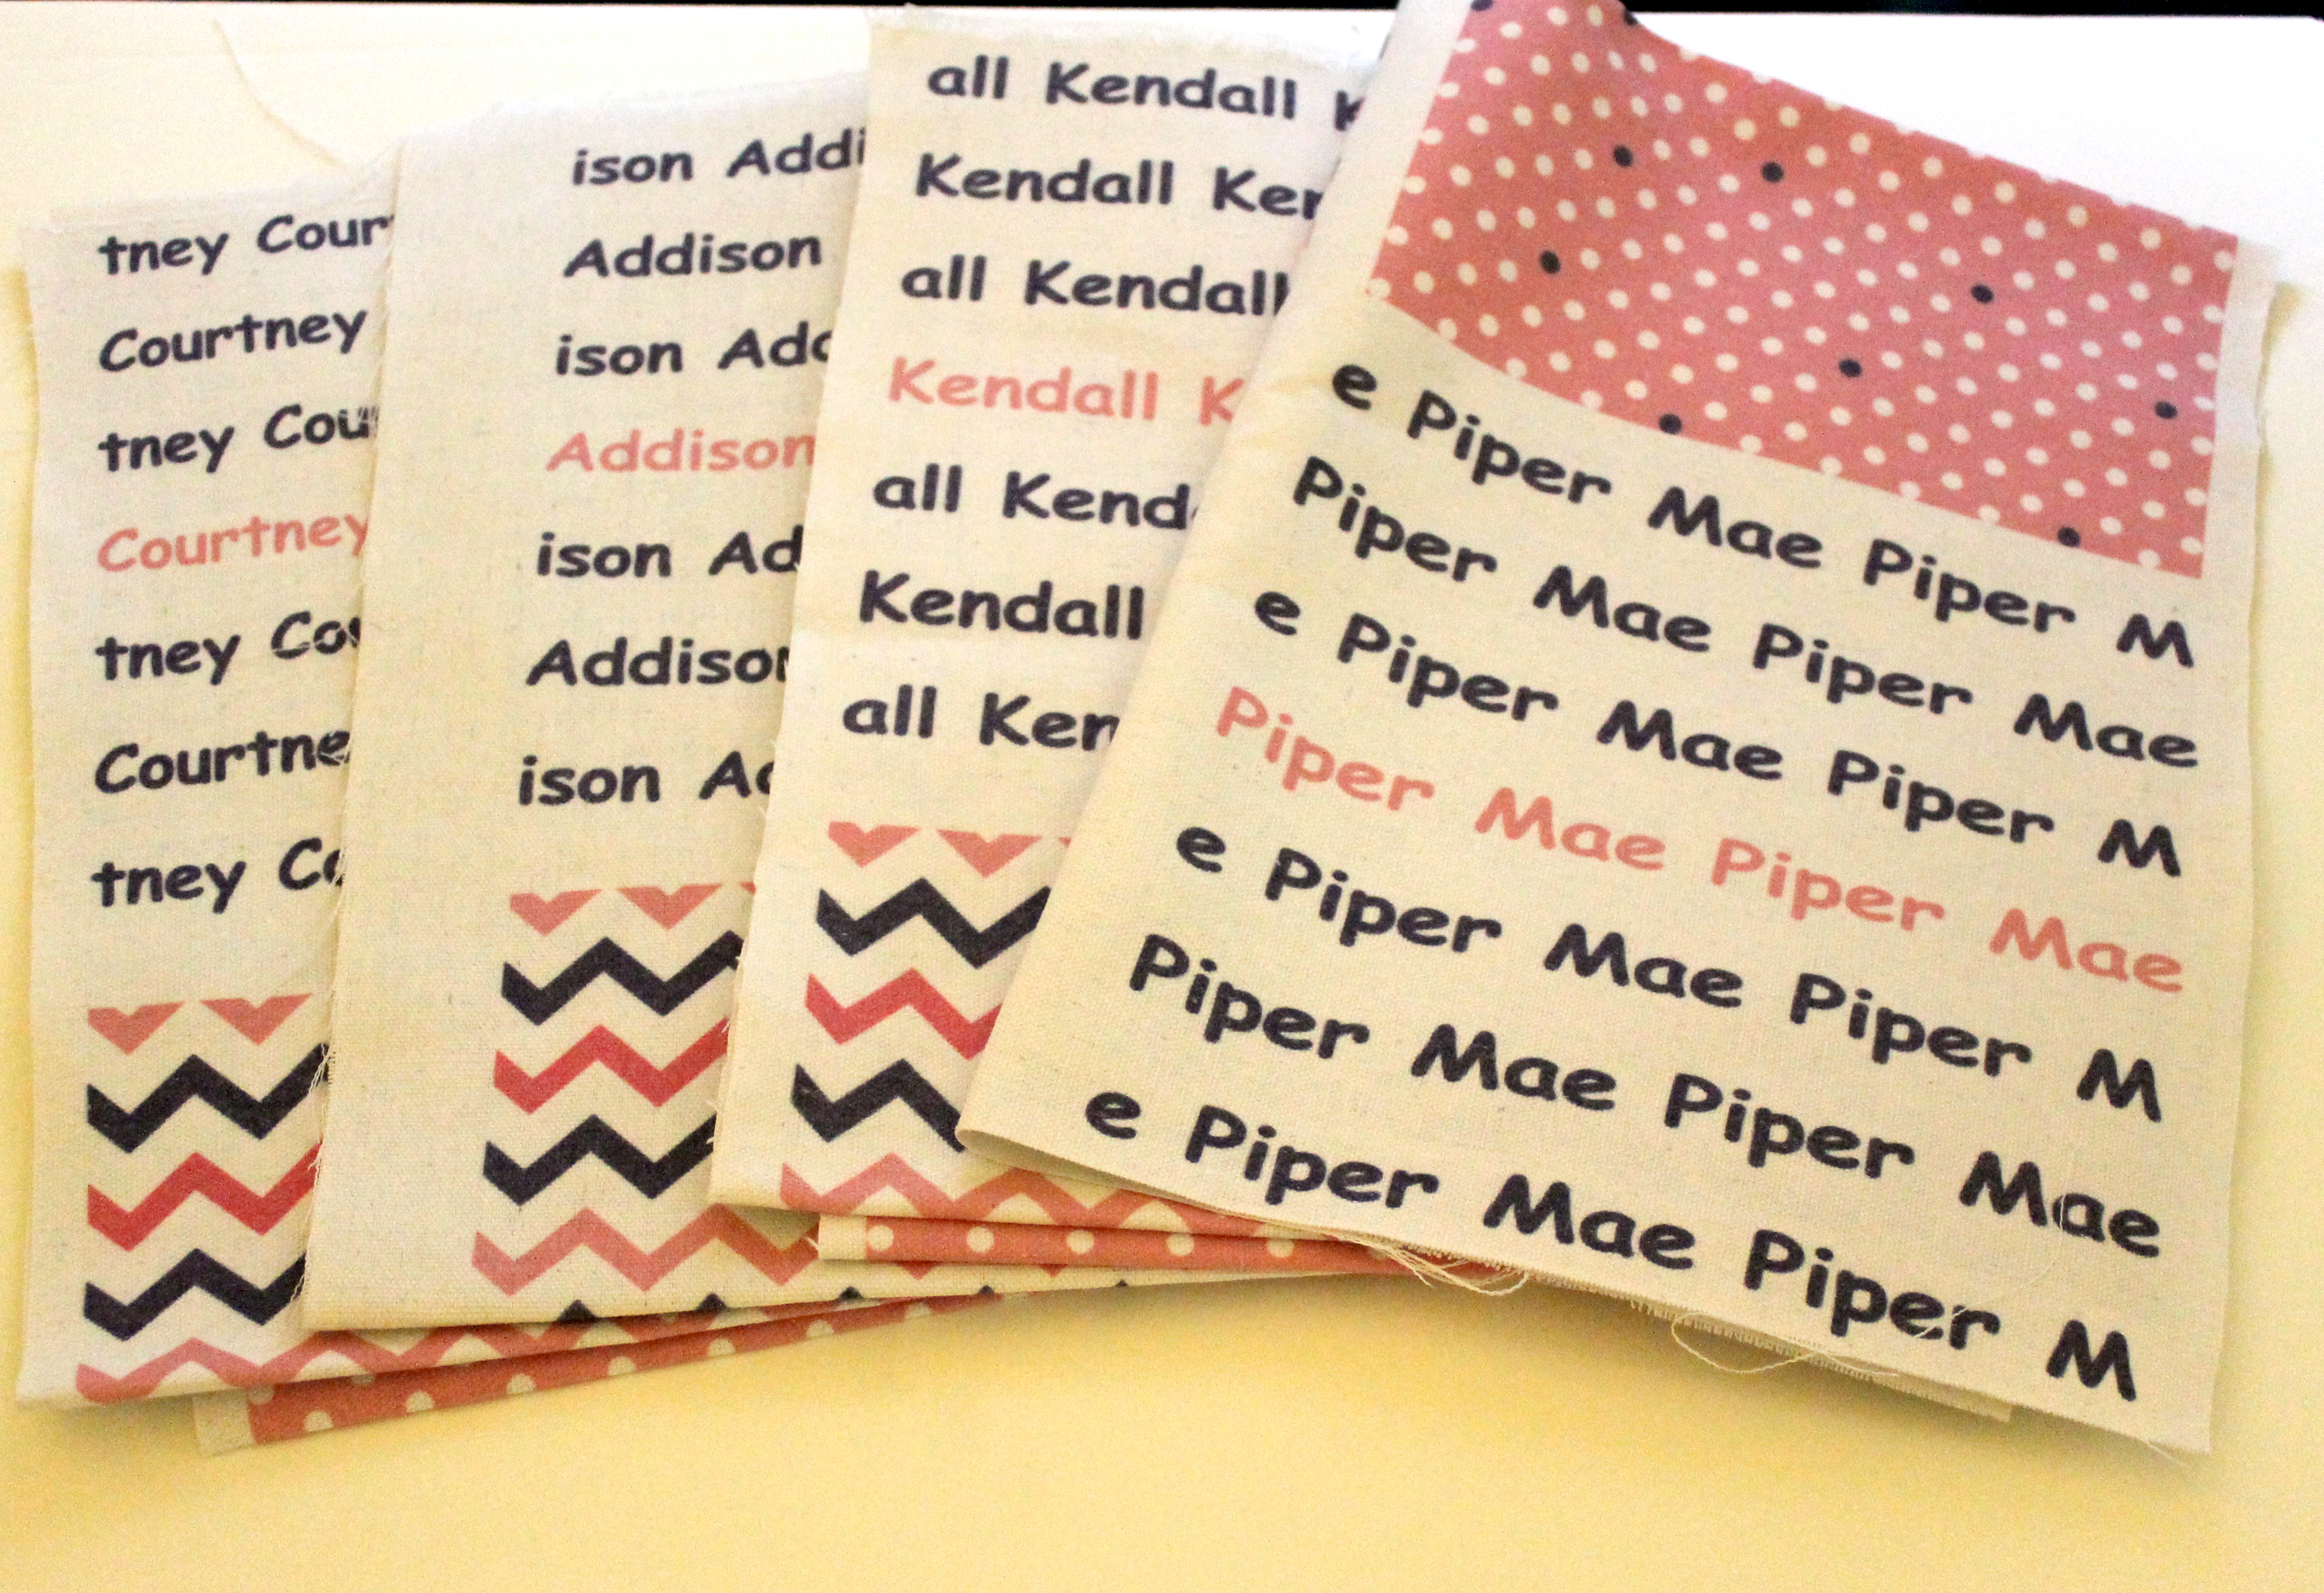 Each panel is about 20″ wide by 29″ long.

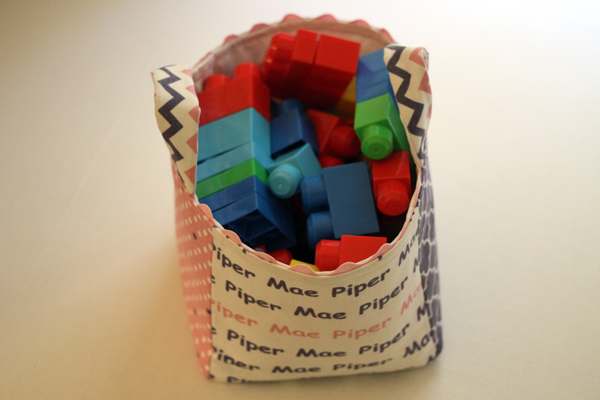
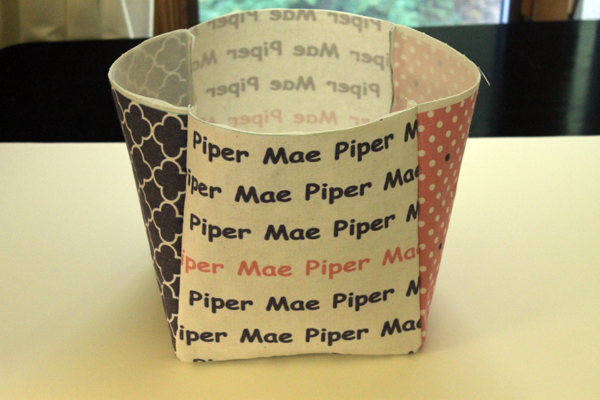
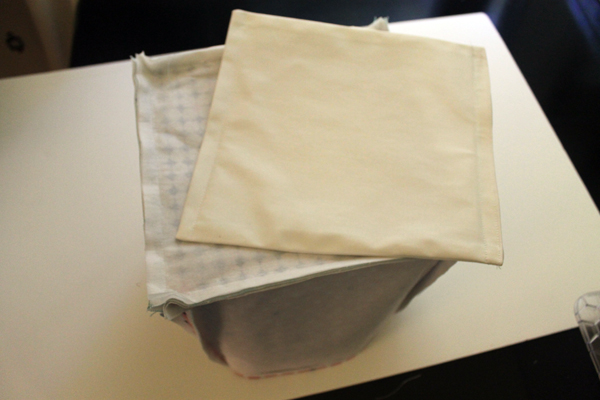
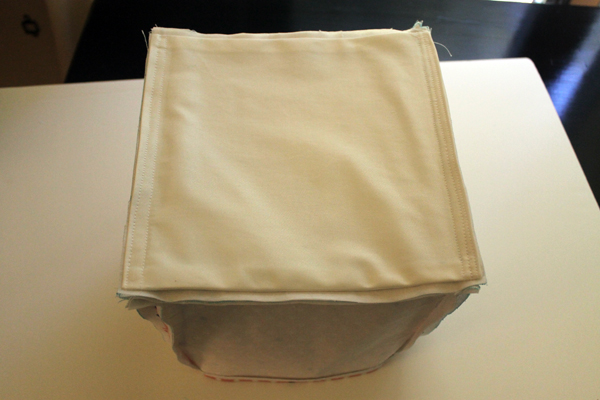
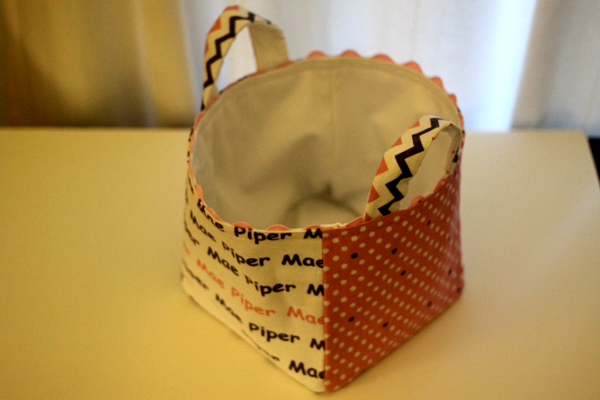
After spending a weekend with Piper back in December I decided to make her a fabric storage box.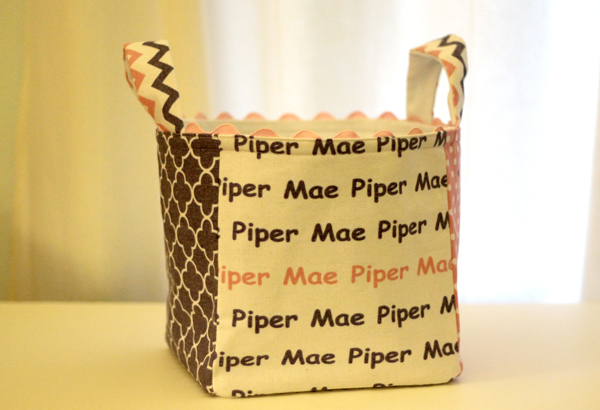 Something she can store her hair brush, combs, and ribbons in. Or maybe her legos and mega blocks. Piper really likes to build!
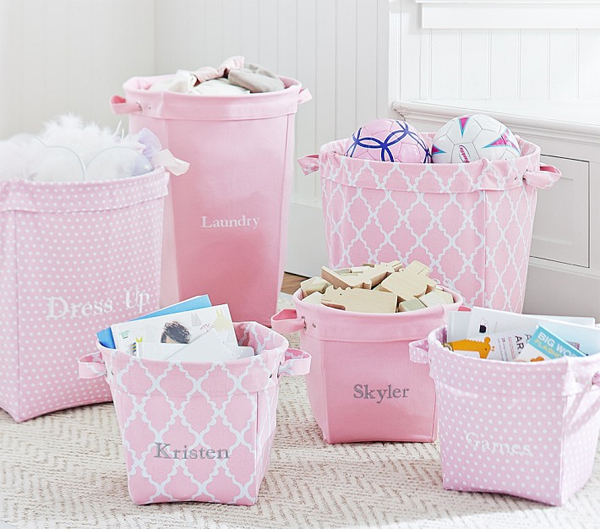
Here’s some boxes that I discovered at Pottery Barn Kids after I already completed this one. The handles are just a bit different than the box I made for Piper!
I based these instructions on the size of this fabric panel but you can easily make this out of any sturdy home décor fabric, denim, canvas, duck, you get the idea….
DIY Fabric Box
The finished box is 8 1/2” high and wide.
Use ½ “ seams unless otherwise indicated
Supplies:
You’ll need about 2/3s of a yard of the exterior fabric, lining, fleece, and heavyweight fusible interfacing.
A 10 x 20″ piece of muslin or other light colored fabric.
1 yard wide coordinating rick rack
8” square piece of plastic canvas
Fussy Cut from exterior fabric panel
5 9 ½” x 9 ½” pieces
2 2 ½” x 10” for handles
Cut from lining
5 9 ½” x 9 ½” pieces
2 2 ½” x 10” for handles
Cut from fleece
5 9 ½” x 9 ½” pieces
2 2 ½” x 10” for handle
Cut from heavy weight fusible interfacing
5 9 ½” x 9 ½” pieces
Directions:
Adhere interfacing to the wrong side of each exterior piece, following manufacturer’s directions
Sew fleece to the wrong side of each lining piece
Exterior
Attach sides to bottom, leaving seam allowance (1/2”) open on all ends.

It will now look like a giant plus sign.
Fold the plus sign, and sew two bottom sides.
Open up and sew other two sides.
Turn right side out. Box!
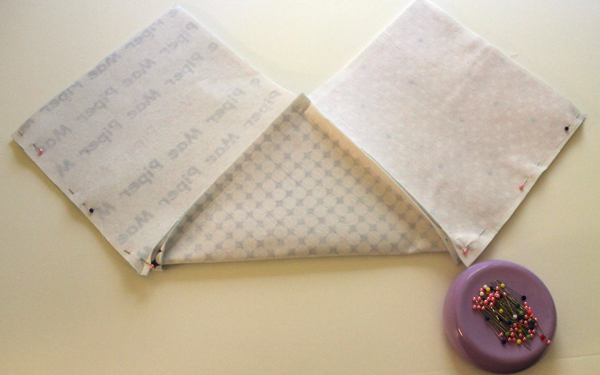
 Lining
Create the lining the same way as the exterior.
Press under ½” along top of lining.
Pin the rick rack to the top folded edge of the wrong side of the lining. Start at a side seam and ‘dip’ the curve of the rick rack down to hide the raw edge. The middle of the rick rack should be aligned with the top fold of the lining so the half of the rick rack’s ‘wave’ sticks up from the top.
Stitch the rick rack in place.
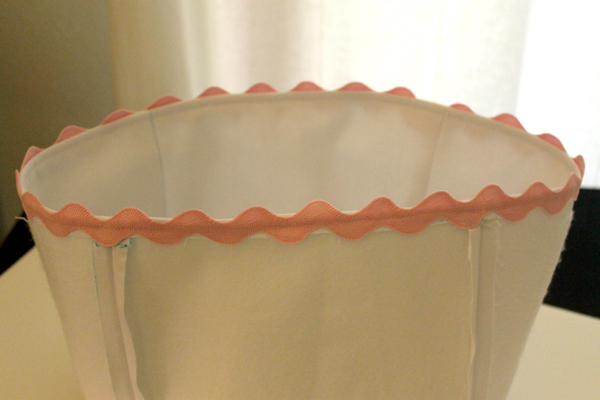
Press under ½” along top of exterior box.
Bottom Insert (optional)
The bottom insert is a sleeve for the plastic canvas which will be attached to the seam allowance to provide some stability to the bottom of the box.
Cut one 8” x 8” piece of plastic canvas.
Cut piece of muslin 10” x 20”. Fold short ends together. This should now be a 10” square. Stitch two sides together.
Press edges on open side under 1/2”. Turn right side out. This should now be a 9” x 9 ½” rectangle.
This step will make tabs to sew on the seam allowances on the bottom of the box. (Sounds confusing but it’s actually easy) Stitch ½” from the folded edge. Insert plastic canvas piece. Stitch close to pressed open edge and then ½” from pressed edge. (Don’t catch the plastic canvas in your stitching. Your machine might not appreciate it!) The plastic canvas will now be centered in the insert.
Pin the 9 ½ “ side of the insert to seam allowances on the bottom. Stitch.
Handle
Layer the handle fabrics in this order: batting, back fabric right side up, top fabric right side down. Align all raw edges, pin, then stitch together with ½” seam allowance, leaving both short ends open. Trim seam allowance to ¼” and turn handle right side out.
The handles will be on the sides that don’t have the name. Place the ends 1 ½” from the seam on each side. The raw edges of the handle should be 1” from the top pressed edge. Pin in place. Make sure you put the pins on the exterior of the box so the pins do not get left on the inside when done stitching!
Put the lining inside the box exterior with the wrong side of lining against the wrong side of the exterior. Match up the side seams and make sure the top folded edges are together. Pin together and stitch ½” away from edge. Top stitch close to top edge.
Done!
OMG – Soooo cute !! I love that fabric too.