I love to refinish trays. They are so useful in any room and I never seem to have enough. I don’t pay full price for a tray–way too expensive! I don’t even like to buy them on sale; I either get them at a thrift store or on the clearance rack. No matter how ugly they are, they can be beautiful.
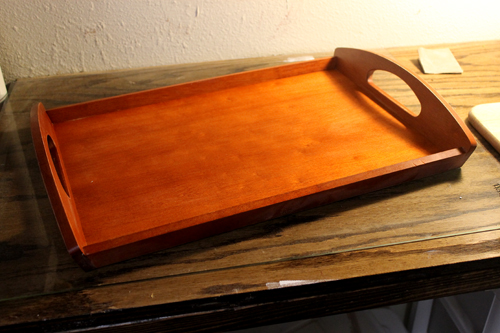
I posted about this tray back in December. It’s probably my favorite and I picked up it for $10 and made it beautiful by cleaning those lucite and brass handles and spraying the tray gold.
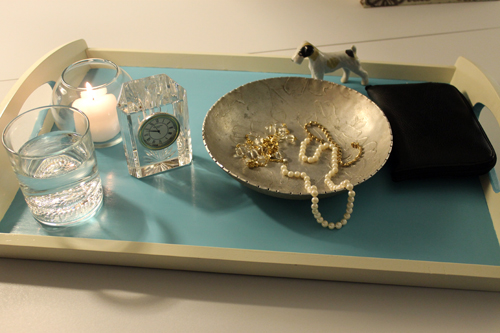
I found this tray on clearance in a shop at an outlet mall. It was already on sale then marked down 70%. Yippee! I wanted to do a stained glass mosaic on it but I was in a hurry. Plus I’m afraid to get any little cuts on my fingers on the glass grinder right now. It could ruin my career on the banjo!
Since color blocking is the trend, I painted the tray cream and a shade of blue that matches the guest bedroom. It’s now a place for my visitors to place their personal items.
Before I developed the phobia of cutting my fingers on the glass pieces, I made this mosaic tray.
Another finish I like to do with trays is decoupage. I either create a design or buy a small poster then use modge podge. These also make nice gifts–put a bunch of goodies on the trays and wrap it up like a gift basket. Fun, easy, and a personal gift.
This is Maggie in her V Day sweater last year. It seems to have stretched out this year and is way too big. Could be from Jes and I trying it on as a headband. Sorry Mag, but it looks nice on Dedo!
Here’s a list of dog traveling websites I check before I schedule a trip. Lots of valuable info.
We’ve been a little under the weather here this week and few things warm and lift the spirits like chocolate. OK, and a steak – which is now the ‘so-happy-I’m-almost-done-with-this-sickness’ meal at Chez Beal ! “Steak ‘n Cake!!” It just happens to be Valentines Day this week too. (Like I need a reason to work up a chocolate froth!) So we had our NY Strips on the grill, some yummy veggies and now the last patient is back in bed with the remote in hand – time for some Cake.
However, this is the Healthy Eating Blog so I can’t go all out on the cakeness. I found a cupcake recipe from WholeFoods and thought I’d give it a whirl. Sometimes when people make something vegan and dairy-free, and sugar-free, etc. the results can be well, less than appealing to those of us who enjoy knowing something isn’t contributing to our delinquency, but still puts a smile on our face. I did take the opportunity to change some of the Vegan aspects to suit my carnivorous lifestyle. I don’t even know what ‘powdered egg-replacer’ is much less have it on hand. (good Lord, what kind of chemical could THAT be?!) So, if you don’t have it, don’t sweat it… let’s get bakin’.
Valentines Chocolate Surprise Cupcakes:
Step 1
Step 1
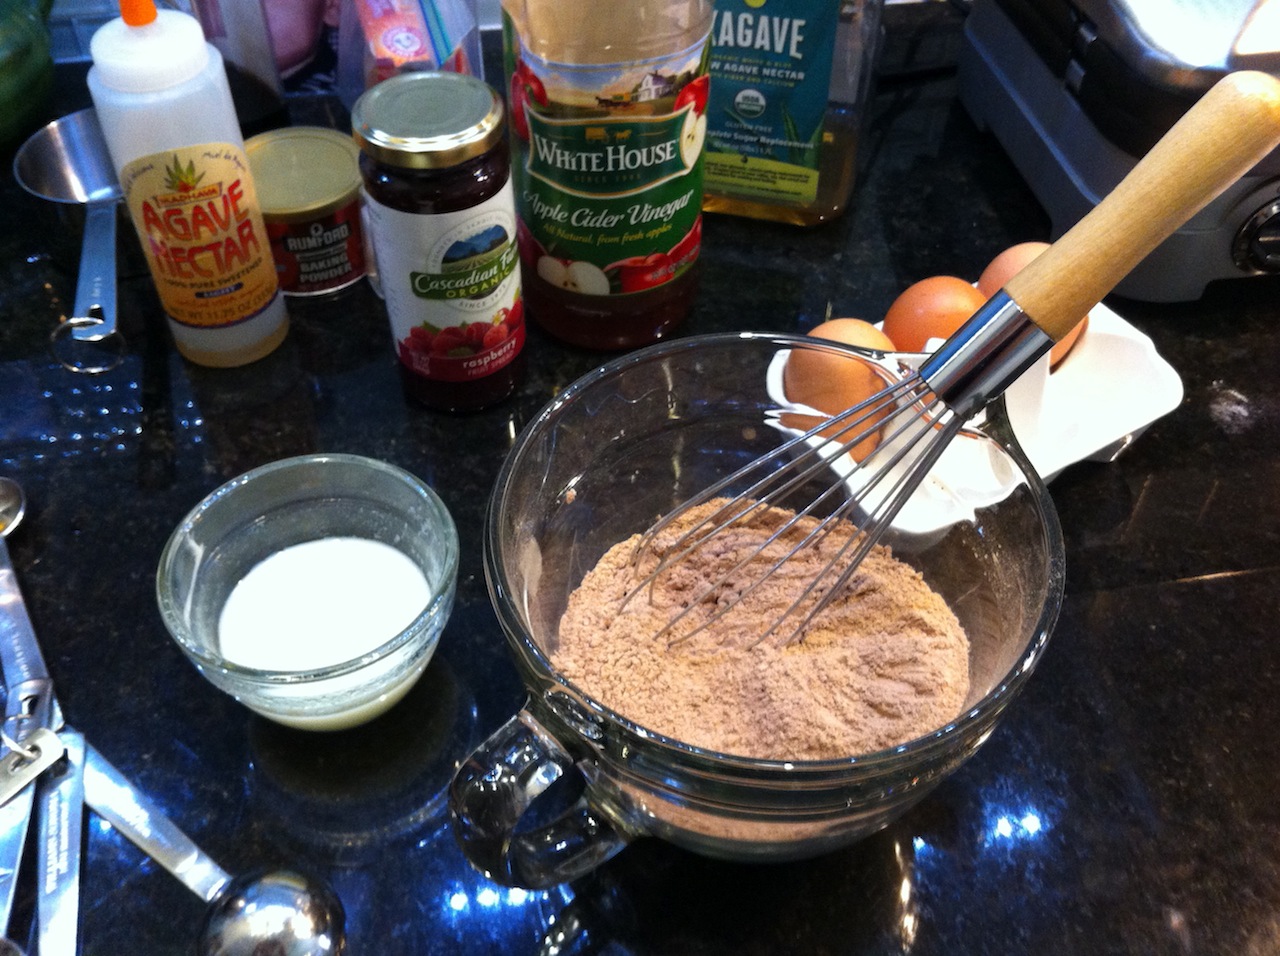
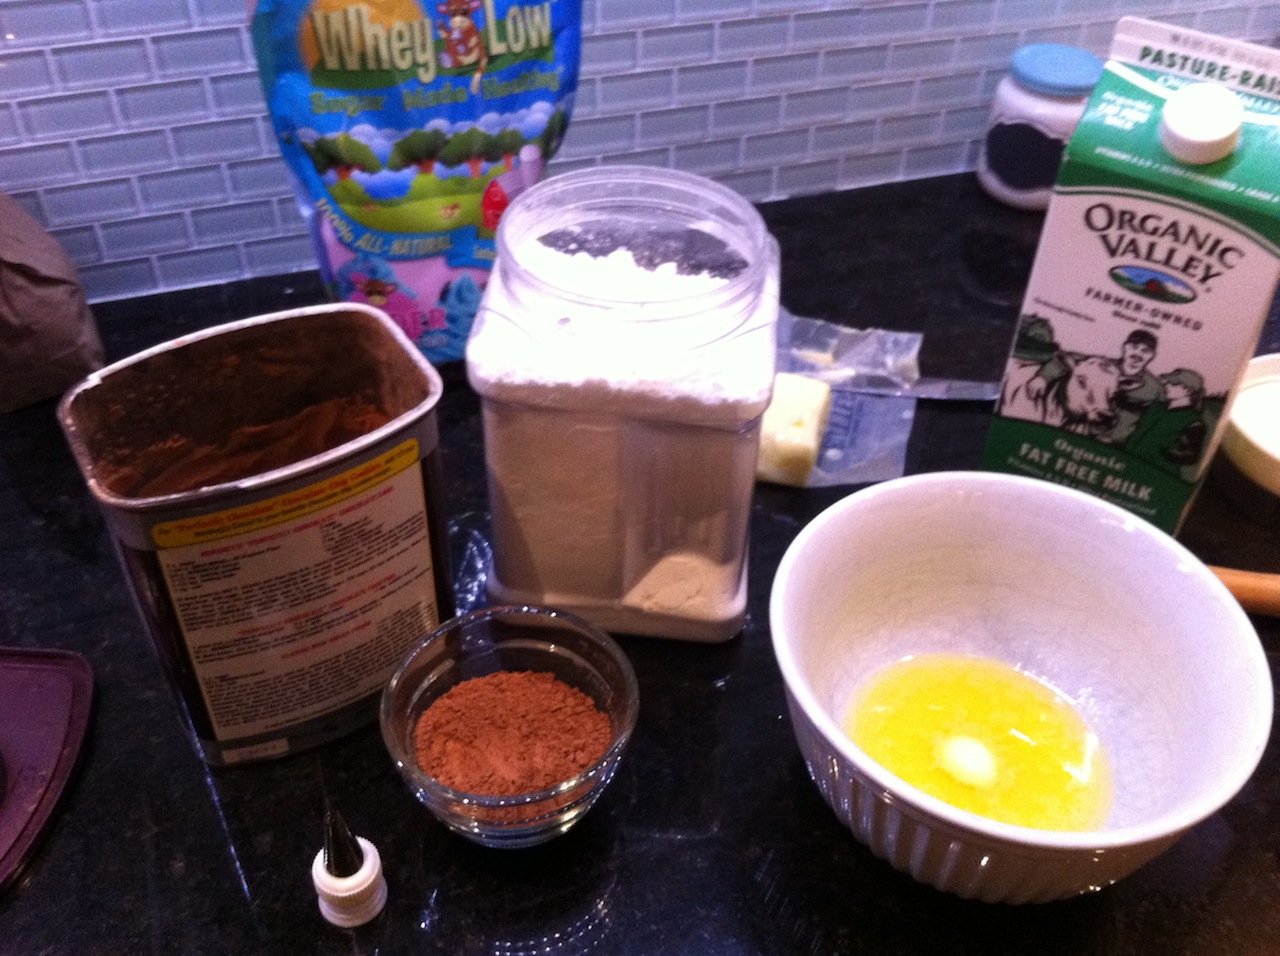
Gather the staff, and light the fire to 375 deg please.
3/4 Cup AP Flour (unbleached is always best)
1/2 Cup Whole Wheat Pastry Flour
1/4 Cup Cocoa Powder (unsweetened)
1/4 tsp Salt
1/2 tsp Baking Soda
1 tsp Baking Powder
1 Egg
1/3 Cup Butter, melted (or canola oil)
2/3 Cup Agave (or maple syrup)
1 tsp Vanilla
1/4 Cup FF Milk (or soy milk)
1 tsp Apple Cider Vinegar
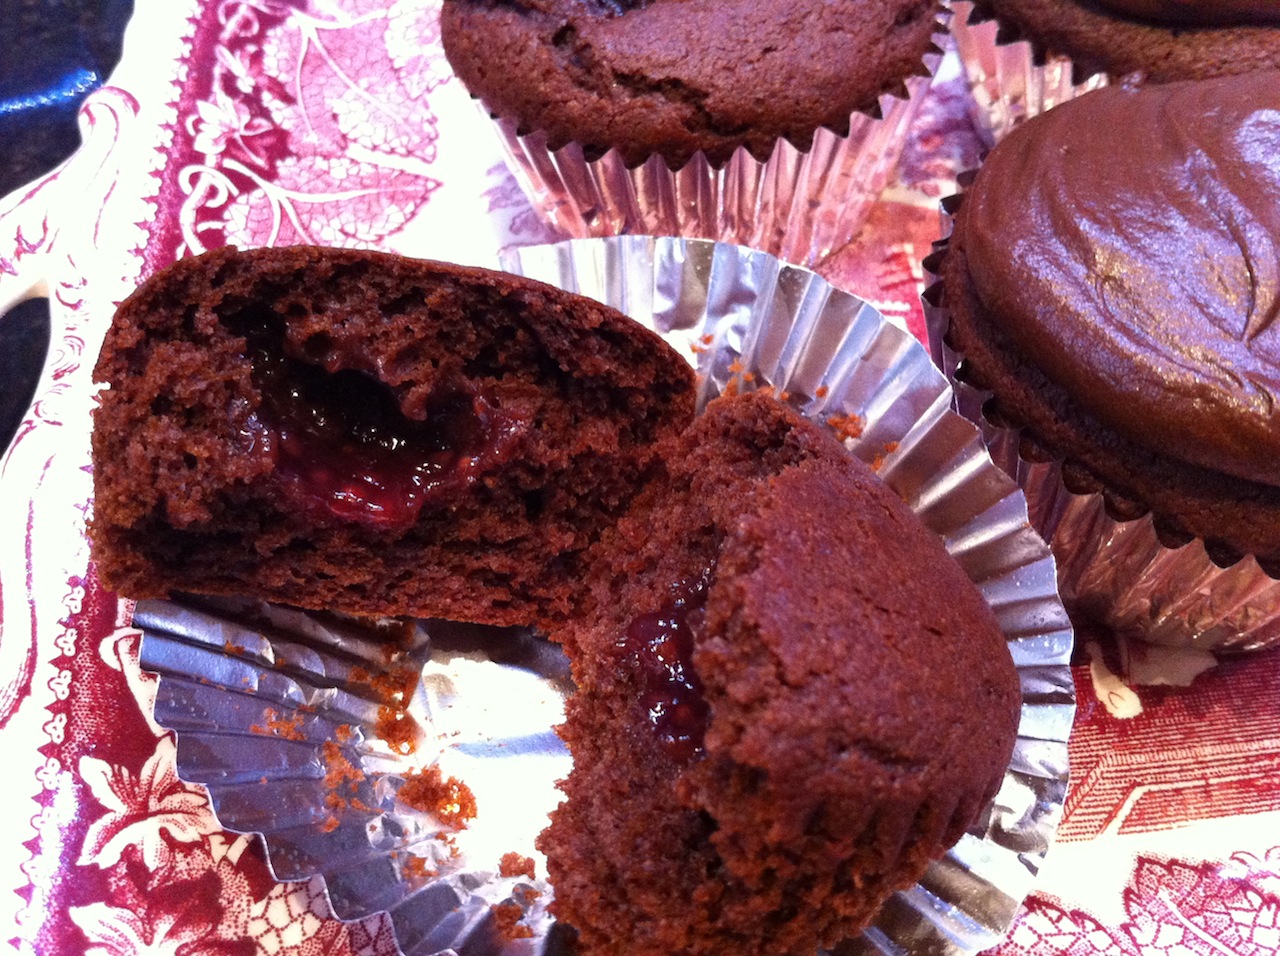
1/4 cup Raspberry Jam (or other fruit – cherry? Yum)
Step 2:
Step 2
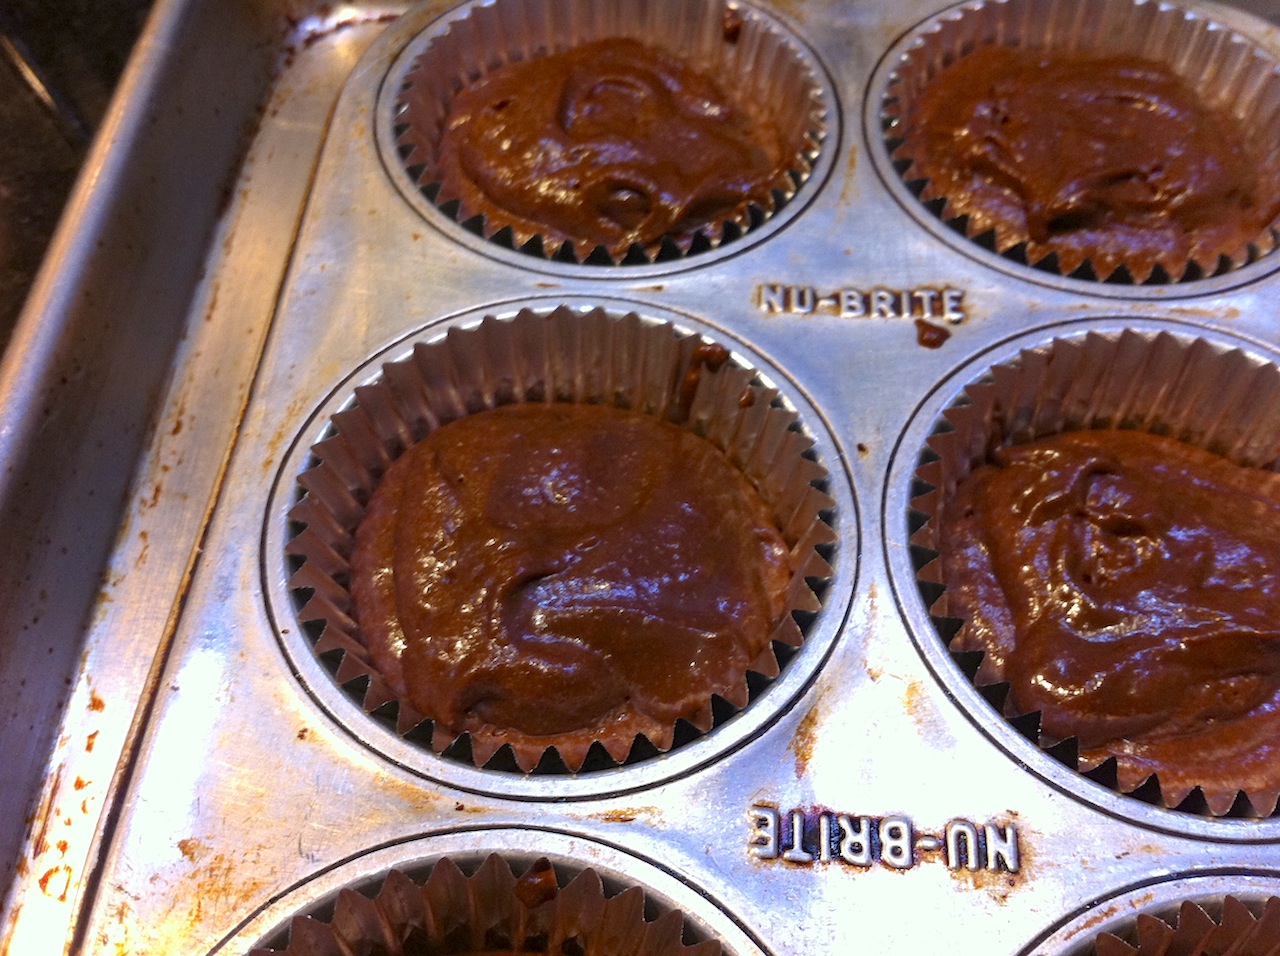
Combine the dry ingredients and set aside. Did you heat that oven? …and get the little muffin tins ready. Line them and give each a spritz of baking spray. OK, where was I – oh yeah, toss the wet ingredients, except the vinegar and milk, into the mixer bowl and beat for a minute. Slowly add 1/2 the dry. Careful with that cocoa powder, or you’ll look like you got a bad bronzer job! Then the milk, then the rest of the dry – now you can add the vinegar.
Step 3:
Step 3
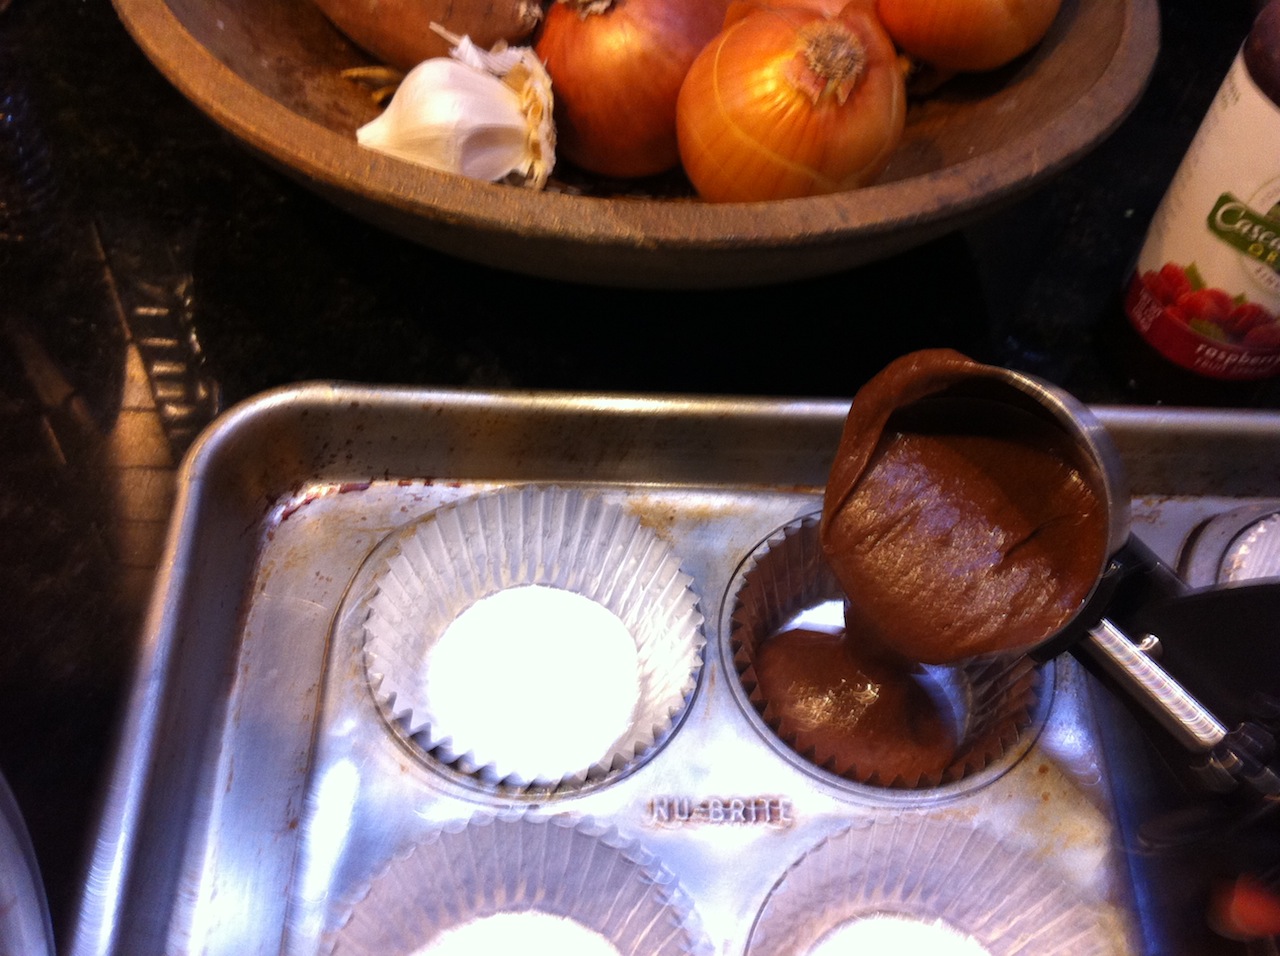
Yes, it’s a shaky photo – it ain’t easy spooning that out and hitting the clicker! Yes, that’s an ice cream scoop. But here it’s called portion control! Fill the tins about 1/3 full.
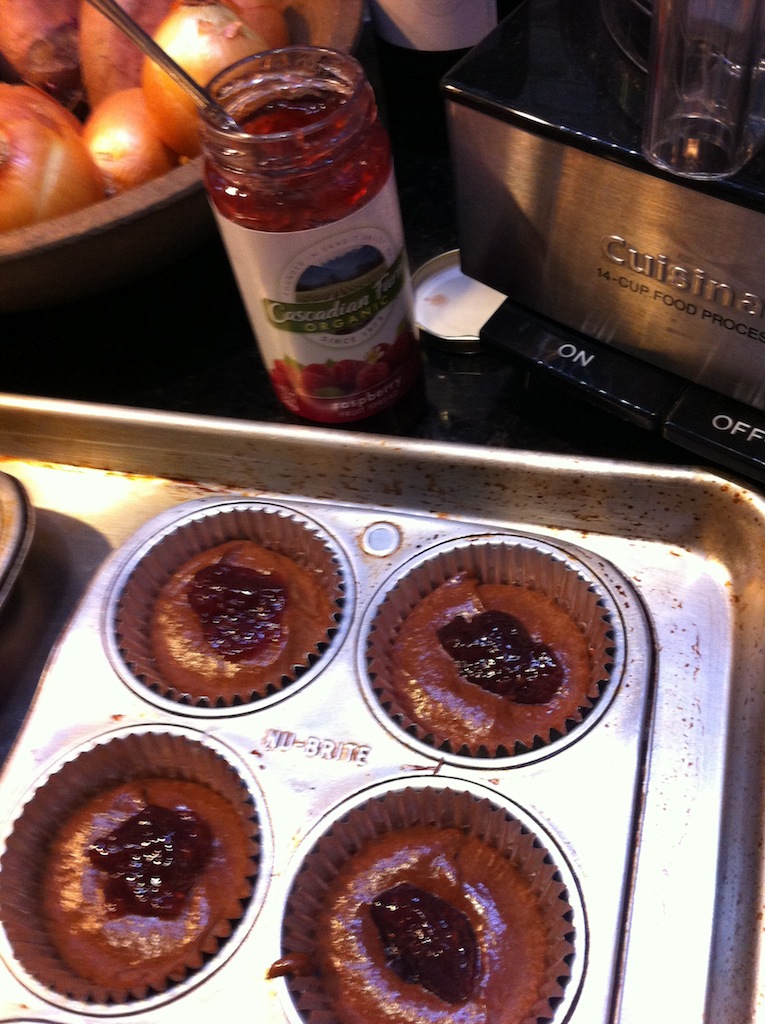
Step 4:
Step 4
Now top each with a dab of jam filling. Not too much – keep it in the center.
Step 5:
Step 5
Now cover the jam with the remaining batter. Just a spoon each should do. Make sure to cover the sides or the jam will melt and run out in baking. No surprise there – it’s all over the place – and burnt. Not yummy.
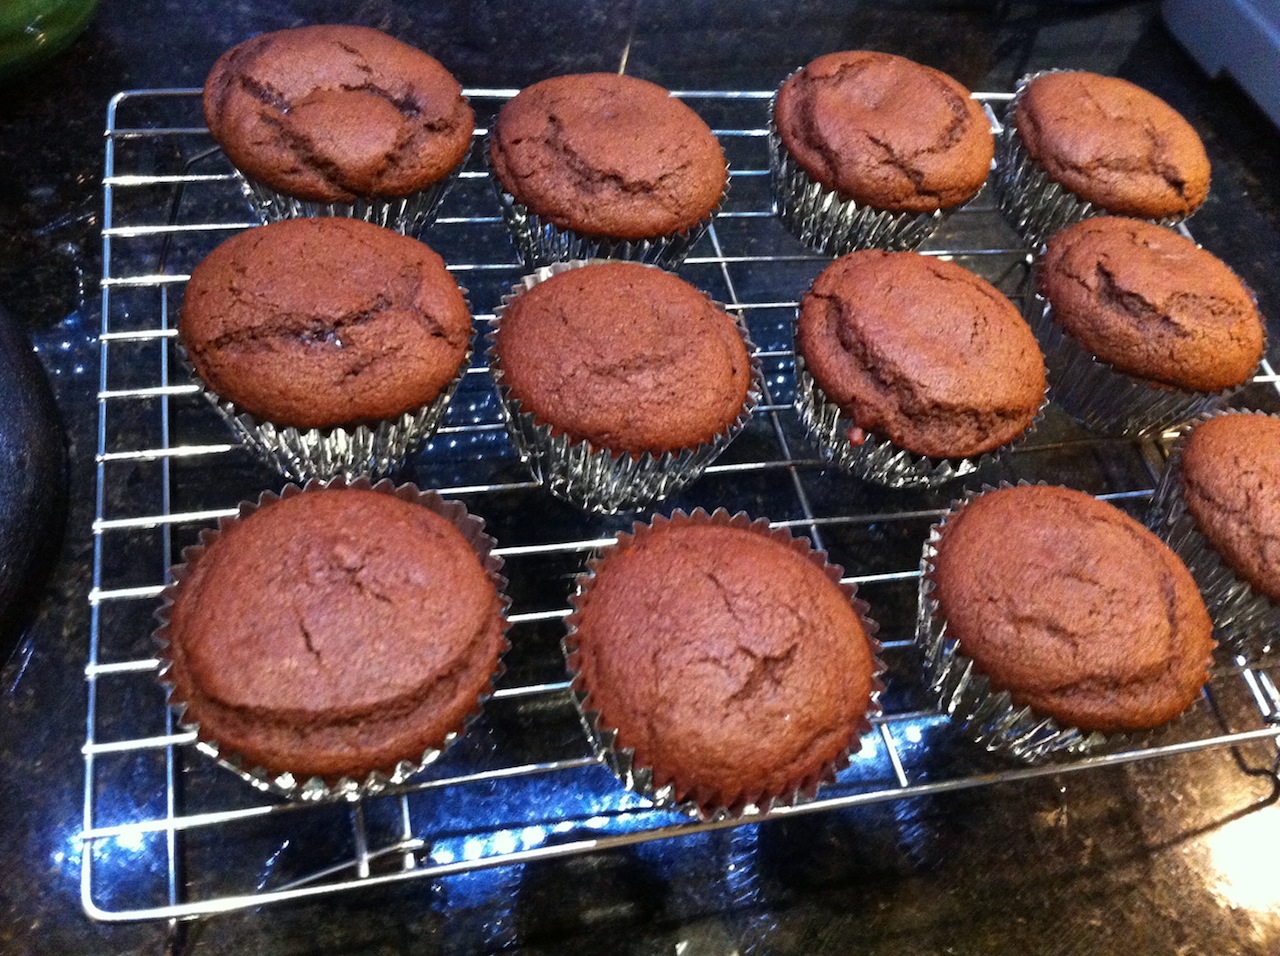
Step 6:
Step 6
Get ’em baking for 20 – 25 min. There they are. Beautiful!!! Cool on a wire rack.
Step 7:
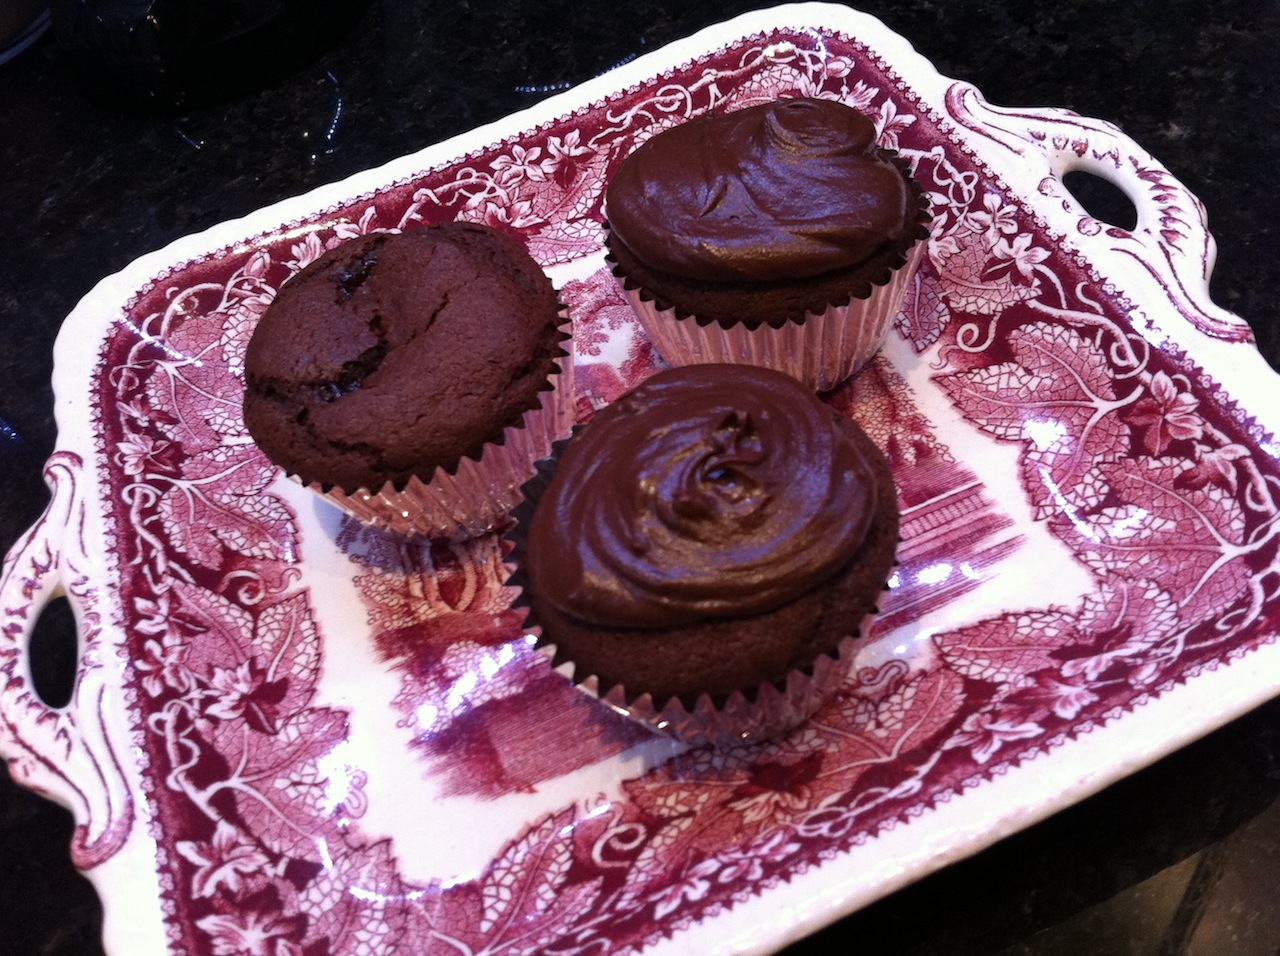
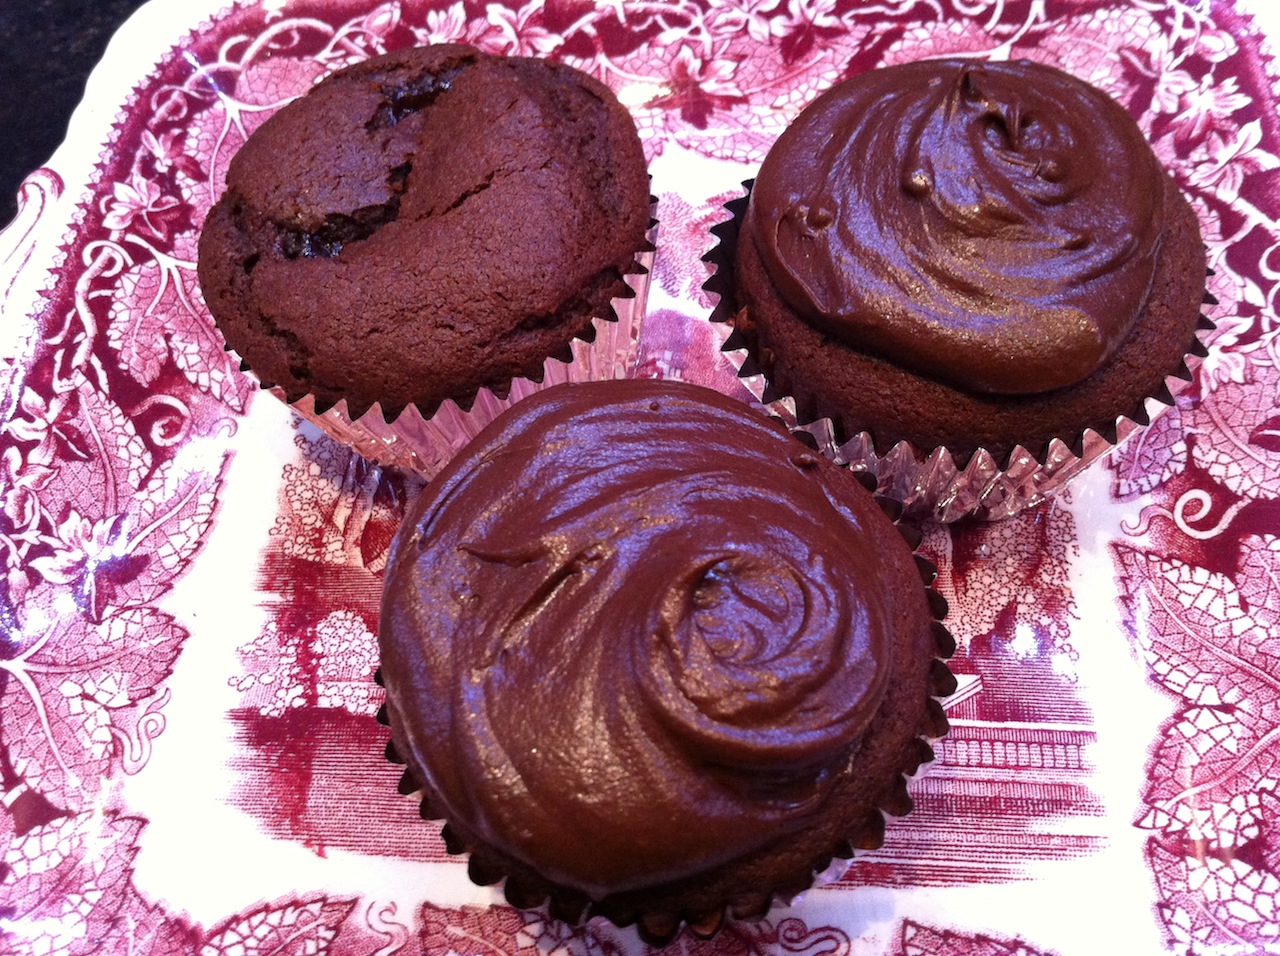
Now, you could stop there and be all healthy, but it’s Valentines Day and my sweetie’s not feeling well. More C H O C O L A T E !!!
Make up some icing with: 1/2 stick butter, melted, 1/3 cup Cocoa, 1 tsp Vanilla, 1-1/2 Cup Powdered Sugar, 3 Tbl Milk. Whip it up and once the cupcakes are cool, spread with the back of a big spoon. Now, you can do this with Whey-Low Powdered sugar, and bring down the butter too to save on calories – but not tonight.
Step 8:
Step 8
Break one open – Surprise! Jam filling. Although, if there are seeds you’ll want to warn people. Nobody really wants mystery crunchy bits in a baked good.
Finale:
Aren’t they pretty – good enough to eat! And don’t forget they’re not bad for you – without the icing, of course. There’s no processed sugar sweeteners in these cakes. The recipe analyzer says : 152 cal, 5.8g fat (now, add the non-diet icing and it’s 252 cal, 10 g fat)
Taste Tester is smiling. Another thing I like about this one is that this recipe only makes 12, so they’ll be gone before they’re stale – or sunrise.

 I found this tray on clearance in a shop at an outlet mall. It was already on sale then marked down 70%. Yippee! I wanted to do a stained glass mosaic on it but I was in a hurry. Plus I’m afraid to get any little cuts on my fingers on the glass grinder right now. It could ruin my career on the banjo!