DIY Apron with Moda Fabrics

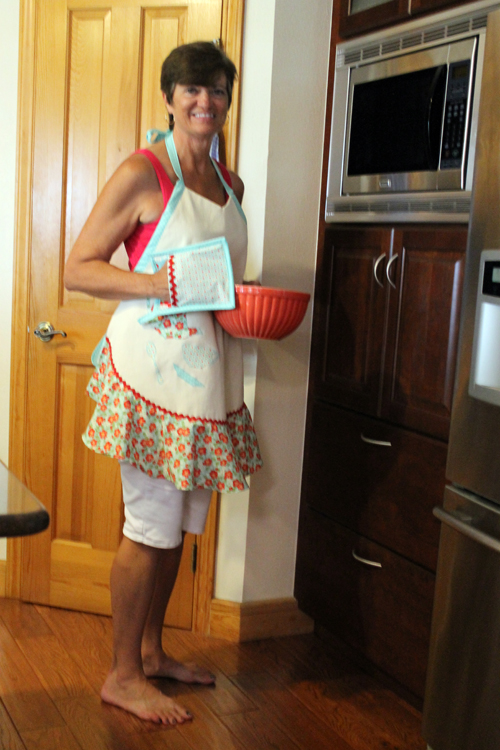
I’ve been kind of obsessed with perking up my kitchen with Moda Fabrics.  I started with tea towels, moved onto pot holders, and now I’ve made an apron–and more potholders, because four potholders just aren’t enough.

DIY Apron with Moda Fabrics
My new apron!
DIY Apron with Moda Fabrics
And more potholders. Now my kitchen is a much happier place with all these bright colors!

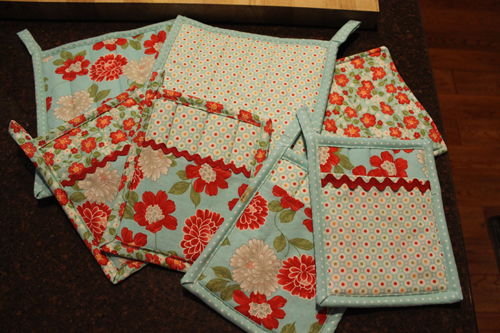
It’s so easy to mix and match patterns in the Moda Fabric line.  I had originally purchased three different prints but when I started cutting out the apron I realized that I didn’t have quite enough fabric for the flounce.  So off to my little quilt shop in Crystal River where I picked up a fourth print that also featured aqua and red.  Love it.

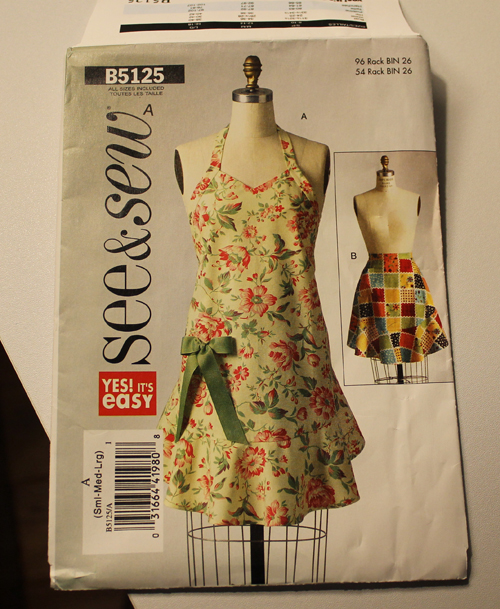
I’ve already featured this apron pattern in a previous post.  I made it for a “photoshot” and it was adorable with yo-yos.  Too cute.

DIY Apron

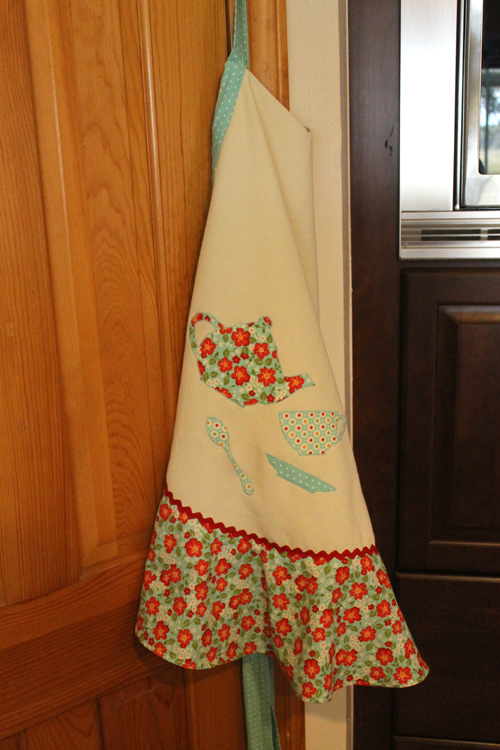
This time I decided to make it for me!  And follow along with the “tea time” theme.

So here’s the pattern:

DIY Apron

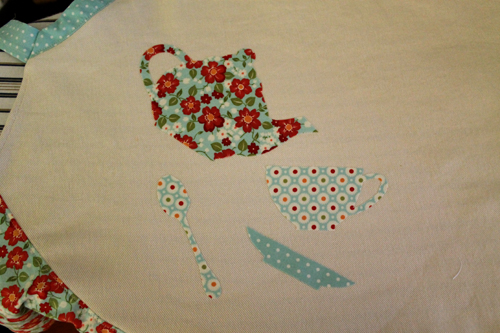
I used the graphics from sew4home that I referenced when I made the tea towels.  I just made them a bit larger with Photoshop.  Using Heat ‘n Bond lite, I cut the graphics out then placed them on the apron in a haphazard pattern.  Because I’m a haphazard cook, I thought that was appropriate.  And I put some rick rack on the flounce just because I recently fell in love with rick rack.

DIY Apron with Moda Fabrics
Place appliques, press, then satin stitch.

Thought I’d also share a little tip that I came across on pinterest or a different blog–I really should keep track but this one I just posted in my brain. (I do try to credit the original poster on pinterest) Patterns usually come in several sizes now.  The apron pattern was a s-m-l.  You just have to cut along the correct pattern lines.  Since I don’t want to waste the other sizes–hey I might need them if I lose weight or, more likely, gain!  It’s quite tedious to try to cut the fabric along the correct lines.  So anyhow, I found this tip to trace the size that you need onto freezer paper.  Now why didn’t I think of that!  I just happened to have freezer paper that I bought for another tip that I never used.  (Forgot what it was, something about sewing with minky fabrics)

DIY Apron with Moda Fabrics
Trace the pattern onto Freezer paper. Make sure you also note all the markings. Like “place this side on fold”, which I didn’t do and pinned the wrong side on the fold. Drat!

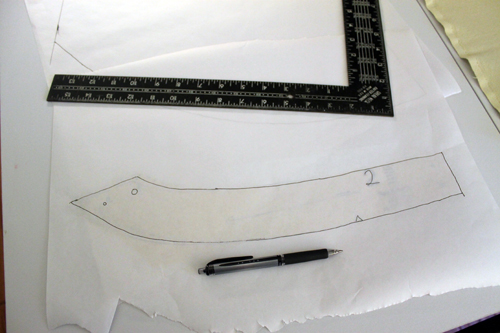
Anyhow, this was SO much easier.  Patterns are rather delicate and after using them a few times they turn into shreds.

Here’s my adorable new apron. Now maybe this will inspire me to cook more.  (not likely)

DIY Apron with Moda Fabrics
Look at me pretending to cook!  And wow is my hair short!

Creatures in the Garden

Creatures in the Garden
Dragonfly on Cosmos
Creatures in the Garden
Dragonfly on Indigo Spire
Creatures in the Garden
Brown Anole, this guy lives in the bird feeder and comes out occasionally to scare the granddaughter when she’s attempting to fill the feeders.  Then the lucky squirrels eat the sunflower seed that gets flung everywhere.
Creatures in the Garden
I think this is a juvenile anole.

We came across this caterpillar a few miles from our house.  We were attempting to “geo-cache” with the three older grandkids–unsuccessfully I should add.  This guy was almost six inches long.  Of course, one of the boys wanted to step on it.  Yech.  But I saved it’s life and we looked it up on the Internet.  It’s the caterpillar of the Royal Walnut Moth which isn’t even listed in “National Audubon Society Field Guide to Florida”.  That has got to be one awesome moth!

Creatures in the Garden
Hickory Horned Devil Caterpillar.


Creatures in the Garden
I really can’t tell one of these lizards from another! This one could be a skink or another brown anole.  I think I need to get William to identify these guys for me!


Adventures with Michelle, Rose Cutting

Last year I submitted a blog entry with a story about my favorite rose bush. A fabulous old rose that was saved from certain destruction, and resurrected from a bleak existence. In the garden

I had done rose cuttings for years when living in Brooksville. My first introduction to starting plants from cuttings came from my Mom. She was always growing something green in a glass of water on a window sill. Then there was my GrandDad, who took up the hobby of gardening in his retirement. He traded his freon and industrial a/c gauges for fungicide and hand trowels. A bit over-the-top with most of what he did, he mixed his own potting soils and bug repellents. He had a special war on the Japanese Beetle as I recall. I also remember a love affair with a rose bush he had to leave behind in his native Pennsylvania. He said it was called The Seven Sisters. I remember it climbing all over a massive embankment studded with light pink roses in clusters of seven. The gruff old-timer brought some cuttings South and set to reproduce them. He intended them to climb on a fence at the new place in Florida, and they did. That was the first time I’d seen a plant grown from a stick. Fast forward to my own, first, home, a tiny cottage in Brooksville with a snarled rose, planted by the previous owner, and tied to a pecan tree instead of a trellis. Later I trimmed it and had fresh little roses all over the house. A bit of research found that it’s what’s known as, a Cracker (or China) Rose. Very tough, disease resistant and a perfect contender for a replication experiment. So, that’s what I did and there were little rose bushes all over, and made for lovely give-aways. But that was then and this is now. The rose I’m working with now is new to this trick – and it’s a cheap one.


Step 1:  Get some rose cuttings (beware of patent rules and bio-engineering that limits reproduction), a few pots, some potting soil (I like the Miracle Grow pre-mix) and Rooting Hormone. You can use honey as well, but I’ve not tried that. You’ll also need a clear plastic topper for the pot.

Adventures with Michelle, Rose Cutting

Step 2: Trim the cuttings to just a few leaves and cut the end at an angle.

Adventures with Michelle, Rose Cutting

Step: 3 See the cut, there’s a bud just above it. Now, dip the cut end in the rooting powder.

Adventures with Michelle, Rose Cutting

Step 4: Use your finger and make a hole for each cutting. Put the cuttings in and cover with soil.

Adventures with Michelle, Rose Cutting

Step 5: Give them a good watering. Then make them a terrarium tent. In the first photo there were plastic bags and rubber bands, that is my normal style. Then I saw the kid’s plastic cups – perfect! I pushed the rim into the dirt and set them in partial sun to grow. That was in May. Keep in mind, the green leaves will fall off, that’s ok. The green stick will grow…the brown ones, not so much. A while later you can pull the top off.

Adventures with Michelle, Rose Cutting

A month later (in June) there’s new growth! Nice… now, not all of them lived. Only about 50% made it. That’s ok, the ones that lived did really well.

Adventures with Michelle, Rose Cutting

Adventures with Michelle, Rose Cutting

Another 30 days (in July), and not only is it a happy little rose plant – there’s a bloom! In fact I wasn’t paying attention and spotted a bright pink spot out by the garden shed and went to investigate. Wow – I missed it. This is the spent bloom on my little rose soon-to-be-bush. I’ve got just the spot for it to offset it’s parent. I just hope it gets to be as big and beautiful.

Adventures with Michelle, Rose Cutting

Next, begonias and hydrangeas, pineapples, mangoes….and Mom’s been telling me about the African Violets she’s been starting. I guess she’s moved on from those glasses of water in the windows – or not.

Michelle @ badzoot.com