I went out to take some pictures and it was raining! What a surprise!
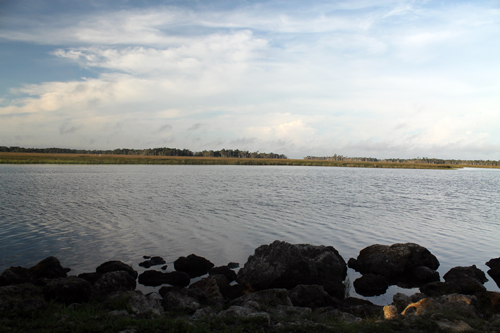
But I’m trying to look at the good side of this soggy weather–I have a very luxurious green yard, I don’t have to water it, the aquifer is filling up, and last week when we had a brief bit of sun there were these really cool clouds. Happy Tuesday!
Another rainy weekend. Friday’s plans for fishing were dashed when we woke up to thunderstorms which continued off and on through Sunday. Not much opportunity to get any photos, either. What to do, what to do….
So as we listened to the rain hit the skylights, we decided to settle in and continue with my zombie obsession. Fortunately we had all 3 seasons of “Walking Dead” on our DVR so we finished watching that–for at least the second time. Yeah, just ask me anything about how to kill a zombie. Still raining on Saturday so headed out to catch “World War Z”. What could be better than Brad Pitt and zombies? Nothing. And those zombies can really run! Now, if we only had “Dawn of the Dead” and “Shawn of the Dead” on DVD my zombie weekend would have been complete!
But I ended my weekend with real live living people. Yvonne, Donna and Michelle all came to visit me so we could have a “girl day”. Girl talk, lots of adult beverages, and junk food! And Michelle brought jam! Yeah, that beats Zombies anyday!
So it was a great weekend–rain can’t keep us down!
Sunday morning the skies cleared up so we squeezed in a bike ride to the boat ramp on Mason Creek.
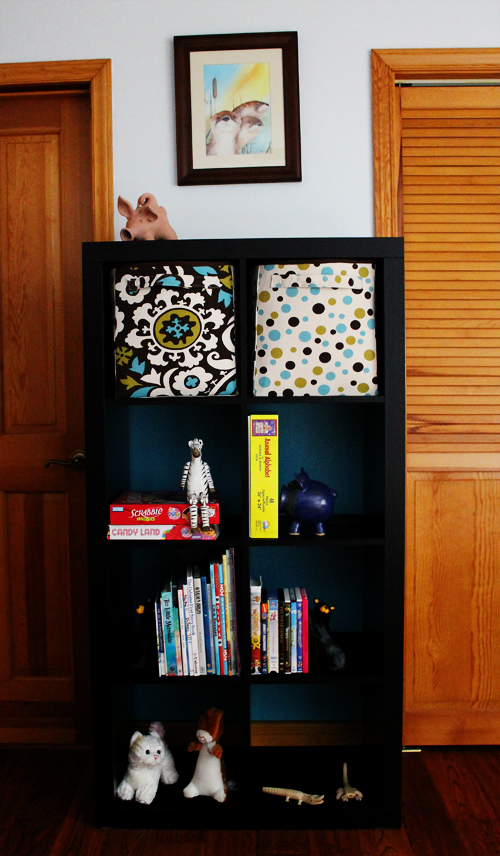
So does everyone love Expedit shelves from Ikea? If you don’t know what they are, just do a search on Expedit on Pinterest. There are so many good ways to use these shelves. Terry has an Expedit shelf and desk, I have two in my laundry room, and two in the second guestroom–aka grandkids’ room. And that’s what this post is about. Making boxes for the lovely Expedit.
Here’s the expedit in the guestroom.
This is an expedit shelf. I painted the wall behind it a coordinating color. And I’m eventually going to tell you how to make the boxes that are in the first two cubbies.
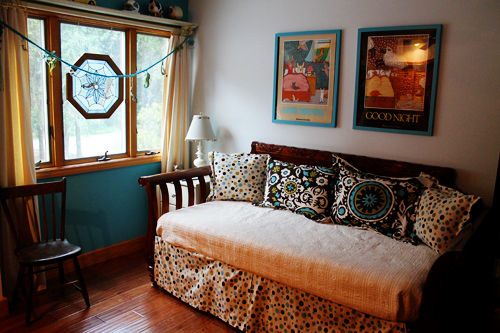
But while I’m in the guestroom, I thought I’d give you a little tour…
Here’s the daybed that turns into a king size bed when the trundle is raised and secured with enough bungee cords and a king-size mattress pad, sheets, etc., But no guarantee it still won’t roll apart. If you are lucky enough to stay in the twin size beds, one has mermaid sheets and the other has Dora.
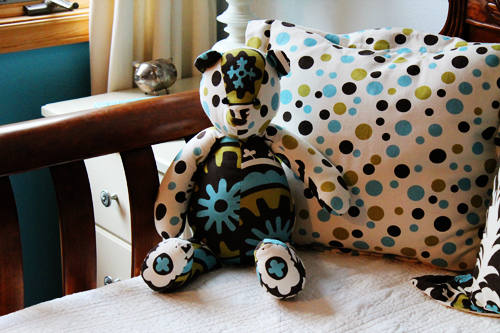
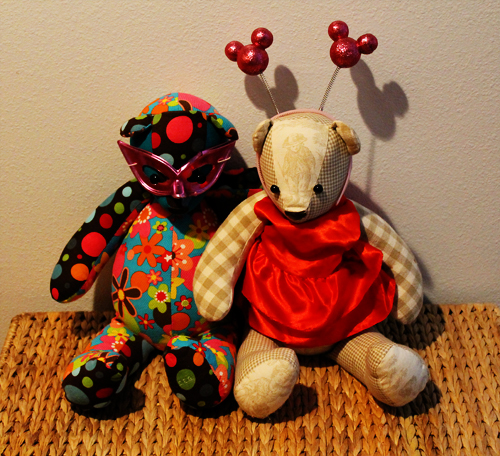
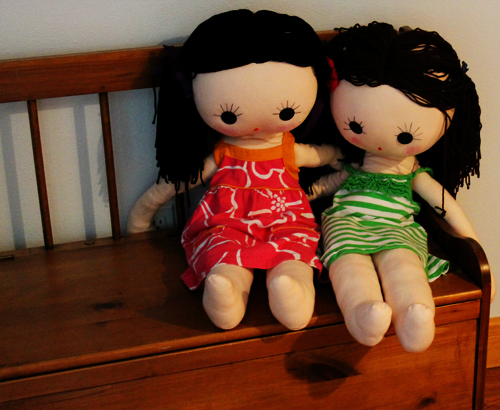
Here’s a bear….And two more bears!And two scary dolls, one of my sewing failures. Both Piper and Andrew are afraid of these dolls.
So back to the Expedit Boxes. I had a wee bit too much fabric left after sewing the pillows and bed skirt. So made a bear. Then a tote. Then an iPad cover. Still had some left. Time to make storage containers. And that is the end of that fabric!
Now, all you that don’t sew can go check out another blog, because here are the instructions!
First, I used Pellon Peltex 71F. It’s “single-sided fusible ultra firm stabilizer”. And it’s expensive. $8.99/ yard and I needed two yards per box because it’s only 22″ wide. What is this stuff made of? I used a 50% off coupon plus another coupon that took 10% off my entire purchase. I probably wouldn’t have bought it except I wanted to try something new. Plus I already had the fabric and the muslin that I lined it with. Using the stabilizer also made the project difficult because it was just so stiff.
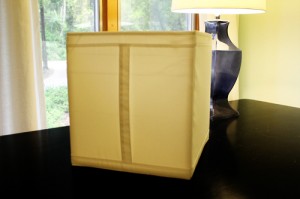
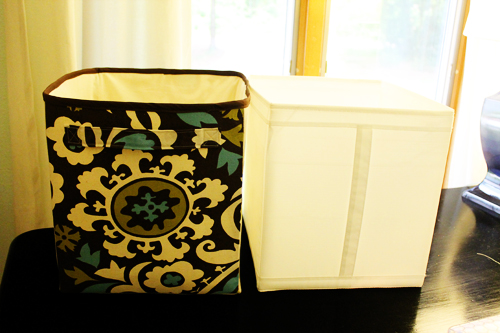
This is the box from Ikea that I was copying.
The finished box is 13” high and 12” wide on front and back, the sides are 13” high and 13” wide.
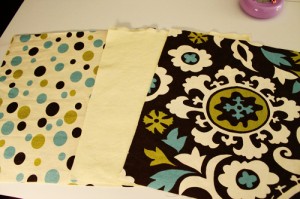
Premier Prints Fabric that I ordered from www.fabric.com.
Cut from fabric
3 13″ x 14″
214″ x 14″
1 10” x 3” for handle
Cut from lining (muslin)
3 13″ x 14″
214″ x 14″
Cut from Pellon Peltex 71F Single-Sided Fusible Ultra Firm Stabilizer
312″ x 13″
2 13″ x 13″
Center Peltex on wrong sides of side and bottom pieces and attach per instructions that come with the Peltex.There should be ½” open on each side.
All seams are 1/2″
Create Handle
Fold wrong long sides together, press, stitch ¼” from edege on 2 sides—leaving one narrow end open.Turn right sides out.Tuck in raw edges of open end.Topstitch close to all edges
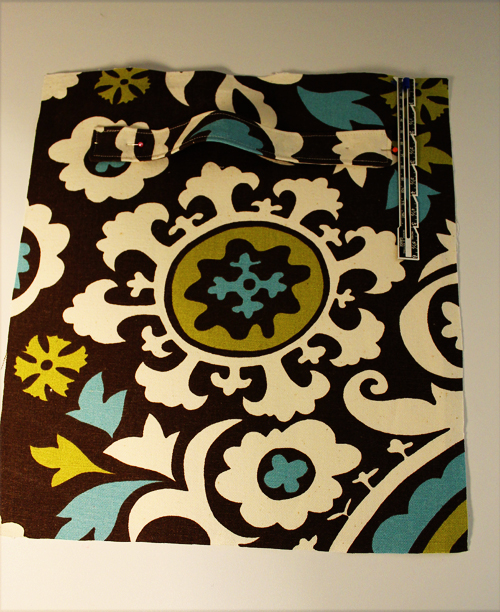
Pin handles 2” from top, 2” from each side. Attach each end by sewing a one inch square then end with an X to make handle secure.
HandleHandle detail
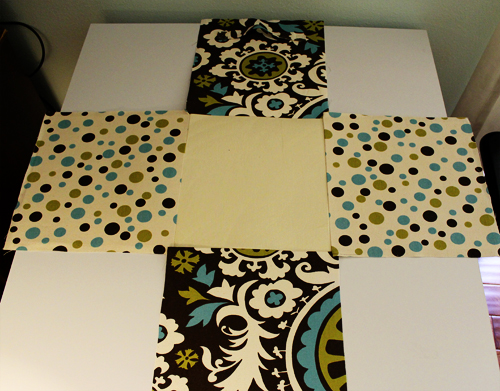
Attach sides to bottom, leaving seam allowance (1/2”) open on all ends.
It will now look like a giant plus sign.
Looks like a big plus sign when all the bottom edges are sewn together.
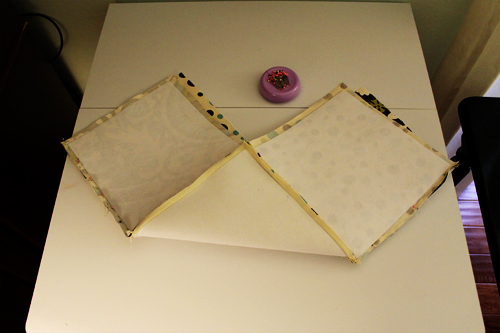
Fold the plus sign, and sew two sides…
This is a little confusing…fold the plus sign in half and sew the two bottom sides.
Open up and sew other two sides. Turn right side out.
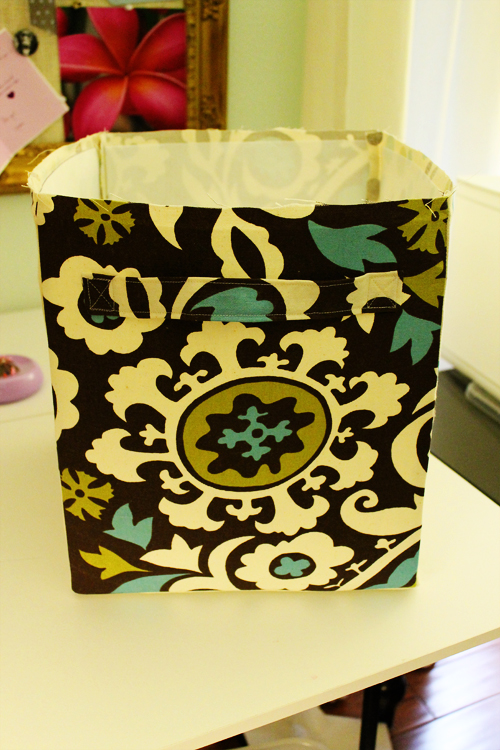
It’s a box!
Now sew the lining together using the same method.
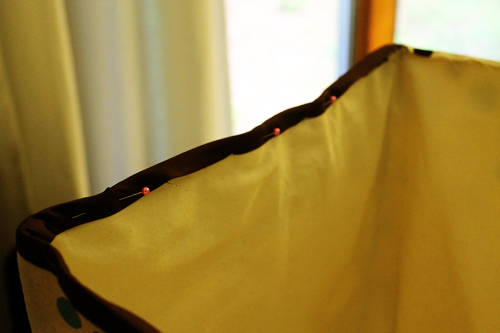
Put the lining inside of the box, wrong sides together.Stitch together along top, ½” seam. Trim close to top seam.Attach matching bias tape along top.Stitch down.
Pin on the bias tape. And sew!
Done!
Just like the Ikea box–but it matches the bedroom!
I have recently created a BETTER and less expensive way to create Ikea boxes. Check it out: DIY Expedit Box–Part II.