Adventures in the Kitchen with Michelle, Caviar Cookies

Caviar Cookies…What a revolting thought!

No, no wait – this is a bit of April Fools at the Holidays. This time of year I spend an inordinate amount of time (and money) at one of my favorite places, Williams-Sonoma. Every year Chuck and his band of merry-men collect tons of odd ball and hard to find items to include in your seasonal cooking adventures. In the market for steamed French chestnuts? Sure! How about that Vanilla Paste I’ve told you about – oh, yes! This year I bought, completely by impulse…it was sitting there by the register in a sweet little basket of holiday trimmings, Chocolate Peppermint Caviar. I kid you not. It looks exactly like caviar, but made with minty chocolate bits that are slightly crunchy! Now I’m no fan of caviar, it’s just not on my list of good things – it’s on the list of bad things (I don’t have to kill the chicken to make an omelet). But that’s just me. That said, this candy treat is screaming to be part of your Christmas cooking. Or whatever holiday your celebrating – everyone celebrates something that the end of the year, right. So,

Here’s the inky colored goody:

Caviar Cookie, Adventures in the Kitchen with Michelle, Caviar Cookies

Step 1:

Step 1, Chocolate Peppermint Caviar

Step 2:

Get out your favorite sugar cookie recipe and a biscuit cutter that’s about the size of a Ritz cracker. Roll ‘em out and cut.

Step 2, Sugar Cookies

Step 3:

Mmmmm, smell that? Oh,no, you can’t — sorry.

Step 3, Sugar Cookies BakingStep 4:

Get out your favorite fluffy icing. I made mine, but I know you’re hiding one of those insipid cans somewhere! – ugh! Icing’s so easy, but that’s another blog. OK, so here are the tiny treats! So cute on a salt cellar spoon – I don’t do caviar, so there’s no horn spoon to be had here. Note the sour cream in back? Take a bit of the sour cream and mix in a bit of icing to sweeten it up and give it form. I used about a 2 – 1 ratio, but I don’t know how many cookies you’re making to give you a recipe. Do it to taste, but be careful not to add too much icing or it’ll just taste like cream cheese frosting. Oh, yeah, I know you can just buy a can of that too…eeewwww! The sour cream makes it different and fresh.
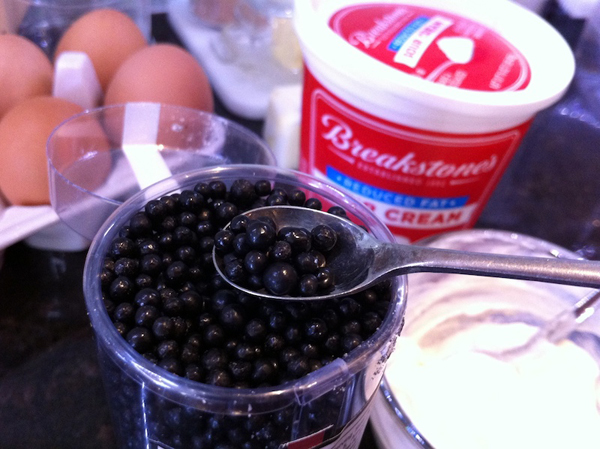
Step 4, Caviar CookiesOK, so a dollop on each cookie. Now make a tiny dent to hold the little chocolate nibs. That’s it! So yummy! So cute. Oh, I had made some carrot jam previously and added a eency weency piece of candied carrot to make it pretty…it is the holidays after all. Even at Christmas no one is safe from my somewhat odd sense of humor.
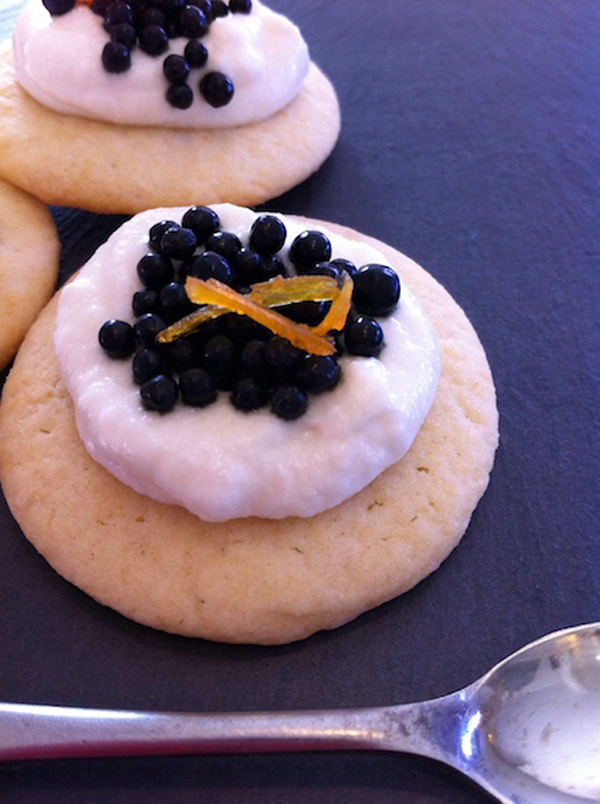
Finale -- Caviar Cookies

Adventures in the Kitchen with Michelle, Better Pizza — Period!

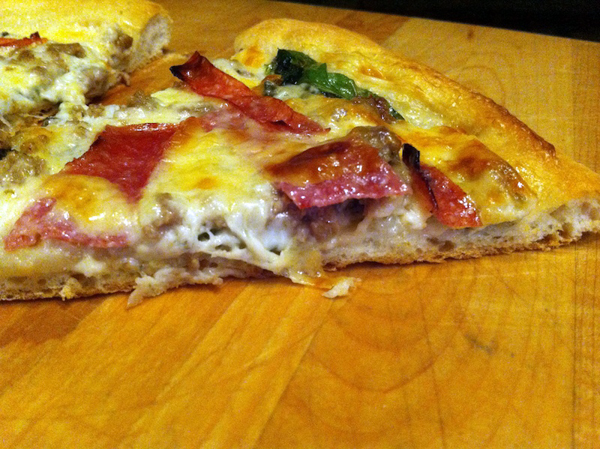
Pizza Piece

But I can’t eat pizza with The Boys. Have you see the stuff that comes delivery? “Better Ingredients, Better Pizza,…”, really?! OMG – the grease level is off the charts (from all those delivery people). Not to mention the salt, and Oooo that super thick crust. I’m paying what for this? – and have to run a 5k to work it off. No thanks. I don’t think it’s doing myself or my guys any favors. I’ve known for a long time that our local supermarket bakery has a little chill chest stacked with pre-made pizza dough. One day it was BOGO (buy-one-get-one) and I picked some up. I thought I would try and convince The Boys that my pizza could be good too. I have created a monster.

You see, for a long time I’ve taken those freezer pizza’s in the 4-cheese variety and added salami, and ‘pizza meat’ to it because we just don’t like what they call sausage and they’d rather do without pepperoni. At $6.00 each it was more cost effective than having an acne-inducing gut bomb delivered, or driving to pickup a cheaper variety of the same. This beats them all by a mile. It’s difficult to calculate the price or caloric savings, but when you look over this list and run your own local price comparison – I think you’ll be joining me in my pizza parade. Grab your stone and walk this way…

Better Pizza–Period!

This list is just the shopping list – you add it and mix it up as YOU like…but this is mine.

Ingredients

1 Ball of Pizza Dough (yes, you can make your own – but I’m lazy and don’t)

1 Bag of fresh Baby Spinach

1 jar Bertoli (or other) Light Alfredo Sauce* (I like the garlic variety)

Reduced Fat thin sliced Genoa Salami

Provolone Cheese – extra picante, because extra flavor means you use less.

Shredded Mozz Cheese (part skim is fine – but NO fat-free)

‘Pizza Meat’ – this is a pound of lean ground beef, and 2 or 3 links of mild italian turkey sausage. Browned up together and tossed in a zip-loc bag in the freezer. Ready to sprinkle on anything from nachos to stromboli to pasta sauces. It’s a keeper, you’ll see.

Sun Dried Tomato Flakes…this is my secret weapon in all things Italian. You can get a less expensive jar at Target.

Olive oil

Notice there’s no jarred pizza sauce or pizza seasonings. *you can use a red sauce, I like the ‘Classico’ in the small jar. I has a homemade, fresh taste and not a ton of salt. Speaking of salt, pizza seasonings are mostly salt, it seems. There’s plenty of flavor, and salt, in everything else you’re piling on. Trust me – it’s good.

Let the dough sit out for about an hour to warm and rise a bit. Your patience will be rewarded.

Now heat that oven to 400deg. And get out a pizza stone, or a pan. I will say that a pizza stone is a wise investment. They make great free-form breads, tarts, and even cookies.

Carefully stretch out the dough onto the pan/stone. I like to curl mine around the edge to hold it a bit. It’s some stretchy stuff…I have yoga pants with less bounce!

Now, I take a tiny bit of olive oil and smear on the dough. – Easy! Not too much, you can use a brush if you need to, or a mister works great for this. An oil film makes the dough nice and brown and crunchy, but not greasy.

Next, I spread out maybe 2-3 tablespoons of the Alfredo sauce, and sprinkle a tiny bit of tomato flakes.

Then, spread out the toppings at will. I think I use 1/3 of the bag of spinach, and sometimes toss in a couple fresh basil leaves chopped up. I try not to end with the cheese because it tends to become a crust of it’s own (which I like, but the guys don’t).

Pop that puppy in the hot box for about 20 min and you’re DONE!

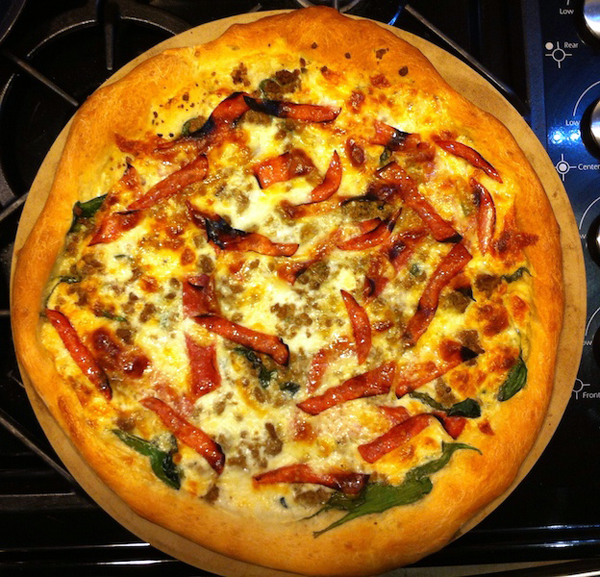
Whole Pizza

Now, you’ll never go back…this is soooo good. And sooo worth the whopping ten minutes it took to assemble. So when you know it’s Sunday Night Football night or Monday, or Thursday, remember to pull out a ball of dough from the freezer in the morning before you leave, and let it thaw in the fridge. Then, by the time you get home, it’s ready to set out on the counter for a hour while you do that voo doo that you doo when you get home every night. Later you can get everyone in on the pizza lovin’ action! And to think you’ve made a pizza that you can actually consider a healthy meal and not a fall-back position, because it’s just better pizza – period. Enjoy!

Pizza

Adventures in the Kitchen with Michelle, Carrots at Christmas

‘Fall Back and Spring Forward’, that’s what we do every Fall and Spring with our clocks. Most of us anyway. I’ve got another idea for that whole scenario. Thanks to my sister’s off-the-cuff most hilarious comment of our recent Thanksgiving Day feast. While we were all talking about weight loss and munching on fattening appetizers, she quips.…”You do set your scale back for the Holiday’s, don’t you?” OMG ! I laughed myself sick as my Mom spun around and gasped at her “You’ve been messing with my scale!?” You see, our Mom has been on a lifelong diet and altering her scale amounts to kicking her cat. You just don’t do it. (Not that you could, or would – the cat that is. I would totally mess with her scale.) That statement planted an evil seed in my mind of a dieters ‘waistline savings day’. I think we should start somewhere before Halloween and end it about week beyond New Years. The Sunday before Halloween we should set our scales back 5 lbs! And after the New Years hangover’s worn off and you unpacked that new workout dvd and yoga mat, set that puppy ahead by 5 lbs…just as an incentive to get that backside movin’. A couple years of that and the only way we’ll get an accurate weight is to visit Holy Toledo* (which I will NOT be doing).

*”Holy Toledo!” is the comment everybody makes standing on the giant scale in the supermarket cart area. Which incidentally is usually made by The Toledo Scale Company.

But I digress, this post is all about Carrots at Christmas. Even though we don’t have a ‘Waistline Savings Day’ yet, I’ll be considering running with my uber fit Auntie’s saying of “No carrots at Christmas!” The holidays are for enjoying life…and eating cookies. Although, just like those bottles of liquor that sport the line ’Sip Responsibly’, I like to follow that mantra as well. So, I don’t go to the buffet and eat just the carrots because I’m watching my weight. I’ll eat those carrots AND the puffed pastry fabulousness, thank you very much. However, I’ve discovered a way to make carrots very Christmas friendly, and not in a carrot cake, and there are no snowmen here. Are you ready for this,…wait for it…. Carrot Jam. Yes, my friends, I too was a-gasp. This comes to us here via, an article in Food and Wine Magazine promoting a cookbook author, blogger, and fellow jam fan by the name of Eugenia Bone and her soon-to-be published book “The Kitchen Ecosystem”. The article included this recipe and noted that she uses it in all sorts of ways, ‘on a mozz sandwich …with a pot roast’ . We paired it with warm brie and crackers for a Thanksgiving appetizer that won’t soon be forgotten!

Carrot Jam, Adventures in the Kitchen with Michelle, Carrots at ChristmasMaking preserves can be intimidating, and since it was a small article, I’ll show you how to get from point A to point B. Super simple.

Carrots For Christmas Jam:

Step 1: Gather the goodies and get out the shredder attachment for the food processor – or take 2 aspirin and get out that box grater. While you’re at it, find a piece of cheesecloth to sacrifice.

Ingredients for Carrot Jam, Adventures in the Kitchen with Michelle, Carrots at Christmas4 lb. Carrots (I used baby carrots since they were on sale, and I like ‘em)
6 Cups Sugar

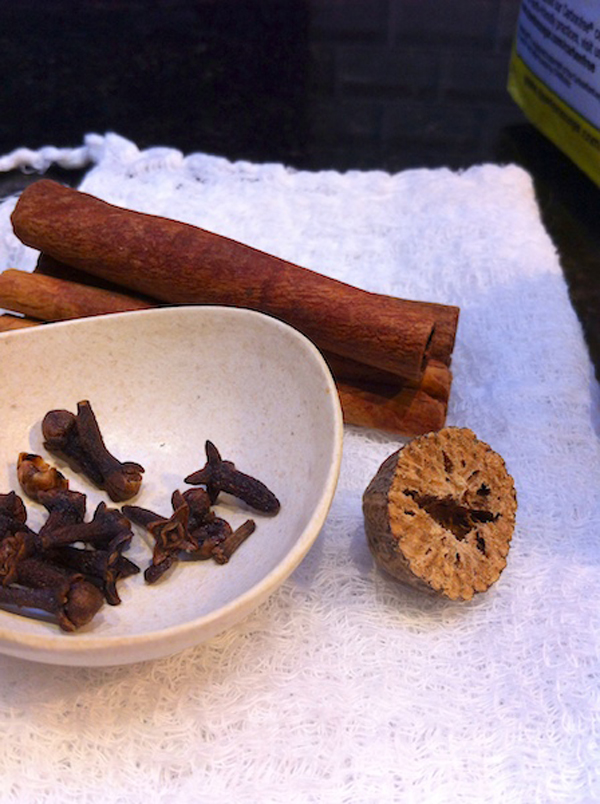
3 sticks of Cinnamon

12 Cloves

1/4 tsp Nutmeg

1 Cup Lemon Juice (fresh please)

2 Tbl Lemon Zest

2 tsp Kosher Salt

Spice Bundle for Carrot Jam, Adventures in the Kitchen with Michelle, Carrots at ChristmasGather the cinnamon and cloves into a cheesecloth bundle and tie off. The nutmeg you’ll add later.

Step 2:

Step 2 for Carrot Jam, Adventures in the Kitchen with Michelle, Carrots at ChristmasShred all those carrots. Zest the lemon, juice it along with another.
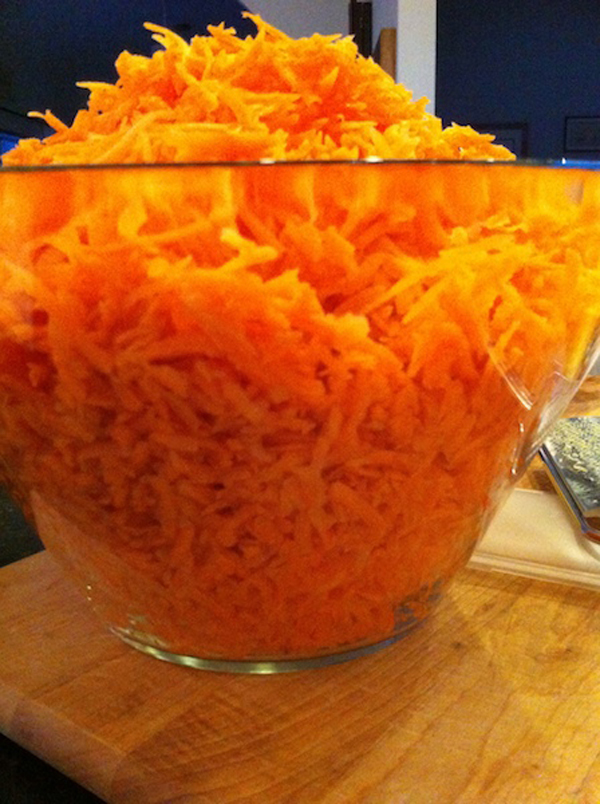
Shredded carrots for Carrot Jam, Adventures in the Kitchen with Michelle, Carrots at Christmas

You know, at first they don’t look like much – remember that gigantic bowl your girlfriend who sells Tupperware talked you into…well, go and get it ! Eighteen cups later…

Step 3:

Look at how full that bowl is! Now add in the sugar, zest, salt, nutmeg and juice. Combine. I used my clean hands, which were just the best tool for the job.

Step 3, Carrot Jam, Adventures in the Kitchen with Michelle, Carrots at Christmas

Step 4: The spice bundle will get nestled in the bowl.

Spice Bundle gets nestled in the bowl for Carrot Jam, Adventures in the Kitchen with Michelle, Carrots at ChristmasStep 5:

In the time it takes to mix this up, the carrots begin to break down and get juicy. Now, they’ll fit back in the smaller (and somewhat more attractive) bowl. Cover and stash in the fridge overnight.

Step 5 for Carrot Jam, Adventures in the Kitchen with Michelle, Carrots at ChristmasStep 6:

…and the next day. Get the mixture into a large pot and light that fire. OMG – I wish you could smell this ! Like a carrot cake, and fresh carrots, and a fall morning and … I need a cup of coffee.

Step 6, Carrot Jam, Adventures in the Kitchen with Michelle, Carrots at Christmas

Step 7:

Cook for about 40min. Or until the texture begins to change a bit and it’s syrupy and yummy. Then remove the spice bundle. I actually took a stick blender to mine, for just a few turns, since it wasn’t getting jammy fast enough. I really wanted it to look like the magazine photo. This is a root and not a fruit so it will naturally have a ‘tooth’ to it.

Step 7, Carrot Jam, Adventures in the Kitchen with Michelle, Carrots at ChristmasStep 8:

Jar them up and keep in the fridge for 3 weeks. Or process and pass out as parting gifts.

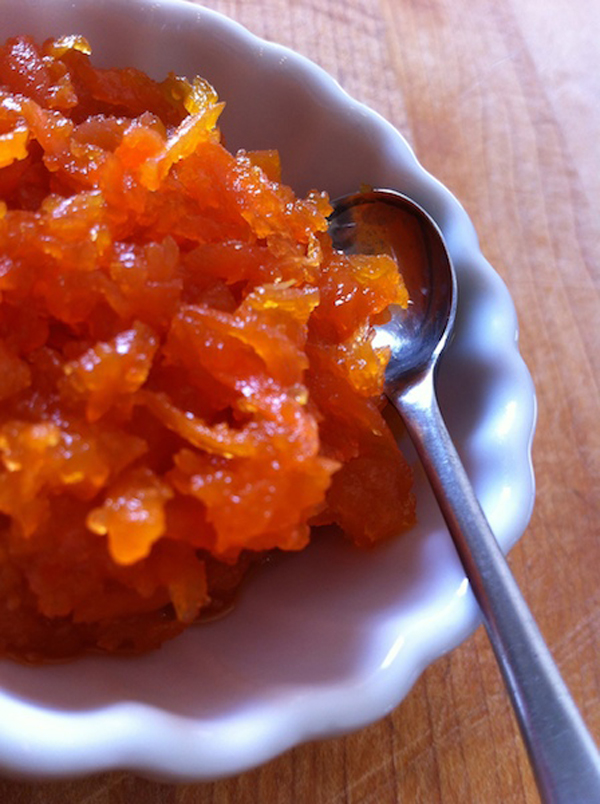
Carrots Jam, Adventures in the Kitchen with Michelle, Carrots at Christmas

The Thanksgiving post showed a small ramekin of this on the cheese tray. The next day I had it on some bread along side my morning yogurt. So Good! Thank you Ms. Bone! She’s so right, this is an all-purpose condiment.

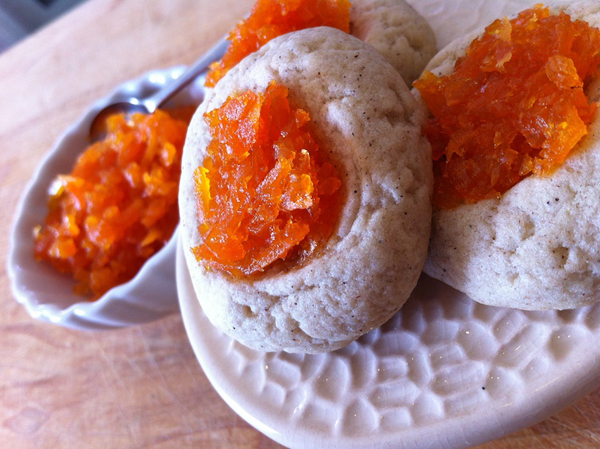
Later that same weekend, I prepared for a Christmas cookie exchange by baking up a Chai Thumbprint cookie with Carrot Jam … a 5 star cookie I assure you! This is quickly becoming my favorite way to enjoy carrots…even at Christmas.

Carrot Jam on Chai Thumbprint Cookies,Adventures in the Kitchen with Michelle, Carrots at Christmas

Michelle Beal