Easy Peasy Halloween Pillow

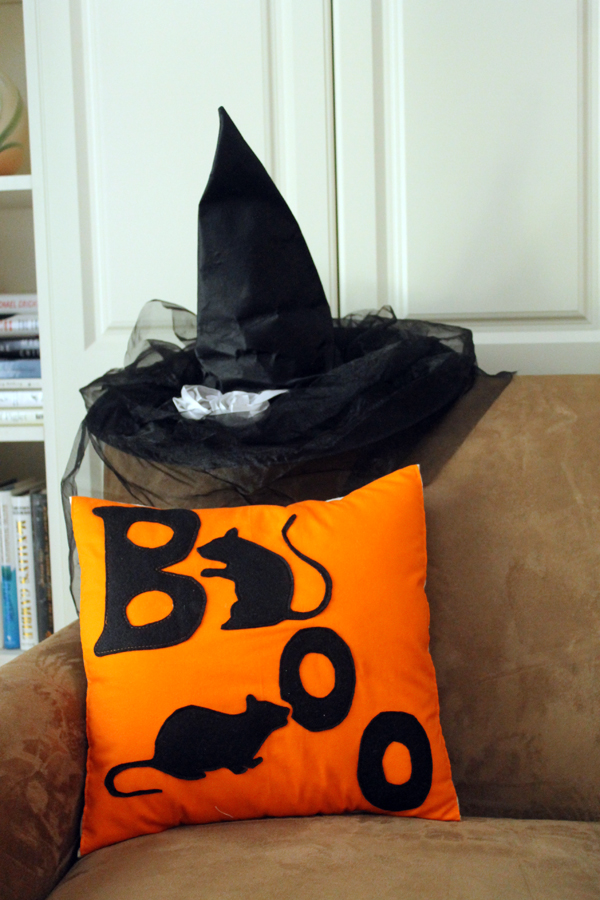
Easy Peasy Halloween PillowOnce upon a time in a land far away, I hosted an annual Halloween bash.  And collected boxes and boxes of fun Halloween décor over the years.  But that was a different life.  We’ve only had one Halloween party at Perfect and that wasn’t even supposed to be a party.  It just turned into one and fortunately I had decorated for the season.  But this year, I wasn’t planning on even getting those boxes of orange and black out. 

Until I saw these creepy little mice from Martha Stewart.

Creepy Mice

And I had to make a pillow!  Which means I had to drag all those other boxes out to keep that pillow company!

Now you might think that it’s too late to make this before Halloween but this is an easy peasy pillow that anyone can throw together.

Here’s the link to get the creepy mice template.

I picked a couple of those mice out, cut a piece of freezer paper the size of printer paper – 8 ½” x 11”–then printed them to the paper side of freezer paper.  I ironed the freezer paper onto black felt.
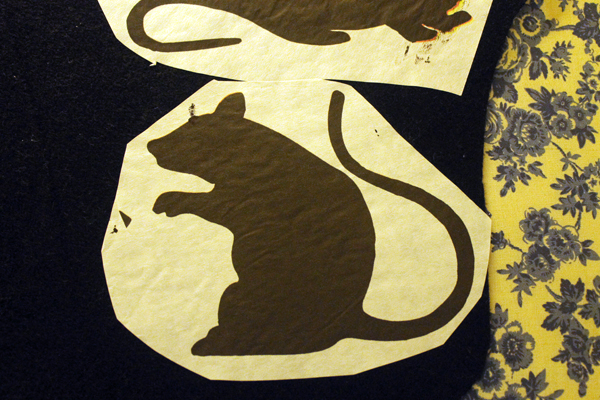
Freezer Paper mice
My printer didn’t like the freezer paper this time and kind of crinkled it a little.

The heat on the freezer paper makes a temporary bond so you don’t even have to pin the template.  If it comes loose while you’re cutting, just iron it down again.

Then I cut out B O O from that same felt.

I had a 16” square pillow that needed a new cover and some flannel and a bit of orange cotton fabric in my fabric trunk. 

I cut the flannel 16” x 40”   (32” around + 1 1/2” seam allowance + 6 ½” for coverage on the back. ) This should give me a 15” square—I like the case to be tight on the pillow.

Press under ¼” on each short end.  Then press under another ½”.  Stitch 3/8” from both edges.

Just to mark the center of the fabric, bring the short ends together and press the fold.

Cut the orange fabric 15 ½” x 16”.

Press under ¼” on the 15 ½” sides.

Fold together to mark the center and press.

Place the wrong side of the orange fabric onto the right side of the main fabric with the pressed centers of both matching. Top stitch close to the side edges of the orange piece.
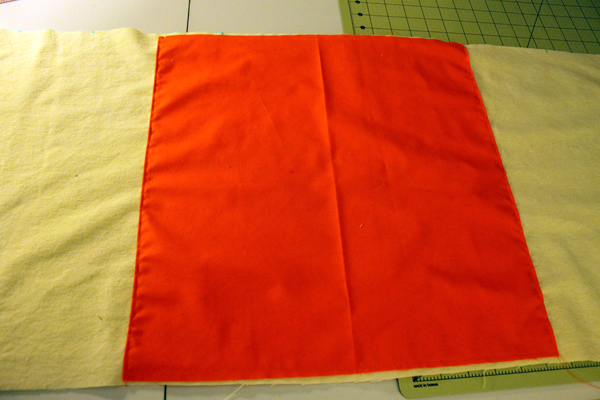
Easy Peasy Halloween Pillow

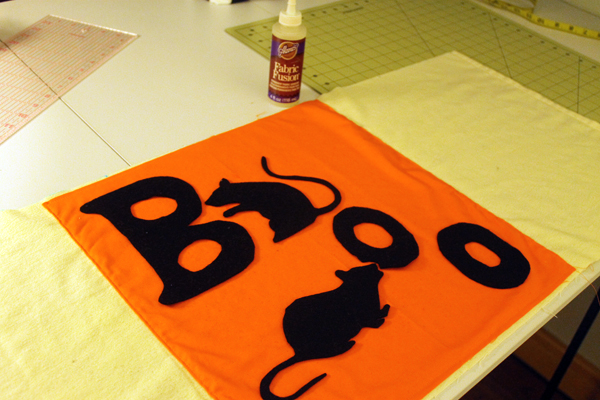
The hardest part was deciding how I wanted to arrange my appliques.

Easy Peasy Halloween Pillow

Then I stuck them to the orange fabric with fabric glue!

Easy Peasy Halloween Pillow

The fabric glue says to leave it sit for 2 – 4 hours.  I had places to go and people to see so I let it set for several hours. 

I could have left them like that because the fabric glue is permanent but decided to do some top stitching around the edges because I like the look.  Totally unnecessary.  (If you do stitch, make sure the glue is dry or it will make a mess! Not that I’ve ever experienced anything like that!)

Fold the main fabric in at the edge of the orange fabric and overlap the flaps over the square. This should measure exactly 15” square. Plus that seam allowance on top and bottom.

Pin top and bottom and sew ½” seams.  Trim the corners.
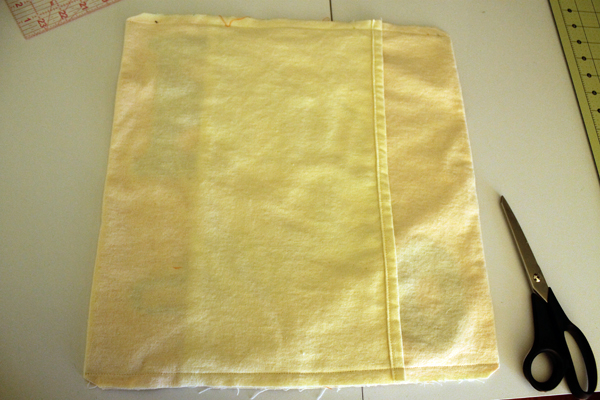
Easy Peasy Halloween Pillow

Turn right side out and stick that pillow form in!

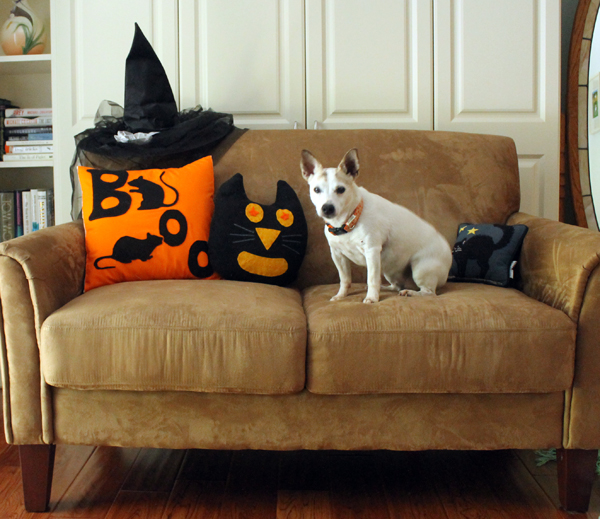
Here’s Maggie thinking, hmmmm, mom just went upstairs with her camera.  There could be a biscuit or two in this for me!

Maggie

Maggie and Pillows
That pooch loves to pose!

 Easy Peasy and SO CUTE!
Adventures in the Kitchen with Michelle, Not so Chunky Monkey

Adventures in the Kitchen with Michelle, Not so Chunky Monkey

I have a confession to make – I love Ben & Jerry, no really. One thing I love about them most is that they make one of my all time favorite ice cream flavors – Chunky Monkey. Oh, yeah you know the one. Full fat banana flavored ice cream with chunks of chocolate and walnuts,… all it needs is a cherry and some whipped cream. Oops, I’m drooling on my keyboard. 

Problem is it’s just too, well, chunky,…on my backside. Seriously. I could eat the whole pint myself. I can fix that though, the chunky part – I’ll still eat the whole pint of this one. Only, I won’t have to run around the world twice to work it off. Come on I’ll show you.

Not So Chunky Monkey

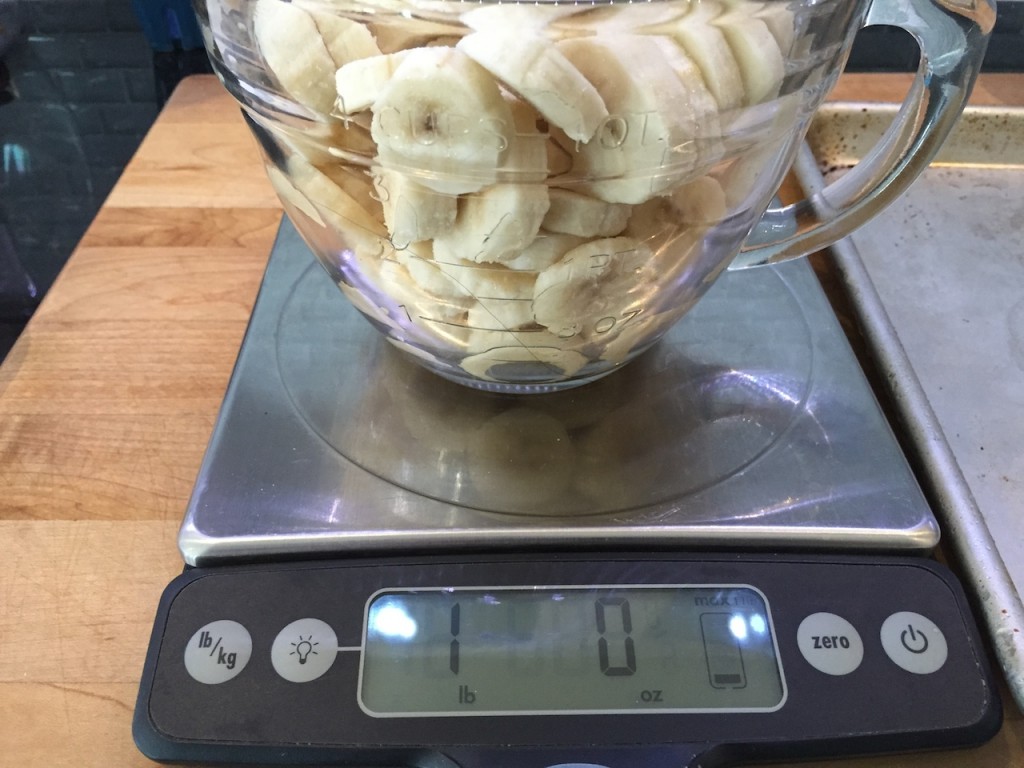
1 lb Frozen Bananas (about 4 cups, or one tray, or 5 or 6 bananas…this is why I weighed this one out)

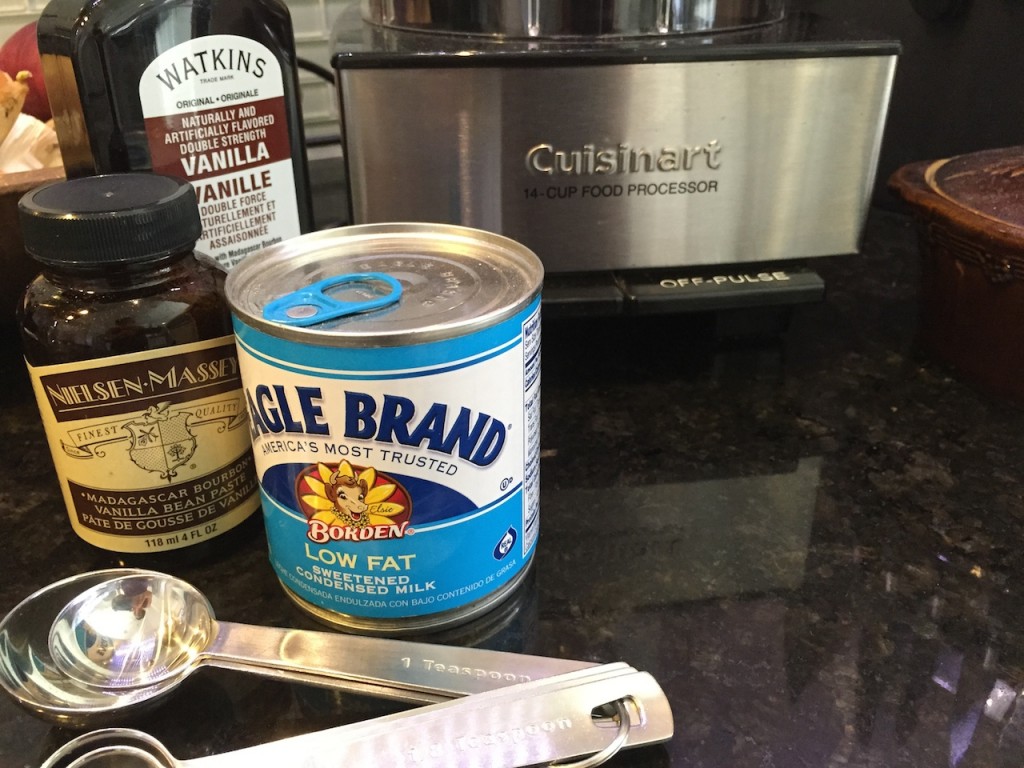
1/2 Cup Low Fat Sweetened Condensed Milk (about 1/2 can)

1/2 tsp Vanilla Extract

1/4 tsp Vanilla Paste * optional, not everybody has this in their cupboard.

1/3 Cup Walnuts chopped

3 or 4 Tbl Home Made Magic Shell, check out that post here

Step 1:

Step 1, Adventures in the Kitchen with Michelle, Not so Chunky Monkey

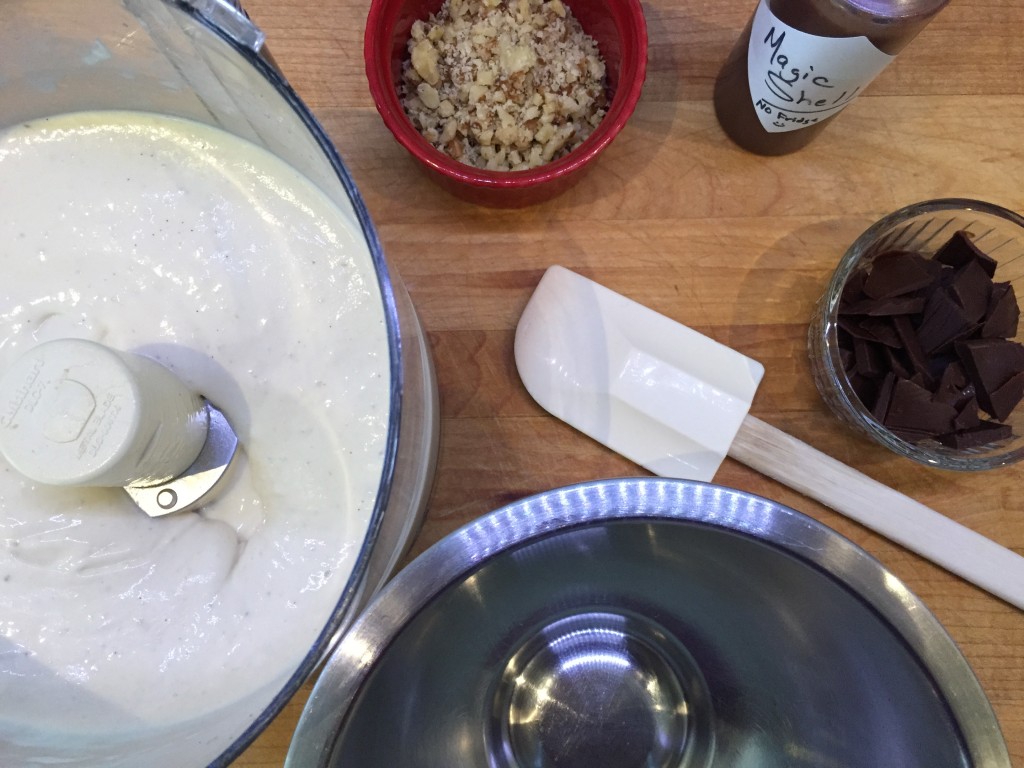
Get out all the goodies

Step 2:

Adventures in the Kitchen with Michelle, Not so Chunky Monkey

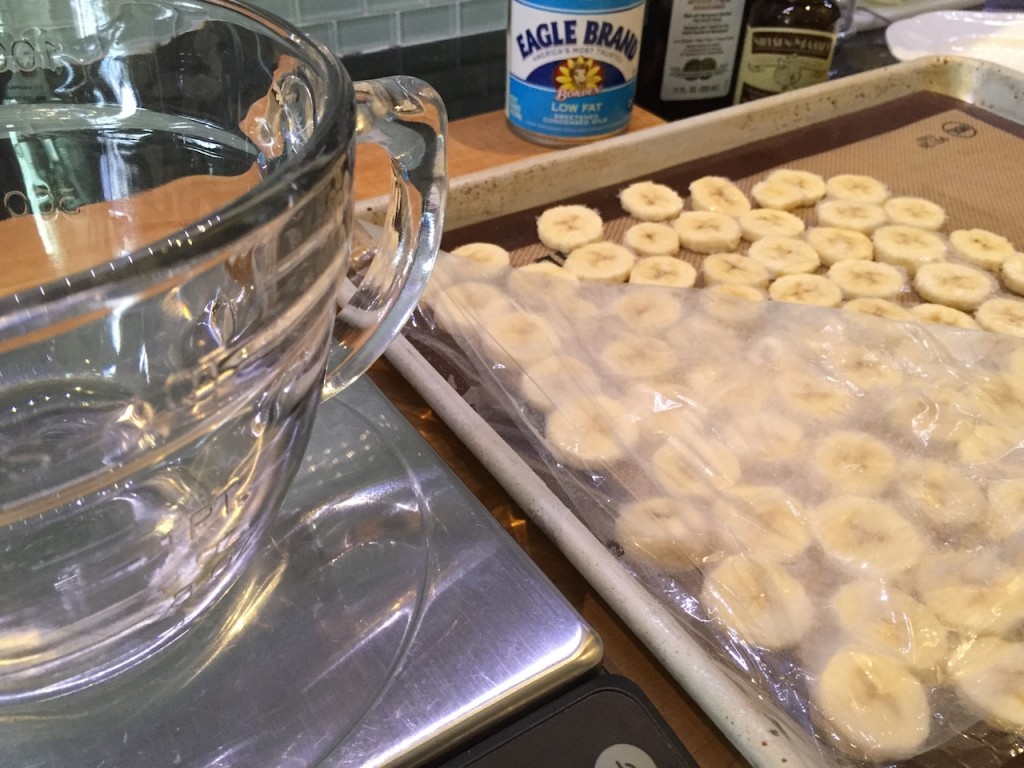
Measure out those frozen banana slices. I buy bananas and keep them in the freezer in a ziploc  for smoothies.

Step 3:

Adventures in the Kitchen with Michelle, Not so Chunky Monkey

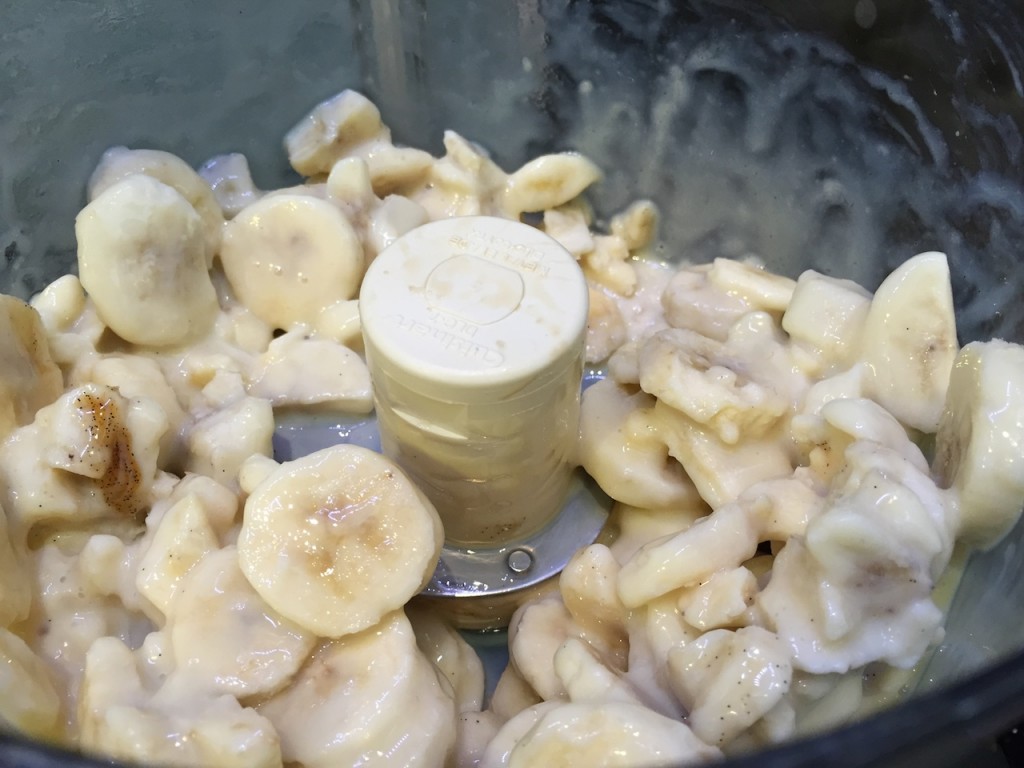
In a food processor, add the bananas, milk, vanilla.

Step 4:

Adventures in the Kitchen with Michelle, Not so Chunky Monkey

Give it all a whirl, pulse it so that all the pieces get a chance to be mashed up.

Step 4a:

Adventures in the Kitchen with Michelle, Not so Chunky Monkey

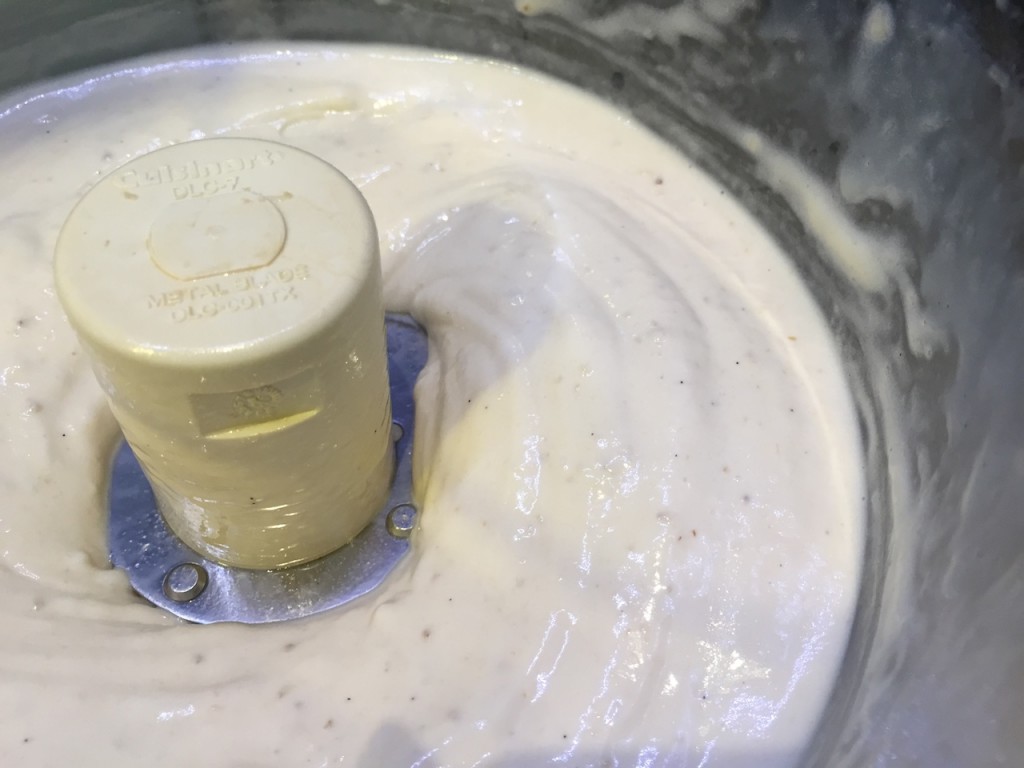
There – now it’s a frozen treat. I can’t really call it ice cream – even though there’s cream in it. Hmmm

Step 5:

Adventures in the Kitchen with Michelle, Not so Chunky Monkey

Get it into a freezer safe container. I like a stainless bowl because it freezes quick.

Step 5a:

Adventures in the Kitchen with Michelle, Not so Chunky Monkey

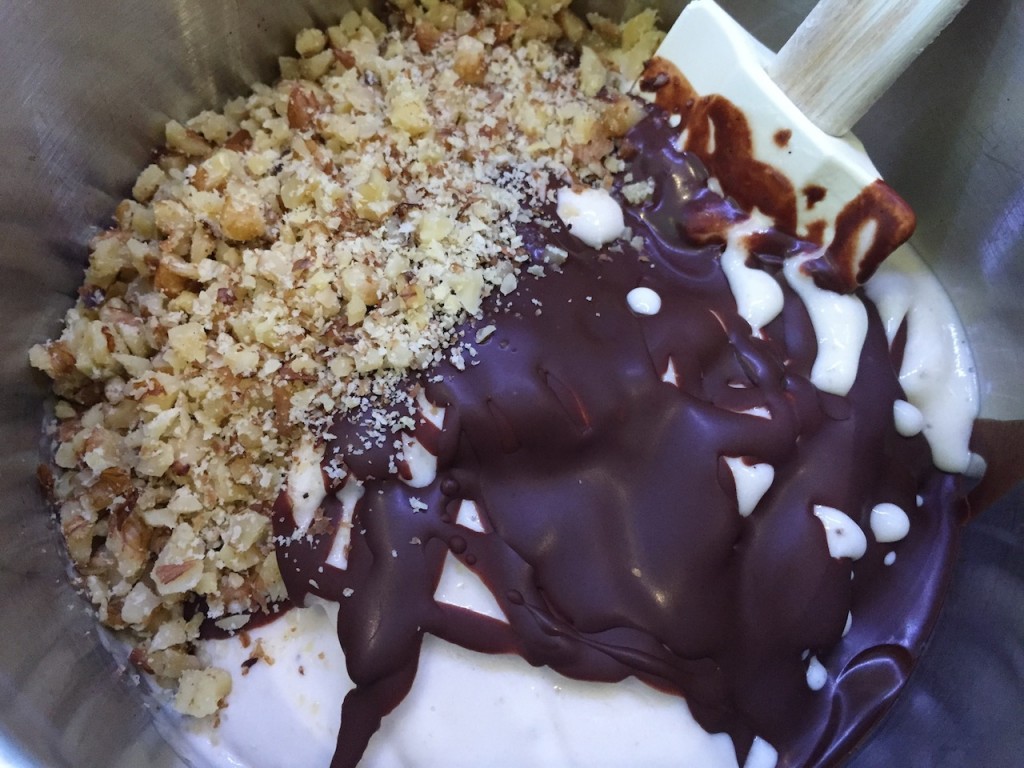
Drizzle on some of that Magic Shell – you did see that post, didn’t you. On that post I showed you to put the chocolate on a plate and freeze to have larger crunchy bits to fold into ice cream. They’re good to have because the drizzles aren’t always thick enough to be considered ‘chunks’. Don’t forget to fold in those walnuts too.

Step 6:

Adventures in the Kitchen with Michelle, Not so Chunky Monkey

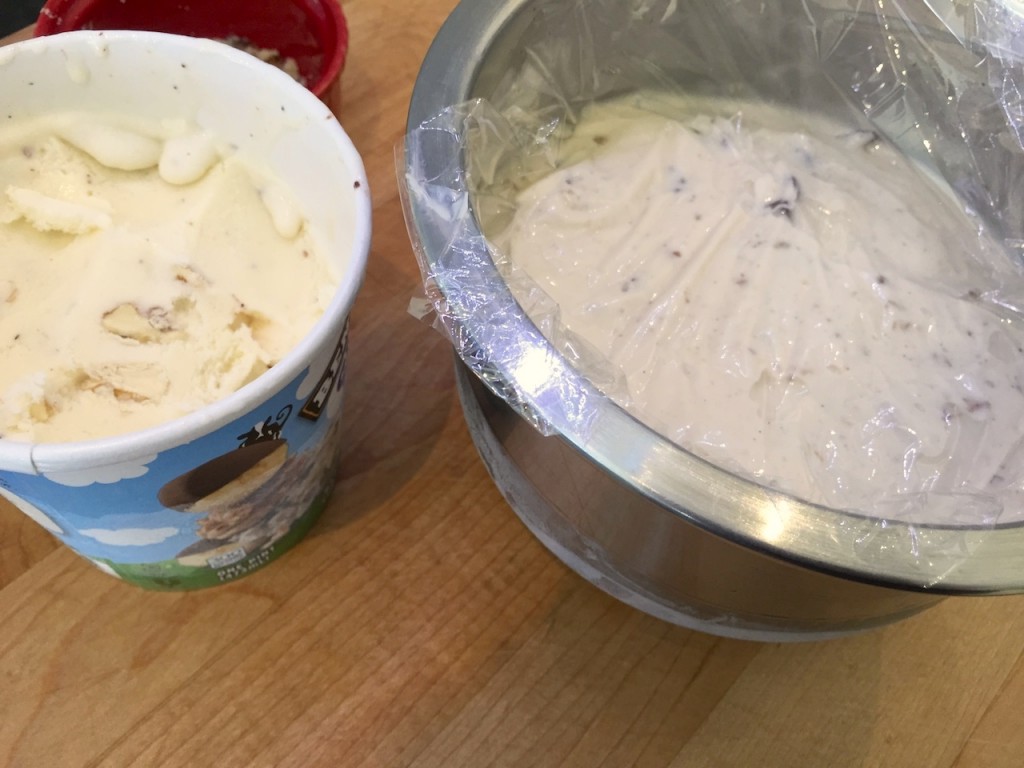
Cover it with plastic wrap, right ON the ice cream so has to keep the bananas from being freezer-fied. Get it chilled until firm – at least a couple of hours.

Finale:

Adventures in the Kitchen with Michelle, Not so Chunky Monkey

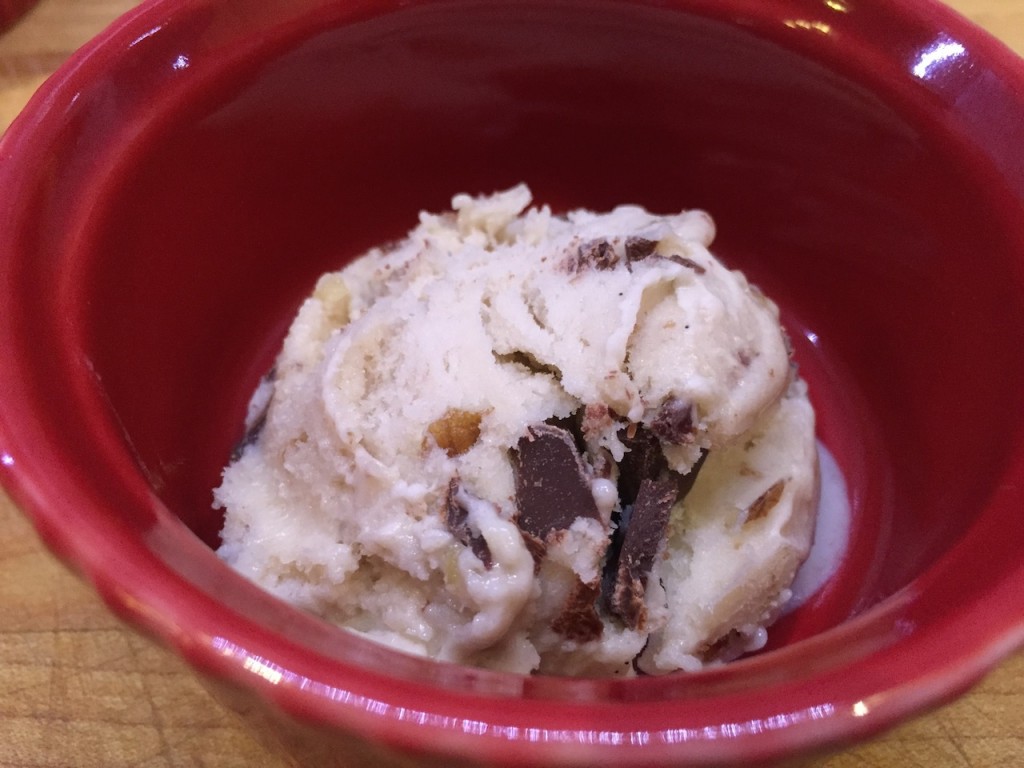
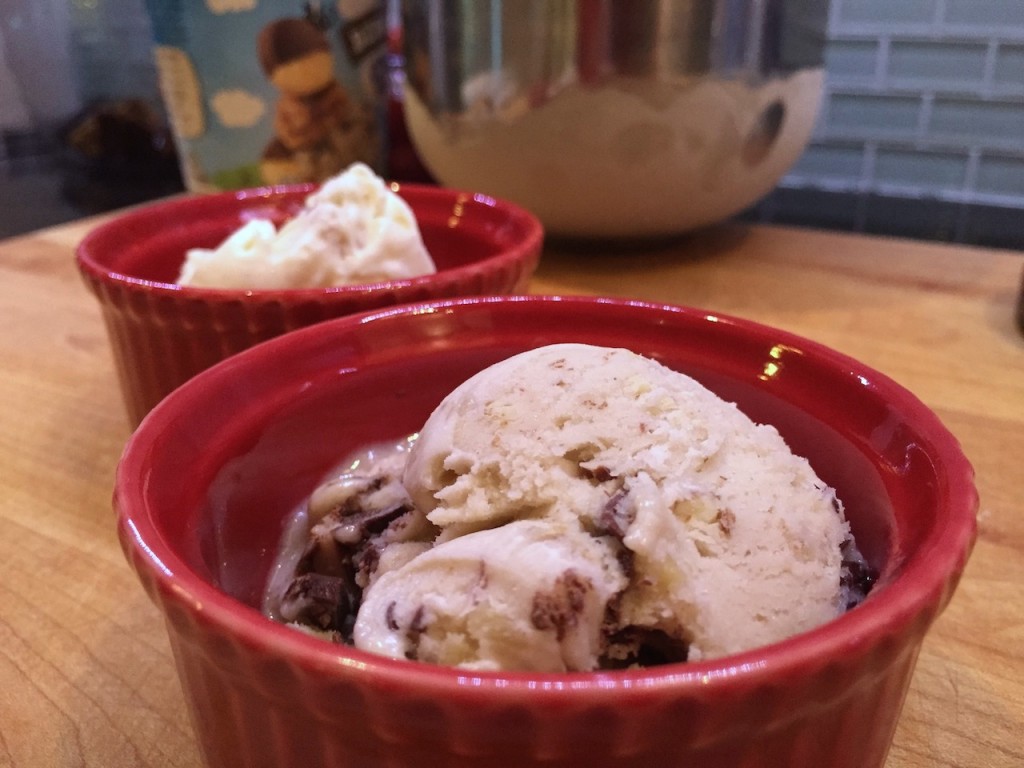
That’s it ! A Low Fat, high flavor and all around good-for-you treat. Not banana flavored ice cream – it’s actually bananas !!! So good – and still has an ice cream texture. Enjoy!

DIY Boxed Corners

I just finished the shopping tote I was making for my daughter-in-law to sell at her Fall Festival that I mentioned last week.  Which means I didn’t have time to write up a tutorial explaining the size or those pockets or any of the fun stuff I added.  

But here it is….

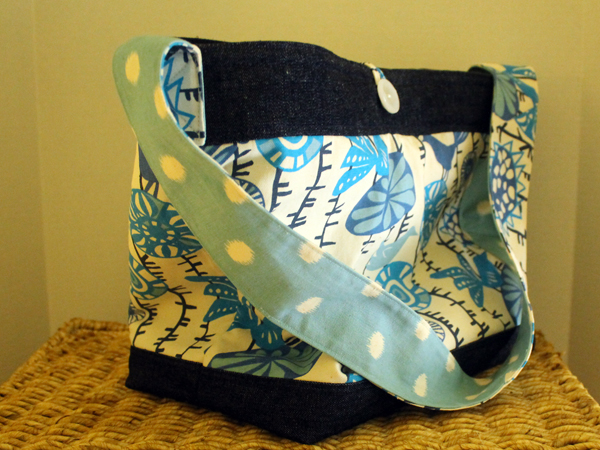
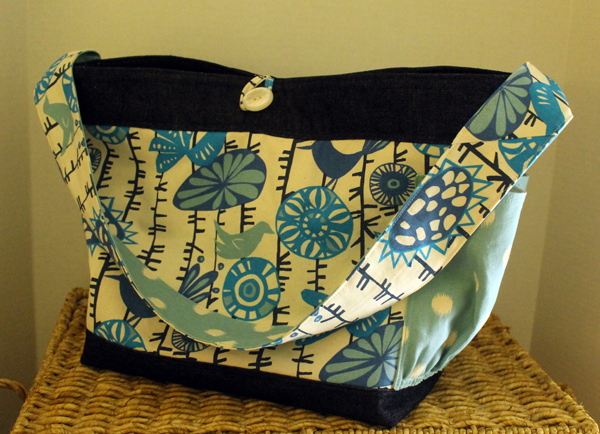
Shopping Tote, DIY boxed corners, #madewithfabric

Yeah, you’ve seen that fabric before.  And I still have enough for a couple more bags.  I wasn’t planning on using this fabric but I messed up the first tote I made and didn’t want to go to the local fabric store and get more.  “Local” for me is a 35 minute drive.  Add the return trip and the hour I spend browsing–half a day is gone!  And I had a deadline–which, by the way was Saturday and I missed it!  I’ll be making a drive to Tampa to deliver the bag today.  

The outside of the bag has two water bottle pockets and a toggle with button for closure.  I used three fabrics–two coordinating from Premier Prints that I got from Fabric.com and a dark blue denim–plus muslin to line the pockets. 

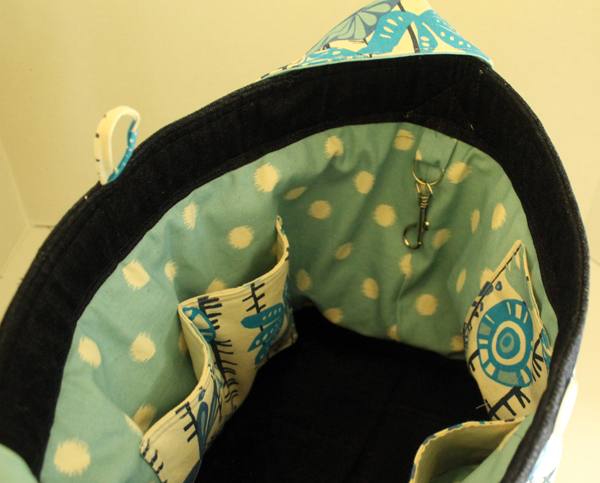
Here’s the inside of the totel  There’s a key snap, phone pockets and a big pocket for your iPad.  I actually made the phone pockets bigger than usual since I saw the iPhone 6 and that sucker is huge!

Inside of toteWhile I’m not doing the tutorial for the bag, I thought I might explain “boxed corners”. 
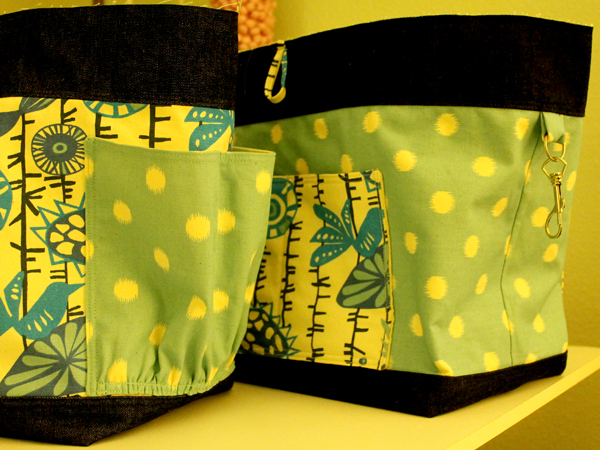
Know what that is?  Boxed corners make the bottom of the bag nice and square. Well, square probably isn’t the right word since this is a rectangle but you probably get the idea.

Tote
The bottom is called a boxed corner. Because it’s nice and square. This is the exterior of the bag on the left and the interior on the right before I fit them together.

I used to do a different method and when I first stumbled across “boxed corners” on some anonymous blog, I found it a wee bit confusing.  So I practiced and checked out a lot of different blogs and now it’s really easy-peasy.  And they are very useful for totes, baskets, and even cushions.

So here’s the quick and easy and hopefully not as confusing explanation…..

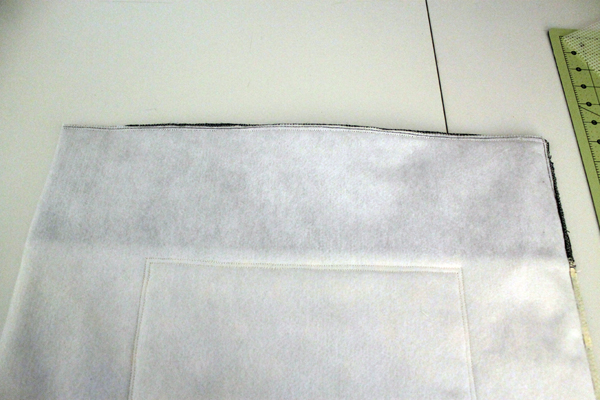
I have a big rectangle lined with fleece, 41″ x 17″, I brought the two 17″ ends together and using 1/2″ seams sewed the one side and bottom. So now it’s 20″ wide by 17″ tall.

Lining
Inside out, of course. The bottom and side are already stitched, trimmed and finished.

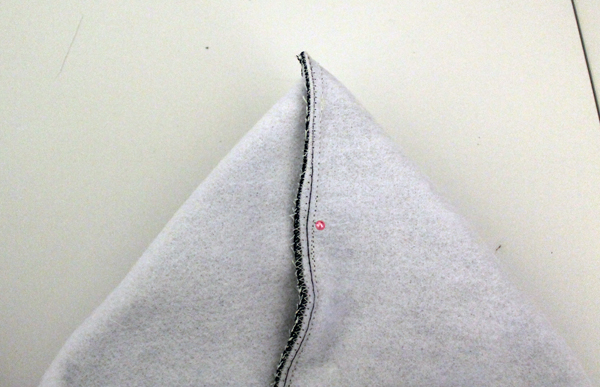
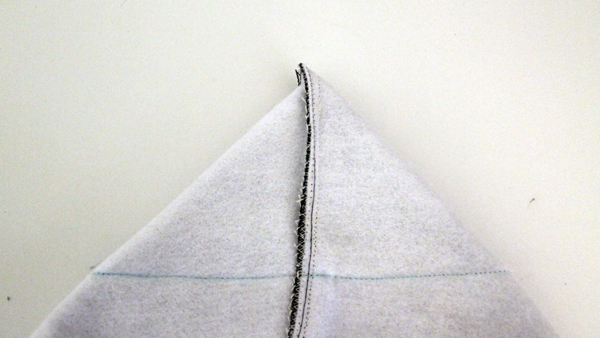
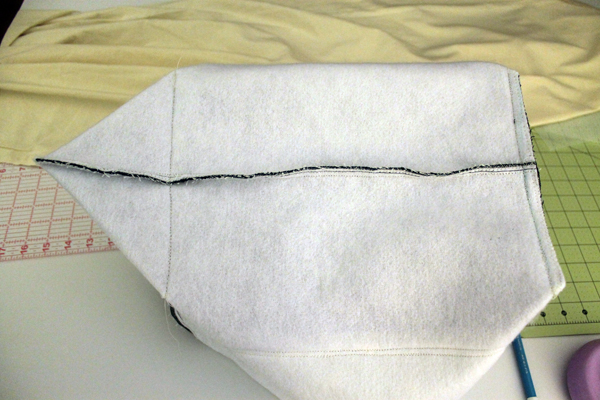
Now it’s time to box the corners.  I’m doing the corner that’s in the upper right of the above picture.  Pick up the fabric and kind of tug that corner apart.  Put the side seam on top of the bottom seam.

corner
I stick a pin in it to make sure I have the top seam lined with the side seam.

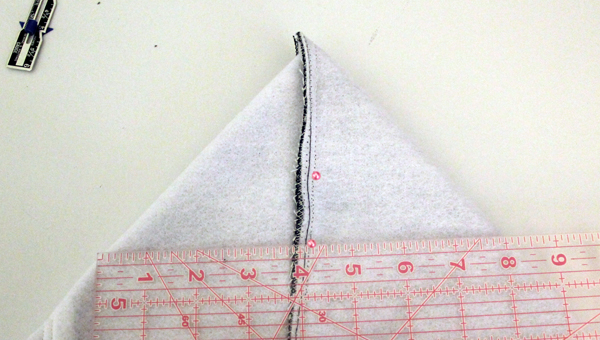
The “box” I am making is 8″ wide.  So I measure down four inches (half of the 8″ box) from the tip and then measure from side to side.  Should be 8″.  Make sure that the seams are lined up exactly–very important.  After I do the pinning I peek inside the box to make sure the seams are actually lined up.  

Corner

Mark the sewing line.

Marked line

And sew on the line.  I usually sew it twice for extra durability. 

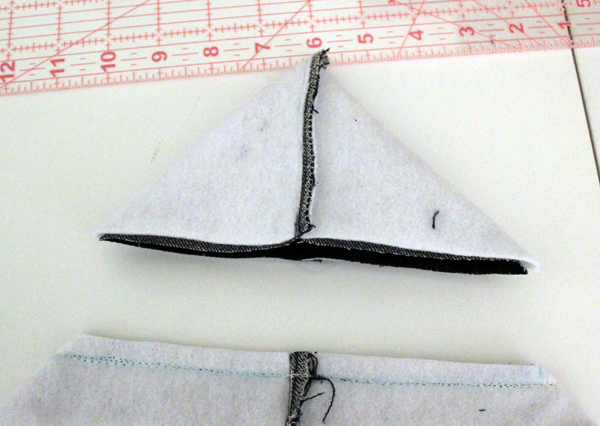
Then cut that point off.  I zig zag the raw edge.

CornerDo the same for the other side.  And that’s it!
This is the entire bottom of the bag.
This is the entire bottom of the bag before I cut off the second corner.  Seems like a big waste of fabric, doesn’t it?

Here’s another look at the shopping tote I made.

Tote
Cute!

 And eventually in one of these posts, I’ll let you know exactly how to figure out all the dimensions you need to calculate to get the exact size that you want your tote to be.  Do you remember when you told your Algebra teacher that you will never use those formulas in real life?  Well, this is an equation that I figured out and it works for all sizes of totes, boxes, and baskets.  And I’m going to add that Algebra was one of my favorite subjects. Seriously.

More to come!