DIY Fabric Box for Piper

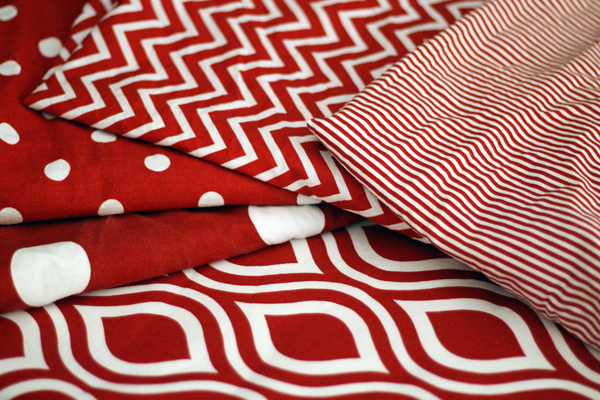
Okay, is this fabric adorable?  There’s one panel there for each granddaughter.  This was an offer from pickyourplum.com a couple months ago.  I get an email from them everyday.  It’s usually things I’m not interested in but I still look at the email.  Once in awhile they have something special–like this fabric.  And I haven’t seen them offer it again so I’m glad I bought it when I did, even though I had no idea what I would do with it.

Special fabric, DIY Fabric Box for PiperEach panel is about 20″ wide by 29″ long.
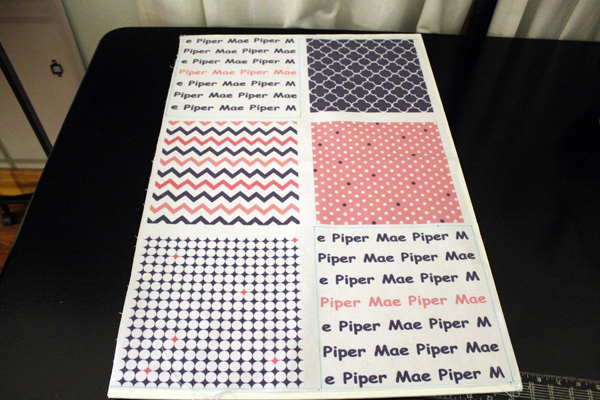
Panel of Fabric

After spending a weekend with Piper back in December I decided to make her a fabric storage box.DIY Fabric Box, Fabric basket, fabric toteSomething she can store her hair brush, combs, and ribbons in.  Or maybe her legos and mega blocks.  Piper really likes to build!
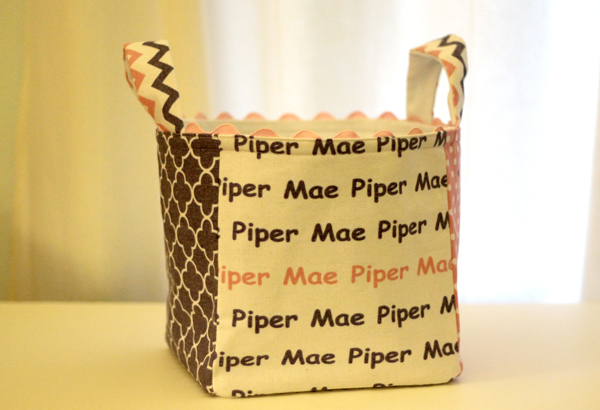
Megablocks in Fabric Box

Here’s some boxes that I discovered at Pottery Barn Kids after I already completed this one.  The handles are just a bit different than the box I made for Piper!
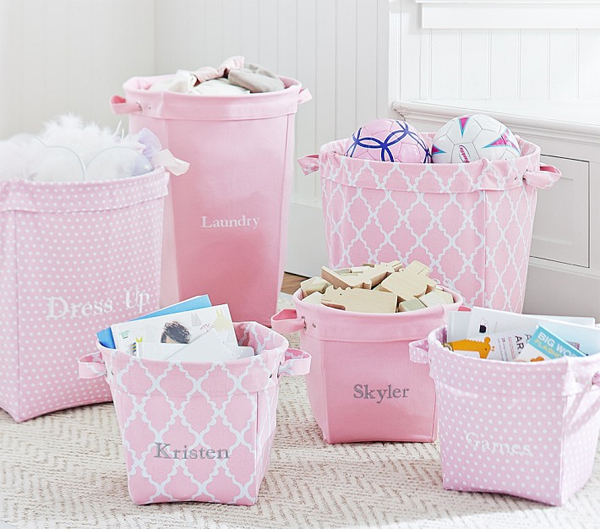
Pottery Barn Kids Storage Boxes

I based these instructions on the size of this fabric panel but you can easily make this out of any sturdy home décor fabric, denim, canvas, duck, you get the idea….

DIY Fabric Box

The finished box is 8 1/2” high and wide.

Use ½ “ seams unless otherwise indicated

Supplies:

You’ll need about 2/3s of a yard of the exterior fabric, lining, fleece, and heavyweight fusible interfacing.

A 10 x 20″ piece of muslin or other light colored fabric.

1 yard wide coordinating rick rack

8” square piece of plastic canvas

Fussy Cut from exterior fabric panel
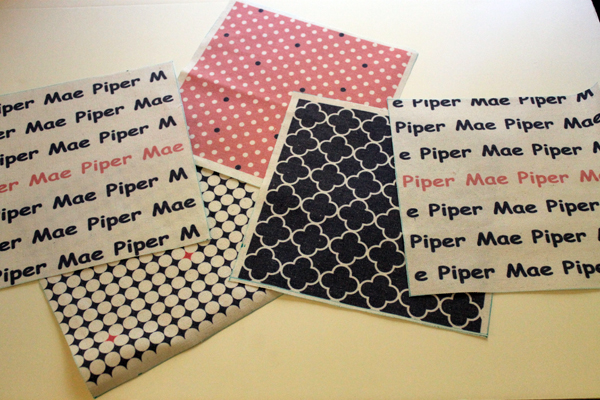
Fussy Cut

5      9 ½” x 9 ½” pieces

2      2 ½” x 10” for handles

Cut from lining

5    9 ½” x 9 ½” pieces

2    2 ½” x 10” for handles

Cut from fleece

5    9 ½” x 9 ½” pieces

2    2 ½” x 10” for handle

Cut from heavy weight fusible interfacing

5    9 ½” x 9 ½” pieces

Directions:

Adhere interfacing to the wrong side of each exterior piece, following manufacturer’s directions

Sew fleece to the wrong side of each lining piece

Exterior

Attach sides to bottom, leaving seam allowance (1/2”) open on all ends.
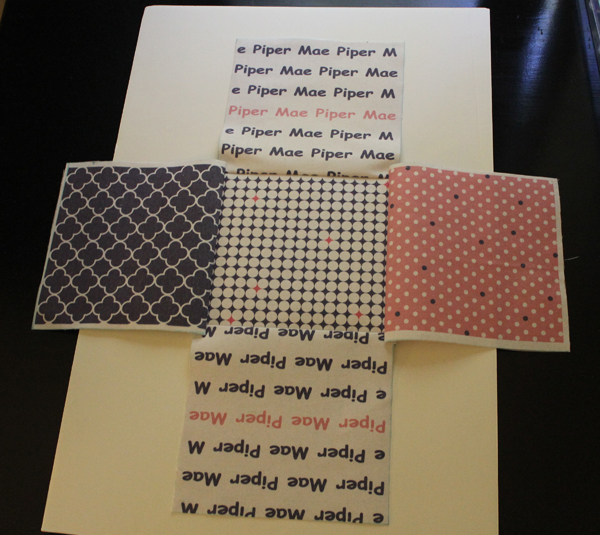
Attach sides to bottom

It will now look like a giant plus sign.

Fold the plus sign, and sew two bottom sides.
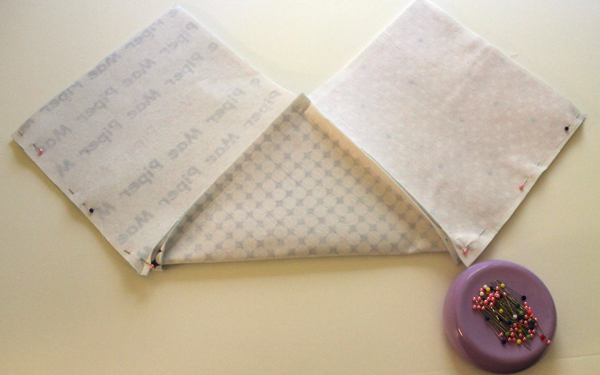
Sew sides
Sew on the sides that are pinned in the photo

Open up and sew other two sides.

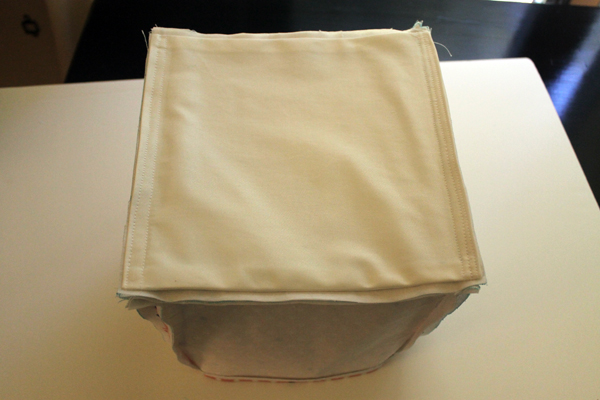
Turn right side out. Box!

BoxLining

Create the lining the same way as the exterior.

Press under ½” along top of lining.

Pin the rick rack to the top folded edge of the wrong side of the lining. Start at a side seam and ‘dip’ the curve of the rick rack down to hide the raw edge. The middle of the rick rack should be aligned with the top fold of the lining so the half of the rick rack’s ‘wave’ sticks up from the top.

Stitch the rick rack in place.
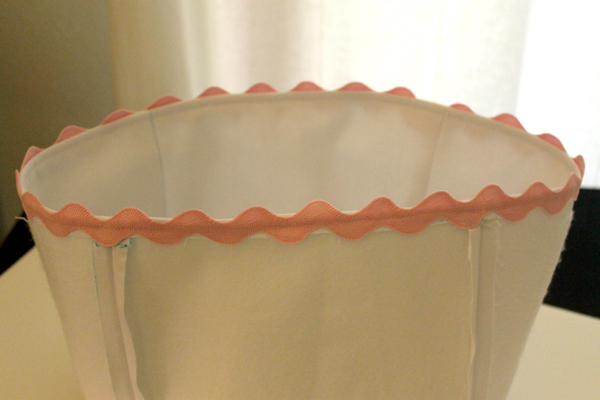
Rick Rack

Press under ½” along top of exterior box.

Bottom Insert (optional)

The bottom insert is a sleeve for the plastic canvas which will be attached to the seam allowance to provide some stability to the bottom of the box.

Cut one 8” x 8” piece of plastic canvas.

Cut piece of muslin 10” x 20”. Fold short ends together. This should now be a 10” square. Stitch two sides together.

Press edges on open side under 1/2”. Turn right side out. This should now be a 9” x 9 ½” rectangle.

This step will make tabs to sew on the seam allowances on the bottom of the box.  (Sounds confusing but it’s actually easy)  Stitch ½” from the folded edge. Insert plastic canvas piece. Stitch close to pressed open edge and then ½” from pressed edge. (Don’t catch the plastic canvas in your stitching. Your machine might not appreciate it!) The plastic canvas will now be centered in the insert.

Pin the 9 ½ “ side of the insert to seam allowances on the bottom. Stitch.
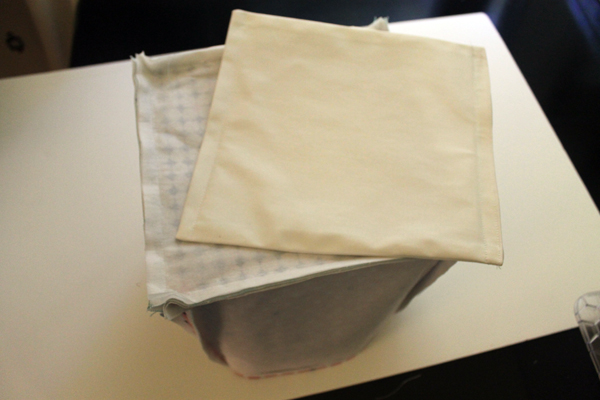
bottom InsertBottom Insert

Handle

Layer the handle fabrics in this order: batting, back fabric right side up, top fabric right side down. Align all raw edges, pin, then stitch together with ½” seam allowance, leaving both short ends open. Trim seam allowance to ¼” and turn handle right side out.

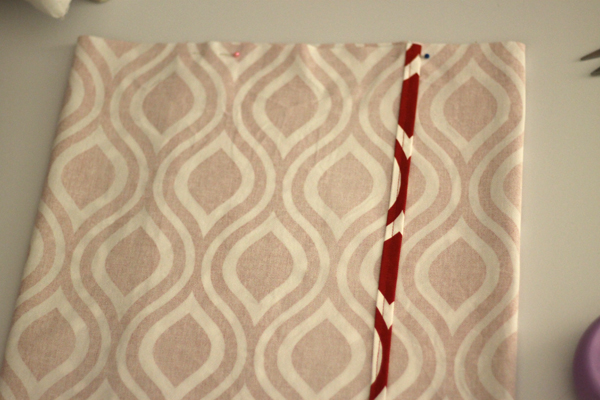
The handles will be on the sides that don’t have the name. Place the ends 1 ½” from the seam on each side. The raw edges of the handle should be 1” from the top pressed edge. Pin in place.  Make sure you put the pins on the exterior of the box so the pins do not get left on the inside when done stitching!

Put the lining inside the box exterior with the wrong side of lining against the wrong side of the exterior. Match up the side seams and make sure the top folded edges are together. Pin together and stitch ½” away from edge. Top stitch close to top edge.

Done!
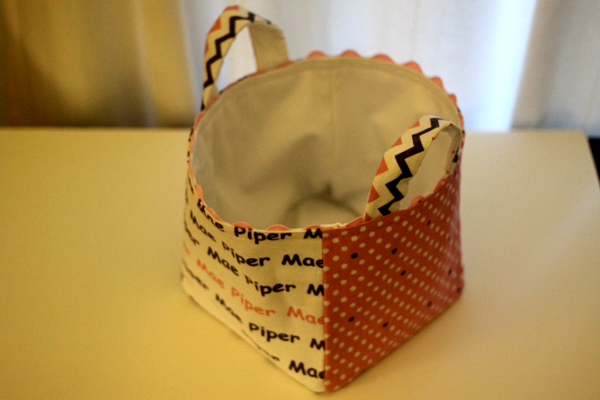
DIY Fabric Box for Piper


Easy-Peasy “I’m Having a Party Tonight” Pillowcovers

Look at all these lovely fabrics.

Fabric, Easy-Peasy "I'm Having a Party Tonight" PillowcoversI waited for Fabric.com to have a sale on their Premier Prints Christmas color fabrics.  So Pretty!  So many projects to make!
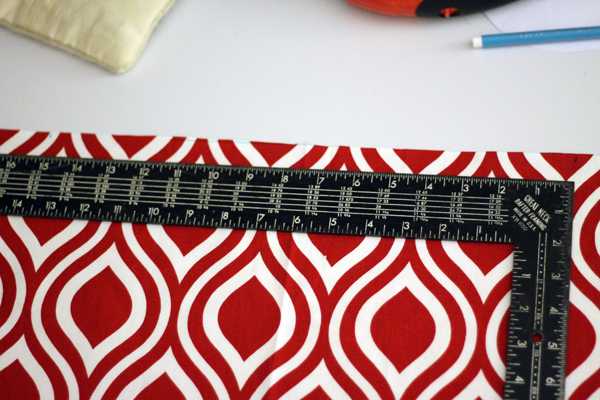
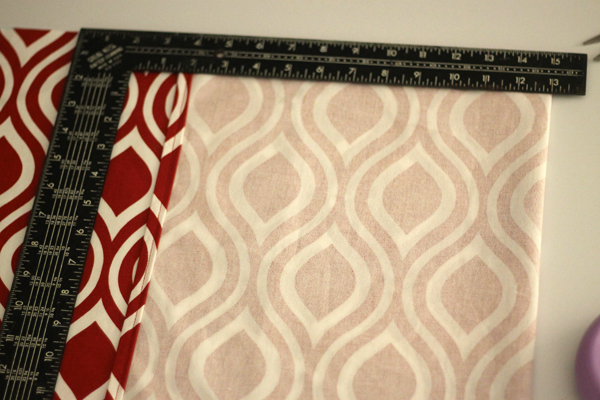
I was having a few guests arriving (like 10) for the weekend.  And I wanted to freshen up my family room a bit.

Let’s make a pillow.

I had a 16” square pillow form.

I cut fabric 16” x 40” (32” around + 1 1/2” seam allowance + 6 ½” for coverage on the back. ) This should give me a 15” square—I like the case to be tight on the pillow.

Typically I would line this fabric with fleece but for easy-peasy “I’m having a party tonight” pillow covers, I’m skipping that step.

Press under ¼” on each short end. Then press under another ½”. Stitch.

Just to mark the center of the fabric, bring the short ends together and press the fold.

Measure 7 ½” from the fold on both sides and mark within the seam allowance.

Fold for center, Easy-Peasy "I'm Having a Party Tonight" Pillowcovers
See the pressed fold? Hard to see the marks but they are there.

Fold each side at the marks.

First Fold, Easy-Peasy "I'm Having a Party Tonight" Pillowcovers

Second Fold, Easy-Peasy "I'm Having a Party Tonight" Pillowcovers

Sew ½” seams on top and bottom.

Turn right side out and stick that pillow form in!

Finished, Easy-Peasy "I'm Having a Party Tonight" Pillowcovers

Easy-Peasy

Adventures in the Kitchen with Michelle, Carrots at Christmas

‘Fall Back and Spring Forward’, that’s what we do every Fall and Spring with our clocks. Most of us anyway. I’ve got another idea for that whole scenario. Thanks to my sister’s off-the-cuff most hilarious comment of our recent Thanksgiving Day feast. While we were all talking about weight loss and munching on fattening appetizers, she quips.…”You do set your scale back for the Holiday’s, don’t you?” OMG ! I laughed myself sick as my Mom spun around and gasped at her “You’ve been messing with my scale!?” You see, our Mom has been on a lifelong diet and altering her scale amounts to kicking her cat. You just don’t do it. (Not that you could, or would – the cat that is. I would totally mess with her scale.) That statement planted an evil seed in my mind of a dieters ‘waistline savings day’. I think we should start somewhere before Halloween and end it about week beyond New Years. The Sunday before Halloween we should set our scales back 5 lbs! And after the New Years hangover’s worn off and you unpacked that new workout dvd and yoga mat, set that puppy ahead by 5 lbs…just as an incentive to get that backside movin’. A couple years of that and the only way we’ll get an accurate weight is to visit Holy Toledo* (which I will NOT be doing).

*”Holy Toledo!” is the comment everybody makes standing on the giant scale in the supermarket cart area. Which incidentally is usually made by The Toledo Scale Company.

But I digress, this post is all about Carrots at Christmas. Even though we don’t have a ‘Waistline Savings Day’ yet, I’ll be considering running with my uber fit Auntie’s saying of “No carrots at Christmas!” The holidays are for enjoying life…and eating cookies. Although, just like those bottles of liquor that sport the line ’Sip Responsibly’, I like to follow that mantra as well. So, I don’t go to the buffet and eat just the carrots because I’m watching my weight. I’ll eat those carrots AND the puffed pastry fabulousness, thank you very much. However, I’ve discovered a way to make carrots very Christmas friendly, and not in a carrot cake, and there are no snowmen here. Are you ready for this,…wait for it…. Carrot Jam. Yes, my friends, I too was a-gasp. This comes to us here via, an article in Food and Wine Magazine promoting a cookbook author, blogger, and fellow jam fan by the name of Eugenia Bone and her soon-to-be published book “The Kitchen Ecosystem”. The article included this recipe and noted that she uses it in all sorts of ways, ‘on a mozz sandwich …with a pot roast’ . We paired it with warm brie and crackers for a Thanksgiving appetizer that won’t soon be forgotten!

Carrot Jam, Adventures in the Kitchen with Michelle, Carrots at ChristmasMaking preserves can be intimidating, and since it was a small article, I’ll show you how to get from point A to point B. Super simple.

Carrots For Christmas Jam:

Step 1: Gather the goodies and get out the shredder attachment for the food processor – or take 2 aspirin and get out that box grater. While you’re at it, find a piece of cheesecloth to sacrifice.

Ingredients for Carrot Jam, Adventures in the Kitchen with Michelle, Carrots at Christmas4 lb. Carrots (I used baby carrots since they were on sale, and I like ‘em)
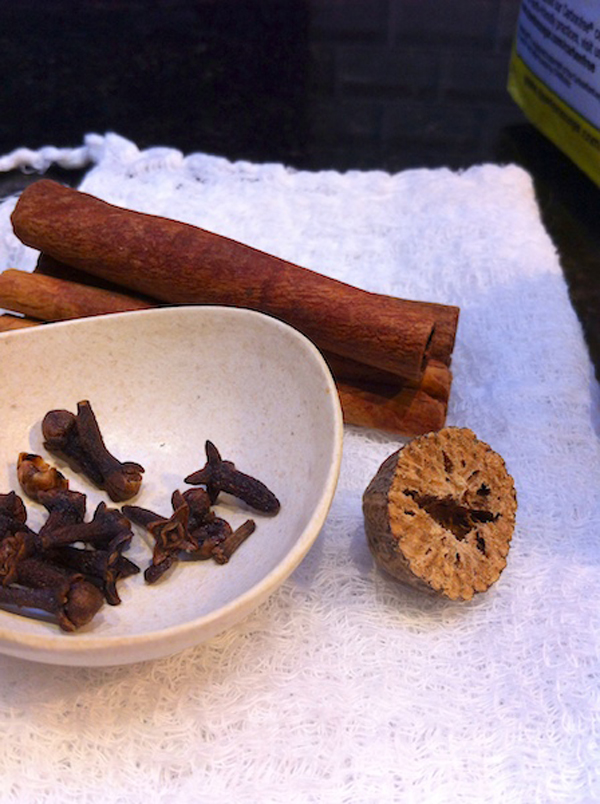
6 Cups Sugar

3 sticks of Cinnamon

12 Cloves

1/4 tsp Nutmeg

1 Cup Lemon Juice (fresh please)

2 Tbl Lemon Zest

2 tsp Kosher Salt

Spice Bundle for Carrot Jam, Adventures in the Kitchen with Michelle, Carrots at ChristmasGather the cinnamon and cloves into a cheesecloth bundle and tie off. The nutmeg you’ll add later.

Step 2:

Step 2 for Carrot Jam, Adventures in the Kitchen with Michelle, Carrots at ChristmasShred all those carrots. Zest the lemon, juice it along with another.
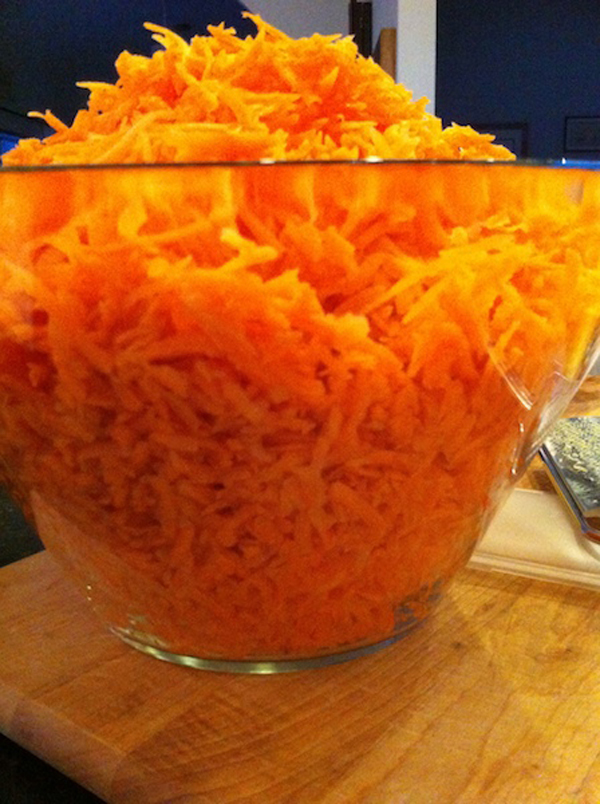
Shredded carrots for Carrot Jam, Adventures in the Kitchen with Michelle, Carrots at Christmas

You know, at first they don’t look like much – remember that gigantic bowl your girlfriend who sells Tupperware talked you into…well, go and get it ! Eighteen cups later…

Step 3:

Look at how full that bowl is! Now add in the sugar, zest, salt, nutmeg and juice. Combine. I used my clean hands, which were just the best tool for the job.

Step 3, Carrot Jam, Adventures in the Kitchen with Michelle, Carrots at Christmas

Step 4: The spice bundle will get nestled in the bowl.

Spice Bundle gets nestled in the bowl for Carrot Jam, Adventures in the Kitchen with Michelle, Carrots at ChristmasStep 5:

In the time it takes to mix this up, the carrots begin to break down and get juicy. Now, they’ll fit back in the smaller (and somewhat more attractive) bowl. Cover and stash in the fridge overnight.

Step 5 for Carrot Jam, Adventures in the Kitchen with Michelle, Carrots at ChristmasStep 6:

…and the next day. Get the mixture into a large pot and light that fire. OMG – I wish you could smell this ! Like a carrot cake, and fresh carrots, and a fall morning and … I need a cup of coffee.

Step 6, Carrot Jam, Adventures in the Kitchen with Michelle, Carrots at Christmas

Step 7:

Cook for about 40min. Or until the texture begins to change a bit and it’s syrupy and yummy. Then remove the spice bundle. I actually took a stick blender to mine, for just a few turns, since it wasn’t getting jammy fast enough. I really wanted it to look like the magazine photo. This is a root and not a fruit so it will naturally have a ‘tooth’ to it.

Step 7, Carrot Jam, Adventures in the Kitchen with Michelle, Carrots at ChristmasStep 8:

Jar them up and keep in the fridge for 3 weeks. Or process and pass out as parting gifts.

Carrots Jam, Adventures in the Kitchen with Michelle, Carrots at Christmas

The Thanksgiving post showed a small ramekin of this on the cheese tray. The next day I had it on some bread along side my morning yogurt. So Good! Thank you Ms. Bone! She’s so right, this is an all-purpose condiment.

Later that same weekend, I prepared for a Christmas cookie exchange by baking up a Chai Thumbprint cookie with Carrot Jam … a 5 star cookie I assure you! This is quickly becoming my favorite way to enjoy carrots…even at Christmas.

Carrot Jam on Chai Thumbprint Cookies,Adventures in the Kitchen with Michelle, Carrots at Christmas

Michelle Beal