DIY Tea Towels

I love cute retro tea towels, aprons, and pot holders at Anthropoligie, Pottery Barn, West Elm, Crate and Barrel….and all those other cool stores.  But Zowie!  That stuff can be expensive.  But that’s just a challenge for me to recreate them a bit cheaper.

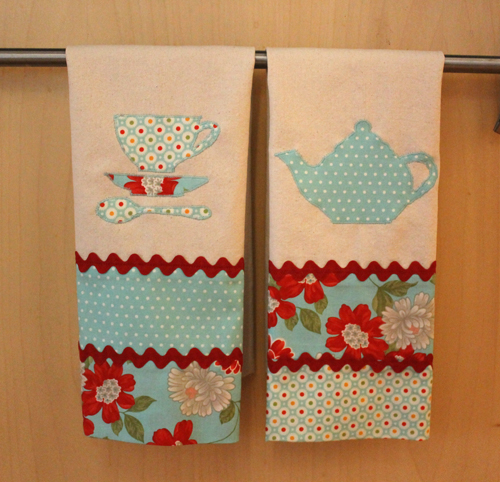
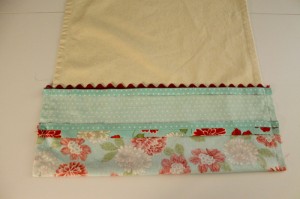
How cute are these?

DIY Tea Towels, Moda fabric

And I plan to make some matching pot holders–but that’s next week’s DIY!

Whenever I’m starting on a new project I always do a lot of research on Pinterest.  I found many tutorials but nothing quite what I wanted–I didn’t want any open seams on the back that might fray–so I just made my own instructions.  I also looked for a cute applique to add and what could be better than tea-related items for a tea towel?  Got the graphics from Sew4Home.  One of my favorite sewing websites.  I’m always amazed that I can get this stuff for free!

INSTRUCTIONS

I’ve made tea towels in the past and just used finished towels that I bought at Jo-ann’s. 
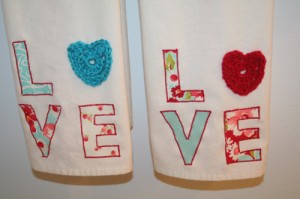
DIY Tea Towels, Moda
I was in a crocheted hearts obsession stage when I made these. I’m over that. But I still love Moda–those prints are from one of their charm packs.

But this time I wanted to use Moda Woven Toweling.  It comes in yards and is finished on both selvedge edges so it can be cut to any length.   I bought the toweling from www.fabric.com and I also bought 3 different Moda prints from our local quilt shop, Tomorrow’s Treasures

DIY Tea Towels, Moda fabric
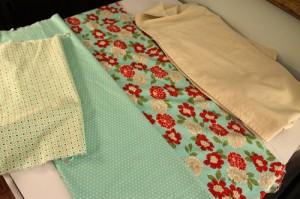
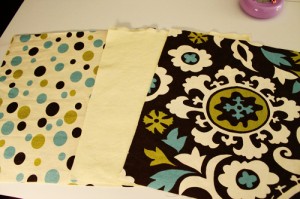
3 Moda prints plus toweling

Always wash and dry fabric, toweling, and rick rack for shrinkage. (Tip– wash and dry small items like rick rack in a lingerie bag so it doesn’t get tangled.)  The toweling started out as 16” but shrunk to 15 ¼”. I’m using a ½” seam.  Any size towel can be used, just make sure to adjust the width to be 1″ wider than the towel.

For each tea towel cut:

20 ½” length of toweling

2 strips of print A, 16 1/4” x 4”

1 strip print B, 16 1/4” x 7”

Cut 2 pieces of rick rack, 16 ¼” long

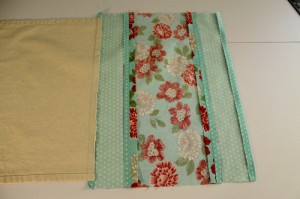
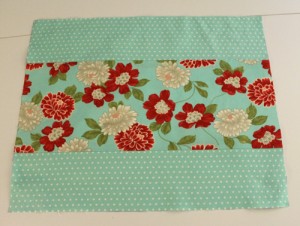
Pin the two strips from A to the large strip B. Right sides together.  Sew.
DIY Tea Towels, Moda fabrics
Strips sewn together.  I’m calling this the “color strip”

Press seams open.

Center the color strip on towel fabric, right sides together, the color strip should be ½” wider on each side than the towel.  Stitch, press seam down.  Press raw edge of strip under ½”

DIY Tea Towels, Moda fabrics

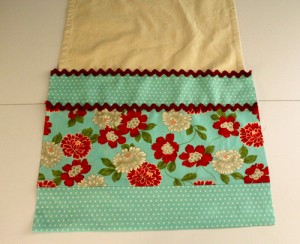
Time for the rick rack.  Center it on the right side of the top two seams of the color strip.  Stitch.

DIY Tea Towels, Moda fabrics

Fold color strip right sides together up to meet seam on towel.  The ½ “ pressed edge will meet the seam.  Line the seams up on the color strip.  Sew ½ “ seams along edges making sure not to catch in the towel sides.

DIY Tea Towels, Moda fabrics

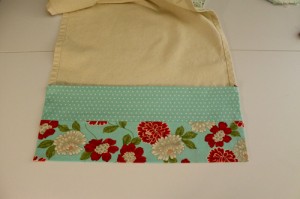
Turn color strip right side out.  Pressed edge of color strip should be on seam of towel.  Stitch edge.
DIY Tea Towels, Moda fabrics
This is the back of the towel.  You need to stitch the upper edge.  I made sure it was lined up with the rick rack on the front and stitched from the front side.

Now finish the other edge of the towel, turn under ¼” and stitch.  Then turn under ½” and stitch.
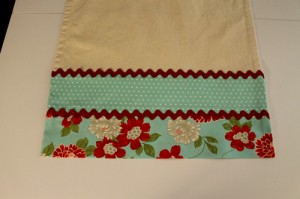
DIY Tea Towels, Moda fabrics
Almost Done!

Make appliqués and attach.  I use Heat n Bond Lite for my appliqués.  I buy it at Walmart and it’s easy to use.  Just follow the instructions on the package.  I also use a satin stitch on my machine to sew around the appliqué.  Every machine is different so just look it up in your manual.  This was probably the hardest part because I made those little handles.  Next time I’ll pick something easier! Like hearts!
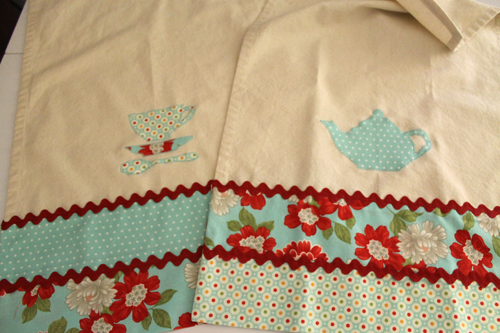
DIY Tea Towels, Moda fabrics
All Done! Now I just need to make some matching potholders and an apron!  I think I’ll be making some of these as hostess gifts, too!

If you like these tea towels, check out my other posts:   Geo-Heart Tea Towel and More DIY Tea Towels.

Geo Heart Tea TowelsButterfly tea towel

Adventures in the Kitchen with Michelle, DIY Ranch Dressing Mix

Here’s a two-fer post on a weird ingredient and what to do with it…

Show of hands, who likes Ranch Dressing? Oh, yeah- we all do. Have you priced it? OMG!I get it, that old recipe from the dude ranch in California deserves to be paid for, but let’s not get carried away here folks. It’s not like there’s black truffle shavings in it! In fact, its ingredients are in most kitchens already. The key is the recipe. There are lots of variations out there, so feel free to mix away. I’ve found one I like and has only once even slightly expensive ingredient. Once you pick up this new addition to your pantry, it won’t be so expensive after you fin d a hundred things to use it in!

Here comes the ‘two-fer’ part of this post. The weird ingredient. Well, it’s really a staple in this kitchen : dried buttermilk. What? Oh, yes. I incorporate this into my ‘quick mix’ that I use for everything from waffles and pancakes to scones. In other words DIY Bisquick…but that’s another Blog post. I found out from one of my favorite magazine/blog/tv shows, ‘America’s Test Kitchen’ on PBS, that the carton of buttermilk isn’t what Grandma used to know (surprise!). Industry has discovered, what most house-frau’s have known for years, that you can make buttermilk by souring regular milk with vinegar. Since they’re already bottling milk, it’s easier and cheaper to just do that too. That’s great and all, but it’s a kitchen short-cut. The real deal now comes in a can in dried form and is, as I understand, the dried remains from the butter making process – buttermilk. You’ll find this little paper can in with the canned evaporated milks and such in the grocery store. Once open, though, it must live in the fridge. It is, after all, milk. So go and get some and while you’re at it check your spice rack and make up your own Ranch or Ranchero mix!

DIY Ranch Dressing Mix:

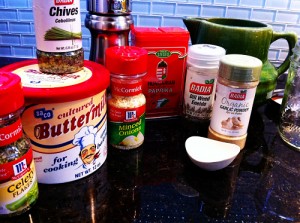
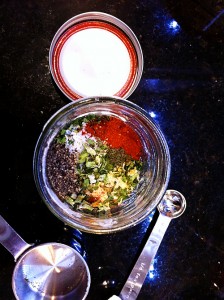
Step 1: Gather the goodies


Adventures in the Kitchen with Michelle, DIY Ranch Dressing Mix
Ingredients for DIY Ranch Dressing Mix


1/4 cup Dry Buttermilk

2 Tbl Dried Minced Onion

2 Tbl Dried Parsley

1 Tbl Dried Chives

1/4 tsp Salt (to taste – or use Sea Salt, but way less of it)

1 tsp Garlic Powder

1 tsp Dried Celery Flakes

1/2 tsp Pepper (white pepper is prettier, but black is available here)

1/4 tsp Paprika (no, not that hot stuff, well, maybe if you’re into that)

1/4 tsp Dried Dill

Step 2:

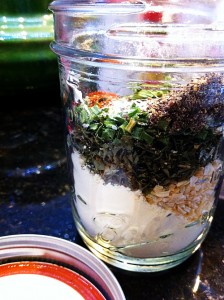
I put mine in a mason jar, because I have a ton of them, and it makes for nice photos – yummy.

Adventures in the Kitchen with Michelle, DIY Ranch Dressing Mix
Ingredients for DIY Ranch Dressing being very pretty.

Step 3:

Another photo – it’s just so cool in that jar – hmmm. Wouldn’t this make a nice gift for someone?

Adventures in the Kitchen with Michelle, DIY Ranch Dressing Mix
Still pretty….

Step 4:

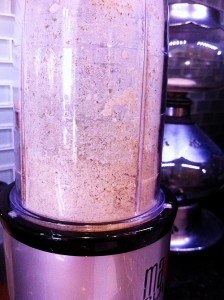
Next I put the mix into the Magic Bullet (or whatever small volume blender you’ve got), and whirled it into a powder. Hmm, looks just like that package stuff. Only way, way, way less money!!!

Adventures in the Kitchen with Michelle, DIY Ranch Dressing Mix
Everything all mixed up!

Finale:

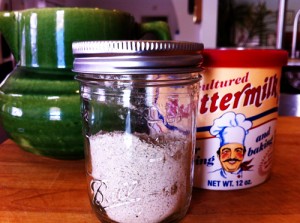
Adventures in the Kitchen with Michelle, DIY Ranch Dressing Mix
Finale!

Now you can use this for salads if you mix it with some milk (fat-free is good too), and a touch of mayo (even Veganaise makes the list here) and there you have it – Ranch Dressing! If you’re into the thick stuff you can add some reduced fat sour cream, or even a pinch of Xanthan Gum. What’s that? Oh, you missed that blog? Well, it’s a natural thickener that’s used for many gluten-free recipes. You can Google it, or just search Kathy’s or my blog. Now, where was I – oh yes, dips. A bit of this in reduced fat sour cream is awesome! Did someone say Greek yogurt?…and a baked potato….Oh yeah. I even have a recipe for Taco Soup that I add a tablespoon to and it changes the flavor completely. One of the nice things about the open mix is that you can make it as YOU like. If you like it with taco sauce, ok. Maybe a teaspoon of spicy mustard, and you got an incredible potato salad. The list goes on and on. Have fun with it. You can make it as fattening as you want, because it starts out pretty darned low. The dried buttermilk is only 80 cal and less than 1 gram of fat in 4 tablespoons (about an envelopes worth) so add it with abandon my waist watching friends. You’re safe.

Michelle @ http://www.badzoot.com/

DIY Expedit Box

So does everyone love Expedit shelves from Ikea?  If you don’t know what they are, just do a search on Expedit on Pinterest.  There are so many good ways to use these shelves.  Terry has an Expedit shelf and desk, I have two in my laundry room, and two in the second guestroom–aka grandkids’ room.  And that’s what this post is about.  Making boxes for the lovely Expedit.

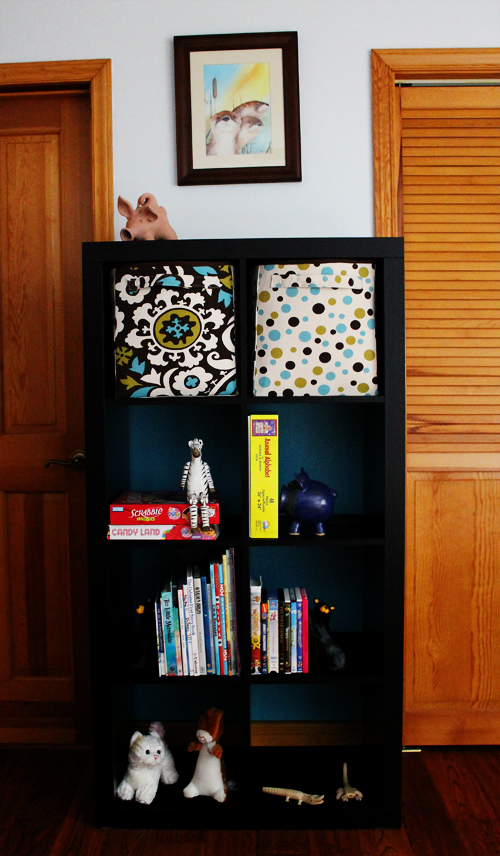
Here’s the expedit in the guestroom.

DIY Expedit Box
This is an expedit shelf. I painted the wall behind it a coordinating color.  And I’m eventually going to tell you how to make the boxes that are in the first two cubbies.

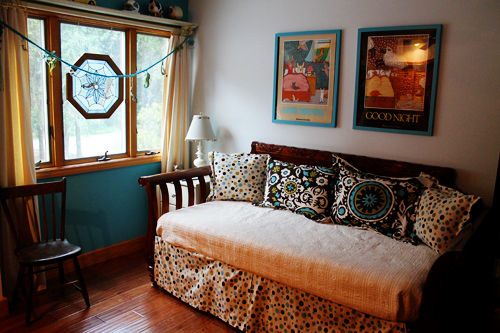
But while I’m in the guestroom, I thought I’d give you a little tour…

DIY Expedit Box
Here’s the daybed that turns into a king size bed when the trundle is raised and secured with enough bungee cords and a king-size mattress pad, sheets, etc., But no guarantee it still won’t roll apart. If you are lucky enough to stay in the twin size beds, one has mermaid sheets and the other has Dora.


DIY Expedit Box
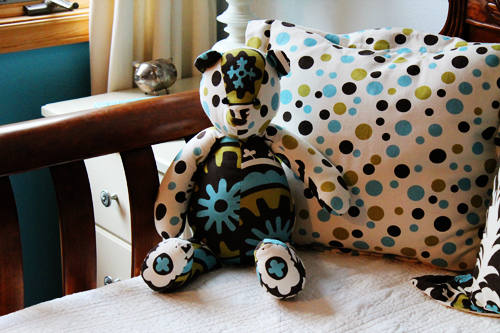
Here’s a bear….
DIY Expedit Box
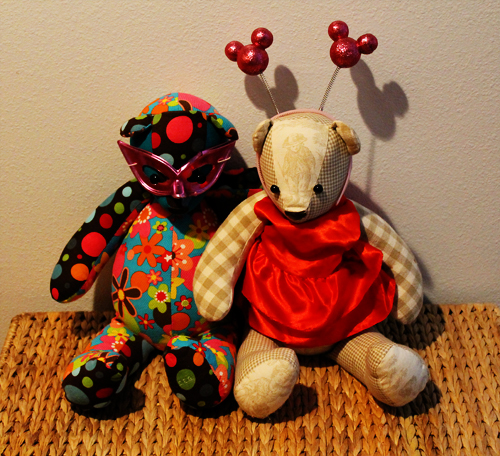
And two more bears!
DIY Expedit Box
And two scary dolls, one of my sewing failures. Both Piper and Andrew are afraid of these dolls.

So back to the Expedit Boxes.  I had a wee bit too much fabric left after sewing the pillows and bed skirt.  So made a bear.  Then a tote.  Then an iPad cover.  Still had some left.  Time to make storage containers.  And that is the end of that fabric!

Now, all you that don’t sew can go check out another blog, because here are the instructions!

First, I used Pellon Peltex 71F.  It’s “single-sided fusible ultra firm stabilizer”.  And it’s expensive.  $8.99/ yard and I needed two yards per box because it’s only 22″ wide.  What is this stuff made of?  I used a 50% off coupon plus another coupon that took 10% off my entire purchase.  I probably wouldn’t have bought it except I wanted to try something new.  Plus I already had the fabric and the muslin that I lined it with.  Using the stabilizer also made the project difficult because it was just so stiff.

DIY Expedit Box
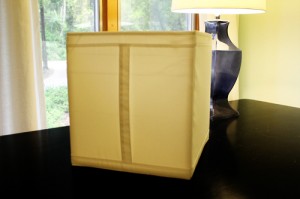
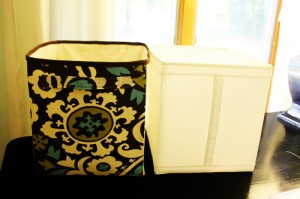
This is the box from Ikea that I was copying.

The finished box is 13” high and 12” wide on front and back, the sides are 13” high and 13” wide.

DIY Expedit Box
Premier Prints Fabric that I ordered from www.fabric.com.

Cut from fabric

3          13″ x 14″

2          14″ x 14″

1          10” x 3” for handle

Cut from lining (muslin)

3          13″ x 14″

2          14″ x 14″

Cut from Pellon Peltex 71F Single-Sided Fusible Ultra Firm Stabilizer

3          12″ x 13″

2          13″ x 13″

Center Peltex on wrong sides of side and bottom pieces and attach per instructions that come with the Peltex.  There should be ½” open on each side.

All seams are 1/2″

 Create Handle 

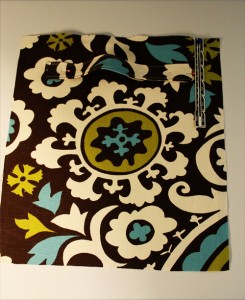
Fold wrong long sides together, press, stitch ¼” from edege on 2 sides—leaving one narrow end open.  Turn right sides out.  Tuck in raw edges of open end.  Topstitch close to all edges 

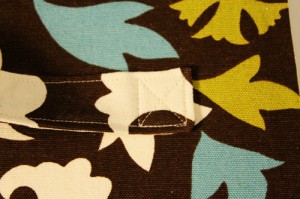
Pin handles 2” from top, 2” from each side.  Attach each end by sewing a one inch square then end with an X to make handle secure.

DIY Expedit Box
Handle
DIY Expedit Box
Handle detail

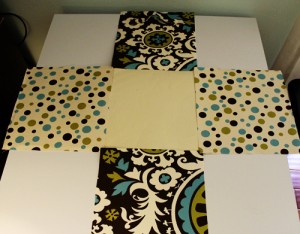
Attach sides to bottom, leaving seam allowance (1/2”) open on all ends.

It will now look like a giant plus sign.

DIY Expedit Box
Looks like a big plus sign when all the bottom edges are sewn together.

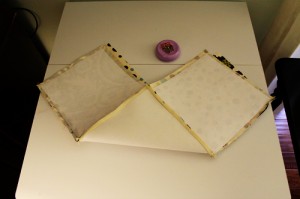
Fold the plus sign, and sew two sides…

DIY Expedit Box
This is a little confusing…fold the plus sign in half and sew the two bottom sides.

Open up and sew other two sides.  Turn right side out.

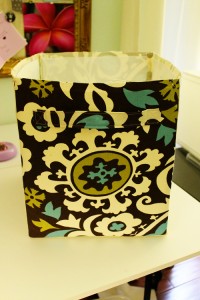
DIY Expedit Box
It’s a box!

Now sew the lining together using the same method.

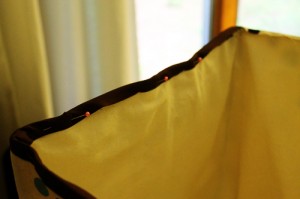
Put the lining inside of the box, wrong sides together.  Stitch together along top, ½” seam. Trim close to top seam.  Attach matching bias tape along top.  Stitch down. 

DIY Expedit Box
Pin on the bias tape. And sew!

Done!

DIY Expedit Box
Just like the Ikea box–but it matches the bedroom!

I have recently created a BETTER and less expensive way to create Ikea boxes.  Check it out:  DIY Expedit Box–Part II.