Adventures in the Kitchen with Michelle, DIY Ranch Dressing Mix

Here’s a two-fer post on a weird ingredient and what to do with it…

Show of hands, who likes Ranch Dressing? Oh, yeah- we all do. Have you priced it? OMG!I get it, that old recipe from the dude ranch in California deserves to be paid for, but let’s not get carried away here folks. It’s not like there’s black truffle shavings in it! In fact, its ingredients are in most kitchens already. The key is the recipe. There are lots of variations out there, so feel free to mix away. I’ve found one I like and has only once even slightly expensive ingredient. Once you pick up this new addition to your pantry, it won’t be so expensive after you fin d a hundred things to use it in!

Here comes the ‘two-fer’ part of this post. The weird ingredient. Well, it’s really a staple in this kitchen : dried buttermilk. What? Oh, yes. I incorporate this into my ‘quick mix’ that I use for everything from waffles and pancakes to scones. In other words DIY Bisquick…but that’s another Blog post. I found out from one of my favorite magazine/blog/tv shows, ‘America’s Test Kitchen’ on PBS, that the carton of buttermilk isn’t what Grandma used to know (surprise!). Industry has discovered, what most house-frau’s have known for years, that you can make buttermilk by souring regular milk with vinegar. Since they’re already bottling milk, it’s easier and cheaper to just do that too. That’s great and all, but it’s a kitchen short-cut. The real deal now comes in a can in dried form and is, as I understand, the dried remains from the butter making process – buttermilk. You’ll find this little paper can in with the canned evaporated milks and such in the grocery store. Once open, though, it must live in the fridge. It is, after all, milk. So go and get some and while you’re at it check your spice rack and make up your own Ranch or Ranchero mix!

DIY Ranch Dressing Mix:

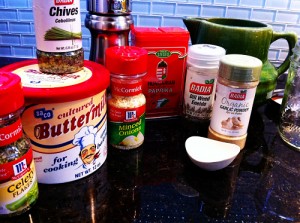
Step 1: Gather the goodies
 

Adventures in the Kitchen with Michelle, DIY Ranch Dressing Mix
Ingredients for DIY Ranch Dressing Mix


1/4 cup Dry Buttermilk

2 Tbl Dried Minced Onion

2 Tbl Dried Parsley

1 Tbl Dried Chives

1/4 tsp Salt (to taste – or use Sea Salt, but way less of it)

1 tsp Garlic Powder

1 tsp Dried Celery Flakes

1/2 tsp Pepper (white pepper is prettier, but black is available here)

1/4 tsp Paprika (no, not that hot stuff, well, maybe if you’re into that)

1/4 tsp Dried Dill

Step 2:

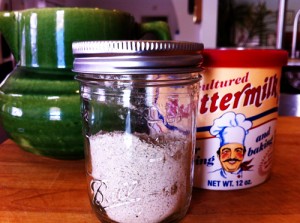
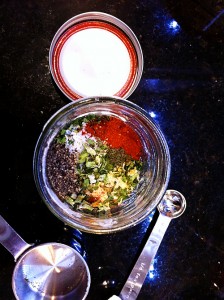
I put mine in a mason jar, because I have a ton of them, and it makes for nice photos – yummy.
Adventures in the Kitchen with Michelle, DIY Ranch Dressing Mix
Ingredients for DIY Ranch Dressing being very pretty.

Step 3:

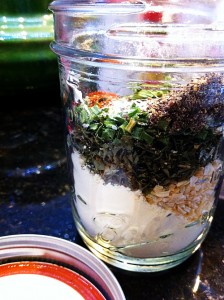
Another photo – it’s just so cool in that jar – hmmm. Wouldn’t this make a nice gift for someone?
Adventures in the Kitchen with Michelle, DIY Ranch Dressing Mix
Still pretty….

Step 4:

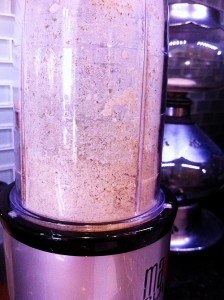
Next I put the mix into the Magic Bullet (or whatever small volume blender you’ve got), and whirled it into a powder. Hmm, looks just like that package stuff. Only way, way, way less money!!!
Adventures in the Kitchen with Michelle, DIY Ranch Dressing Mix
Everything all mixed up!

Finale:

Adventures in the Kitchen with Michelle, DIY Ranch Dressing Mix
Finale!

Now you can use this for salads if you mix it with some milk (fat-free is good too), and a touch of mayo (even Veganaise makes the list here) and there you have it – Ranch Dressing! If you’re into the thick stuff you can add some reduced fat sour cream, or even a pinch of Xanthan Gum. What’s that? Oh, you missed that blog? Well, it’s a natural thickener that’s used for many gluten-free recipes. You can Google it, or just search Kathy’s or my blog. Now, where was I – oh yes, dips. A bit of this in reduced fat sour cream is awesome! Did someone say Greek yogurt?…and a baked potato….Oh yeah. I even have a recipe for Taco Soup that I add a tablespoon to and it changes the flavor completely. One of the nice things about the open mix is that you can make it as YOU like. If you like it with taco sauce, ok. Maybe a teaspoon of spicy mustard, and you got an incredible potato salad. The list goes on and on. Have fun with it. You can make it as fattening as you want, because it starts out pretty darned low. The dried buttermilk is only 80 cal and less than 1 gram of fat in 4 tablespoons (about an envelopes worth) so add it with abandon my waist watching friends. You’re safe.

Michelle @ http://www.badzoot.com/

Adventures in the Kitchen with Michelle, Time to Detox!

People have been detoxing for years. Although the methods and reasons for a detoxification vary wildly. Our poor livers – how they suffer so. Detox diets and tea’s have been the fashion as of late. Since I’m always on a diet, I’m also always open to suggestions of how to down an entire 2 quart pitcher of water in a day. (ugh – who came up with that!) I thought a detox tea would be great. On the Net I found a couple – one that was more like medicine, with dandelion tea with lemon juice, and cranberry juice. One was more akin to ‘extract of tifton 44’ (aka – horse feed) with a sprtiz on lemon. (gag me!) and then there was one that I pulled from a Pin from Lovely Lauri in ND. Which, when I followed the link, found it was from Russia? OK, there are detoxers worldwide! Now this one I like. Simple and refreshing,…which is good because summer’s here and it gets hot,…really H O T !

Summer Detox Drink

First off, I have a plastic pitcher that was one of my best and cheapest finds in a long time. It was at my local grocery store in with the plexi serving ware and such. It only cost about $5 and it’s about 1.5 liter, more or less. The cool thing is that it’s tall and slim, with a strainer lid. That way I can put fruit or ice or whatever and pour without getting all that in my glass. No, I don’t know who made it and I’ve not seen them anywhere else – but if you spot one, buy it. You’ll thank me.

OK, Step 1:

Adventures in the Kitchen with Michelle, Let Detox!

Detox Tea. I like this Lemon version because it’s not all dandelion tea (which is HORRIBLE). This is a good one, but I wouldn’t make an afternoon cup of it alone.

1 or 2 of the Tea Bags

1/2 a cucumber, sliced

1/2 a Lemon, sliced

A Sprig of fresh mint (I’ve got a barrel planted full of it outside the kitchen)

Step 2:

Put it all in the pitcher and top off with water (filtered if you can), and get it in the fridge. It’ll brew in no time. I make mine at night and there it is in the morning. It sits there bragging about how healthy it is and shames me into my workout gear…it’s very good after a workout! Minty cool.

Don’t worry about losing 5 lbs in a week either. What those dieters don’t tell you with their big detox plan is that along with their pitcher of tea daily, all they ate was saltines , lettuce and worked out 45min a day. Oh yea, I’d lose 5 lbs too if I could live like that! If you don’t drink it all in one day, it’s ok – the detox police won’t interrogate you – but don’t let it go for more than 3 days or so. The mint will turn dark and the cukes will start to not look all that healthy. That’s ok because you’ll drink this one – all of it, every day, and your liver will have been to the spa. Which it totally deserves after living with you, and cleaning you up after all those Friday nights over the years!

Michelle @ www.BadZoot.com

Adventures in the Kitchen with Michelle, Let Detox!

Adventures in the Kitchen with Michelle, Chicken with Preserved Lemon

A while ago I posted preserved lemons and I said I’d be back to show you what to do with them. A logical choice for the sweet and salty version is to simply lay a couple of slices on some fish (salmon is nice). Wrap in a pouch of foil and bake for 20 min or so at 350deg. A little rice pilaf and a salad on the side – so very good.

This recipe I pulled from Williams Sonoma and changed a couple of things. It was really tasty, and good for you too.

Braised Chicken with Preserved Lemons

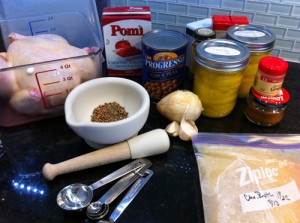
Step 1: gather up..

1 Preserved Lemon*

1-1/2 tsp Coriander Seeds

1-1/2 tsp Cumin Seeds

1/2 tsp Cinnamon

1/4 tsp Cayenne Pepper

1 Chicken (about 4# whole or cut up)

1/2 tsp Ground Pepper

2 Tbl Olive Oil

1 Yellow Onion, chopped

2 Garlic cloves, minced

2 tsp Tagine spice*

1 can (28oz) Diced Tomatoes, drained

1 cup Chicken Broth

1 can (15oz) Chick Peas (garbanzo beans) drained

Adventures in the Kitchen with Michelle, Chicken with Preserved Lemon

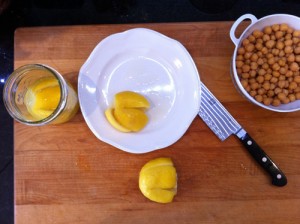
•Preserved Lemon; short cut. Slice a lemon very thin and layer in a dish with salt and let sit while the rest of the dish cooks. The lemon is added near the end.

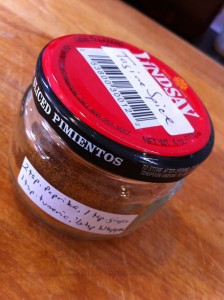
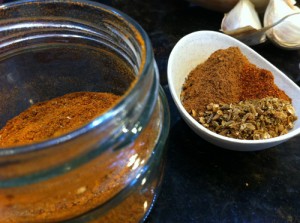
•Tagine Spice; You can buy this at W & S, but that’s a hour away so I made my own of standard pantry spices. I guessed at the amounts using the list from the product description. My Tagine spice Mix: 2 tsp Paprika, 1 tsp Ground Ginger, 1 tsp Tumeric, 1/2 Ground Blk Pepper

Adventures in the Kitchen with Michelle, Chicken with Preserved Lemon

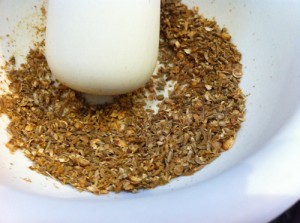
Step 2: Take the coriander and cumin seeds, and toast them in a small pan. Careful, just until you can smell them a bit and the cumin seeds turn a darker green. This changes their favor slightly and is way better than the ground versions. Crush them in a mortar pestle or a coffee grinder (whatever you use to grind stuff).

Adventures in the Kitchen with Michelle, Chicken with Preserved Lemon

Step 3: Make up your Tagine Mix. Combine with the other spices in a small bowl.

Adventures in the Kitchen with Michelle, Chicken with Preserved Lemon

Step 4: Cut up the chicken and remove as much of the fat as you can and leave some of the skin. Heat the oil and brown the chicken in a dutch oven…a large pot, not a new kind of range… so if this is a French made pot, I guess it’s a French oven!? If you bought a whole chicken, cut it up and brown the back pieces as well. But then move them off to be cooked for stock – they don’t make for good eats at dinner. Set the chicken aside and sweat the onion and garlic. Then add the spices and sauté for just a few seconds. This ‘blooming’ step makes the spices come alive.

Adventures in the Kitchen with Michelle, Chicken with Preserved Lemon

Step 5: Add in the tomatoes and broth. Scrape the browned bits from the pot and then add the chicken back to the pot. Simmer for about 40 min.

Adventures in the Kitchen with Michelle, Chicken with Preserved Lemon

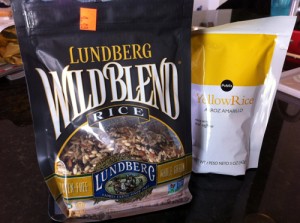
Meanwhile, decide what kind of rice to put on the side. Normally, I use standard yellow rice, but I thought I’d show you a new find. This wild rice combo is great all by itself. The package is pricey, but it goes a long way. This is really good along side grilled meat of most any kind.

Adventures in the Kitchen with Michelle, Chicken with Preserved Lemon

Step 6: Cut up the preserved lemon into a fine dice. Oh – the smell! So lemony…summer in a jar. The rind is almost gelatin like, and the salt has removed the bitter edge to the taste. Like nothing I’ve ever had before.

Adventures in the Kitchen with Michelle, Chicken with Preserved Lemon

Step 7: After the chicken has simmered, add the lemon and chick peas and cook another 5-10 min.

Adventures in the Kitchen with Michelle, Chicken with Preserved Lemon

Finale: Plate it up and dig in. The chicken is healthy after the skin is pulled, and the meat just falls off the bone. This taste of Morocco is a nice diversion from the average weekday meal. And now you know what to do with that jar of preserved lemons you made.

Adventures in the Kitchen with Michelle, Chicken with Preserved Lemon

Enjoy.

Michelle @ www.badzoot.com