Adventures in the Kitchen with Michelle, Lo-Sugar Healthy Strawberry Jam

Strawberries are a big deal here in central Florida. During January, February and most of March you can find them everywhere. Early berries, I find, are rarely very good. Not to mention pricey! The road-side sellers asked $25.00 for a flat this year…what!!? I’ll wait, thank you. Patience is rewarded in this. After the season is in full swing people get tired of strawberry everything – pies, scones, smoothies,…. And the berries get a bit smaller and not quite as pretty. That’s perfect. Because I know that those gigantic berries that they advertise as being sooooo wonderful are not what they seem. Sure, they’re good for dipping in chocolate – and that’s about it. Like grocery store tomatoes, they lack substance and flavor. Oh, they look photo perfect, but take a bite and they’re white inside, sometimes even hollow. Like a beauty queen that can’t add. NEXT! You see, the strawberry, we sometimes forget, started out as tasty little wild things. Over the years farmers have bred them to be more marketable and easier to deal with. To do that you have to give something up, like the tomatoes, and other crops, flavor is the first thing to go. Oversized, camera-ready firm flesh – tastes like sawdust. If you shop Whole Foods, you’ll notice the organic ones don’t look like that. But it’s too far to drive, and too much money. So, I wait. Smaller berries, later in the season are just sweeter (it seems), and because they spoil faster the market sellers need to move them fast which equals cheaper. This past Monday I picked up a 1/2 flat of the super smelling little lovelies at the farmers market for 5 bucks ! I came home, cleaned them up and the next day made some fabulous jam. I even have some left to slice up over my frozen yogurt treats. What a bargain! Three quarts of lo–sugar healthy jam for a little more than a 5 spot – yeah baby. Oh, you want to know how… OK, you’ve seen me do this all before and I’ve learned a new trick to share. So go and get some sweeties and meet me in the kitchen.

Adventures in the Kitchen with Michelle

Lo-Sugar Healthy Strawberry Jam

First you need jars – whatever size you like and get them clean and sterilized. My dishwasher does a good job for me. Then I have a pot of boiling water in the stove for the funnel and scoop. I’ve been sterilizing in the oven as of late, which is great for Ball jars. Although, I have found that plastic handled items don’t exactly ‘sterilize’ themselves at 250deg in the oven – they kinda melt. Not so good.

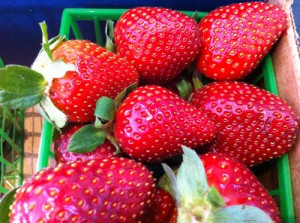
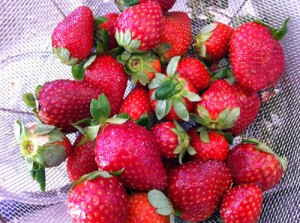
Now, you did go and get some great berries, yes? See, these are perfect Plant City Florida Strawberries. Not too big, perfect shape, not white and green under the tops. Maybe a soft spot here and there. I think I had two or three over-ripe berries to trash in the whole batch.

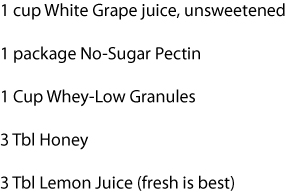
OK, what else:

Adventures in the Kitchen with Michelle

Get some spoons and set them in the freezer. I’ll tell you why later.

And heat your oven to 250 deg.

Step 1: Stop drooling over those things and get ’em cleaned already! (but they’re so cute)

Adventures in the Kitchen with Michelle

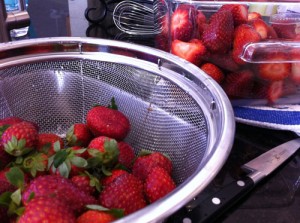
Step 2: Cut off the tops and measure out about 4 lb. of berries. For me it worked out to about 4-1/2 of the little green baskets. Rinse them well and rub off some of the seeds from the outside. No – you do not need some fancy huller tool either.

Adventures in the Kitchen with Michelle

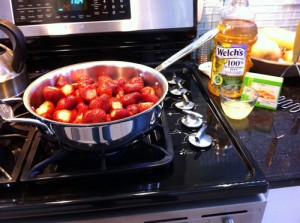
Step 3: Now get your 4 quart pan or pot. Slice the berries coarsely into the pot. Get the grape juice and berries started on low.

Adventures in the Kitchen with Michelle

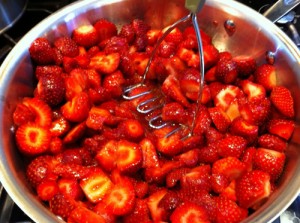
Step 4: Since these aren’t cranberries or blueberries, they’ll need some help breaking down their juiciness. The potato masher works great for this.

Adventures in the Kitchen with Michelle

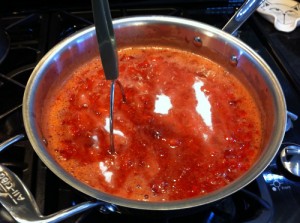
Step 5: Oooo, there’s a nice mash. Now add the pectin, lemon juice, and sweeteners. You can add more or less as you like. Remember it’s jam here, not just a jar of smashed fruit.

Adventures in the Kitchen with Michelle

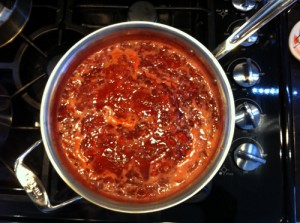
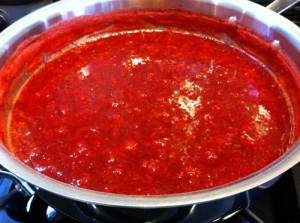
Step 6: Let it boil (simmer) for about 20 min or so, stirring often. Not too high or it’ll burn or boil over. As it is there’ll be foam to scrape off with a rolling boil. (As I took this photo, I thought, you know that whole over-head shot is so nuevo,…but what happens when I drop my favorite toy into the sweet bubbling lava!!!? – Hmmm, you may not be seeing many more of those shots)

Adventures in the Kitchen with Michelle

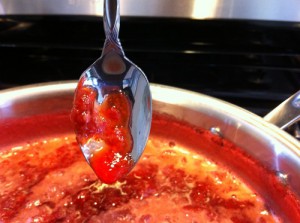
Step 7: OK, remember those spoons. Get one and take a test dip and see if the berries have become jam or still thick sweet juice. This is good. It actually stayed on the spoon long enough to get a photo. Which is way longer than an actual ‘test’ should take.

Adventures in the Kitchen with Michelle

Step 8: You’ll want to skim off the foam – it doesn’t look very tasty.

Adventures in the Kitchen with Michelle

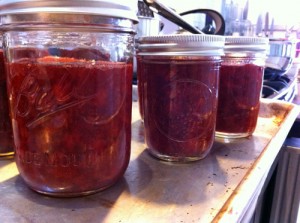
Step 9: Get those sterilized jars filled. And lid them ‘finger tight’.

Adventures in the Kitchen with Michelle

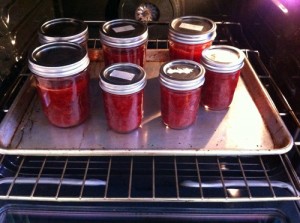
Step 10: Place on a cookie sheet and get them in the oven for 30 min. No pot of scaling water this time. This is the new trick I learned – see what happens when you read books! Yes, that’s a motley crew of jars with reused lids, but these aren’t give–aways. These are aaaallll mine!!

Adventures in the Kitchen with Michelle

Step 11: When they’re out, listen for the pop. Look for the dimple to ensure a perfect seal. Even the reused lids worked. As they cooled I noticed that mine wanted to separate a bit on the bottom. I just gently rolled each one and they continued to cool and jelled just fine.

Adventures in the Kitchen with Michelle

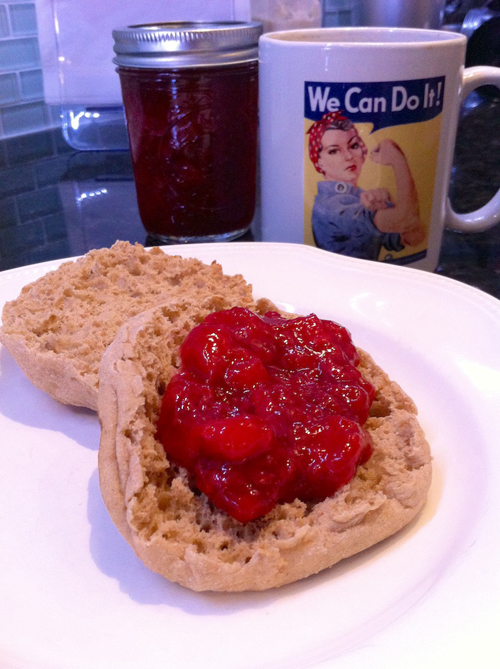
Step 12: After they cool, the next morning you can have healthy strawberry jam. Homemade! So easy, even my coffee mug agree’s “We Can Do It!” – and so can you.

Finalex

Adventures in the Kitchen with Michelle, Key Lime Cupcakes

It’s so cold out and it’s only March ! – I’m feelin’ like I need to head South. No, wait I AM South…ok, maybe a little further South. Let’s say The Keys. Ahhhh, that’s better. I am a mental traveler. There I was with my toes in the sand crisping up on the beach – no, that’s not my swimsuit. Ugh. OK, back to reality. To get into that suit I’m needing to not fall off my diet bandwagon. The Keys, The Keys, The Keys…how ’bout a little Key Lime Pie. Oh, no not that one – with like a dozen egg yolks and a pound of sugar. I can’t eat that! A cupcake. A little portion controlled slice of sunshine topped yumminess. It’s gettin’ warmer already. And with this one you’ll still be able to get into that swimsuit later, maybe even a 2-piece. Hey, a girl can dream!

Mimi’s Key Lime Pie in a Cupcake

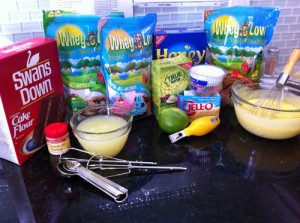
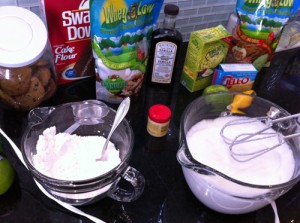
Step 1: Gather the goodies. Including foil cupcake liners. We’ve got a couple of new ones here. There’s yet another type of Whey-Low I’m trying out. It’s for cold deserts and is finer to melt into ice cream and such. I thought it would work well in a cooked icing I plan to try (that’s another Blog). But for you, I’d use my Impossible Cream Cheese frosting for these. You may even want to add in a little lime zest. Next in the newbie line-up is True Lime, a powdered lime concentrate fat-free and nor sugar just dehydrated lime juice. Pucker-up!

Light that fire 325deg this time.

Adventures in the Kitchen With Michelle

Adventures in the Kitchen with Michelle

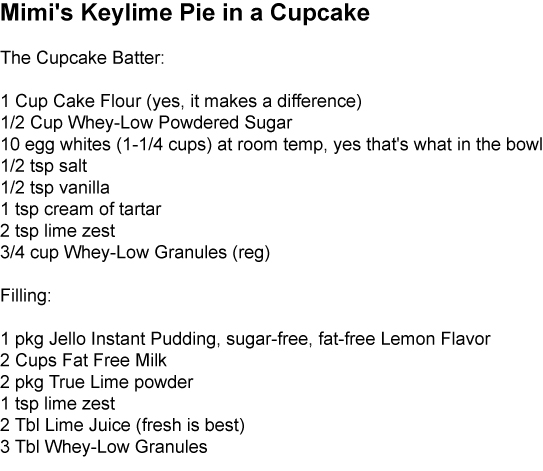
Make this filling and set in the fridge while you make the cupcakes. I’m not even going to bother with telling you how to make instant pudding – this is no different only with a few additions to make it ‘limey’.

Also, 4 whole (of 4 small squares each) graham crackers, crushed. Or just 1/4 cup graham cracker crumbs.

If you’ve ever made angel food cake, these steps will sound very familiar. These are, in fact, little angel food cakes, and the foil liners make tiny cake pans.

Step 2:

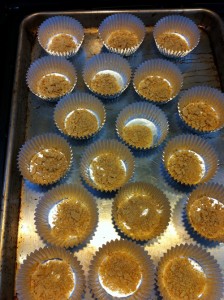
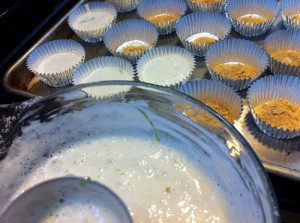
Set out you liners (18 of them) on a cookie sheet. Sprinkle the bottoms of each with some graham cracker crumbs. This is healthy, so I’m not going to mix in a bunch of butter and sugar and bake them…no-no…ok, you can toast them a bit if you want. I didn’t.

Adventures in the Kitchen With Michelle

Step 3:

Mix up the flour, powdered sugar and set aside. In a bigger bowl (NOT plastic) combine the egg whites, vanilla, salt and cream of tartar. Get whipping those egg whites into soft peaks. Sprinkle in the 3/4 cup of sugar slowly and continue to whip until the whites are glossy and firm.

Adventures in the Kitchen With Michelle

Step 4:

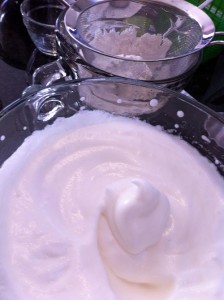
Ooo, see, that’s no Easter Peep those are ‘stiff peaks’…glossy and firm. See the other bowl, yes I’ve got a fine mesh strainer I use as a sifter to ‘sift’ the flour/sugar mixture into the soon-to-be-batter. Shake in about half of it onto the egg whites and get a spatula and FOLD it in. Easy, don’t break the bubbles…now the rest, along with that lime zest…and f o l d.

Adventures in the Kitchen With Michelle

Step 5:

Now scoop the batter into their little ‘pans’. Fill them near the top, I go around 3/4 full and then top them off evenly.

Adventures in the Kitchen With Michelle

Step 6:

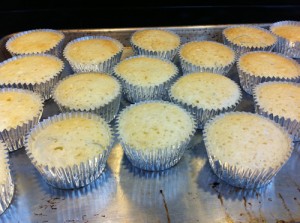
Bake them up for about 13-15 min until golden brown. No, I don’t have the patience to turn my pan half way thru. Oh, well.

Adventures in the Kitchen With Michelle

Step 7:

Get a dowel (or skewer, or straw) and make a hole in the top of each while they cool. Go and get your icing together while they cool – or maybe you forgot about making the filling?

Adventures in the Kitchen With Michelle

Step 8:

Since I have cake decorating stuff I use a plastic Wilton bag – you can use a zip-loc with the corner snipped just as well. I use a big glass to help me hold while I fill. I had to peel back the runt of the litter for a taste test. Now fill the bag with the lime pudding filling and pipe into the holes of the cooled cupcakes.

Adventures in the Kitchen With Michelle

Step 9:

Mmmm, little lime flavored belly buttons – hee hee

Adventures in the Kitchen With Michelle

Step 10…what no step 10? Ok, kinda obvious…ice the cupcake in whatever you came up with.

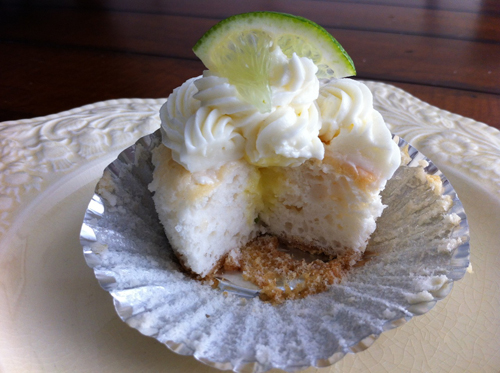
Finale: Look how yummy.

Adventures in the Kitchen With Michelle

Ahhhh, where are my sunglasses. And a margarita…. Oh, and that swim suit? These babies are only…drumroll please… 47 cal/.2g fat without the icing. My icing today added on 101cal/10g fat. For a mini-culinary va-ca of 147 cal and 10.2g fat.

You may do even better with a little glaze instead. Try 1-1/2 cup powdered sugar, 1/2 tsp vanilla(or other flavor), 1-1/2 Tbl melted butter, and a little water. Whisk it up and spoon it on. That’s way fattening than my multi-step cooked icing.

Now, I can take a few steps to my lounge chair…hmm, maybe not. It’s still cold outside. Maybe I’ll just look at the pool from this side of the glass, and continue with my ‘mental travels’ – cupcake in hand.

Adventures in the Kitchen with Michelle, Ginger Dressing

This week I’ve been looking for new and interesting things to do with salads. I’m a big fan of ginger. Ginger Ale, Ginger plants, and yes, ginger salad dressing. I even have a ginger plant that I can dig up a rhizome anytime I want and grate it up for whatever I need. Yummmm.


I noticed that my local store has stopped carrying my favorite version of a ginger dressing. I went looking for another. It also seems that they load them with a lot of oil too – and it’s pricey. Why? Most of the ingredients are kitchen staples. Oh, no that won’t do. Where’s my shovel….and Magic Bullet… let’s mix up our own.


Since Asian classics aren’t my forte, I follow a template. Which means finding something everyone likes first. The Foodies on The Net seem to have a particular fascination with Benihana’s Ginger Salad Dressing. I’ve never been to Benihana’s so, I’m game. There are postings raving about it all over, and even a copy of the recipe on www.food.com as listed in the ‘Top Secret Recipes’ book. Either way, it sounds good, but too much oil, and there are no carrots. I love carrots! See how this happens – I just can’t leave anything alone. I spent the rainy morning in the kitchen blending up my own lower fat and generally healthier version, and here it is for you.


Step 1: Clean-up that mini-blender, if you’ve got one. Or a big one – they all work. Gather the goodies and get out that cutting board. There are lot’s of ingredients, but be patient Grasshoppah ! (come on, you don’t remember Kung-Fu!)
Adventures in the Kitchen with Michelle
1/2 Cup Onion, minced fine
1/4 Cup Peanut Oil
1/3 Cup Rice Vinegar
2 Tbl Water
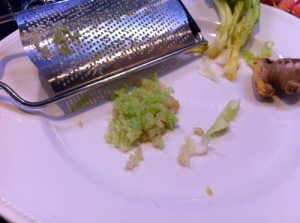
2 Tbl Ginger, fresh, grated
2 Tbl Celery, grated (or minced very fine)
2 Tbl Ketchup (yes, I make my own – but that’s another blog)
2 Tbl grated baby carrots
4 tsp Soy Sauce (I used, 2 soy sauce, and 2 Ponzu, a milder, citrusy soy sauce)
2 tsp Sugar
2 tsp Lemon Juice, fresh is best
1/2 tsp (1 lg clove) Garlic pressed or minced super fine
1/2 tsp Salt
1/4 tsp Black Pepper
1/8 tsp Xanthan Gum (yes, it’s natural…I’ll explain below)


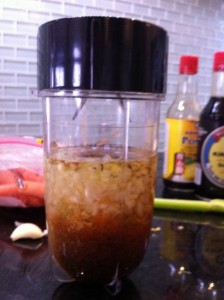
Step 2: Chop it all up, measure it all out and get it in the blender. I like to grate what I can to keep it a super fine – remember we’re making dressing here, not salsa.
Adventures in the Kitchen with Michelle
Step 3: Look how healthy that looks already! See how fine those onions are. Don’t grate them with the others, they’ll just be mush.
Adventures in the Kitchen with Michelle
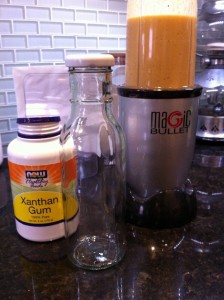
Step 4:  Find one of those dressing bottles you’ve got stashed in the back of your cabinets – I know you’ve got ’em! OK, here’s that weird stuff called Xanthan Gum. This bottle is $8 at the health food store and it lasts forever, because a little goes a long way. It’s derived and processed from fermenting sugars (you can Wiki it). Industry has been using it for years, and not just for food. They use it to make drilling mud slimy…yes, oil drilling. This is a stabilizer used to ‘thicken’ things instead of oil in many of the fat-free store bought items. As well as added to gluten free breads. It’s become a new kitchen staple here.
Adventures in the Kitchen with Michelle
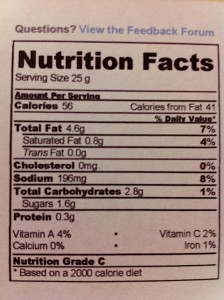
The Count: Look at that calorie count! 56 ! I love it – and it’s good for you too. Ginger is so good for the digestive system and then there are all those other veggies too. I’m feel in’ so good about it. You could lessen the Peanut Oil, but you’d need to up the Xanthan Gum. Then I might add a tiny bit of Sesame Oil (a little goes a long way there too) for extra flavor to make up for the missing peanut.
Adventures in the Kitchen with Michelle
Here’s another idea, do you like spicy? OK, then you’ve probably got a rooster labeled bottle of Sriracha Sauce around – add a drop or two. Ouch – careful !


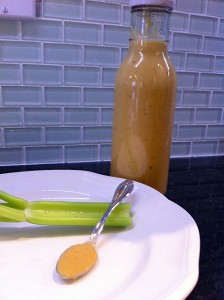
The Finale: This recipe makes just enough to fill one of those dressing bottles – almost like I planned it that way! I couldn’t wait for lunch to try it, so I testing it on some of that organic celery. So Good! Just enough gum to make it stick to the veggie – not too much garlic or ginger bite. I’m looking forward to lunch today – a salad topped with this dressing and a few of those China Boy lower fat Chinese crunchy noodles I found. Yummy… I’m starving and it’s only 10:30!!!
Adventures in the Kitchen with Michelle