Adventures in the Kitchen with Michelle, PB2 Cookies

The Boys ate ALL the cookies being cooped up in the house this weekend – well, that was their excuse. It was like 50 deg ALL DAY! (Lauri, don’t read that).

So, as Will headed out the door this morning he requested Peanut Butter Cookies. Yeah – I love Peanut Butter Cookies! Who doesn’t?! But, I can’t eat ’em. Is there any more fattening cookie…well, if there was a cheesecake cookie maybe. (Hmmm, sounds good, I’ll have work on that whole cheesecake thing)

I digress…remember sometime ago I blogged about a new product called PB2, where they dried the peanut butter and removed the fat and most of the calories. No, No they really did! No Lie! I had a failed attempt at adding in a recipe instead of peanut butter and ruined it. Hey, if I could find a dryer big enough would my butt shrink like a wool sweater??!

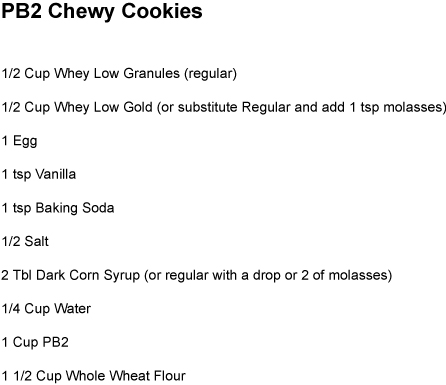
Well, the people that actually make PB2 have their own little set of recipes on their site http://www.bellplantation.com and they sell PB2 along with the oil that they removed from the peanuts, kinda funny. The cookie recipe looked tasty, but still had two kinds of sugar, ooo gotta fix that. Off to the kitchen for some fun…

Adventures in the Kitchen with Michelle

Step 1: Gather the goods. You did find some of that fabulous dried peanut butter stuff didn’t you? Light that fire – 350 please.

Adventures in the Kitchen with Michelle

Hey, what’s wrong with this picture? You guessed it, there’s No Fat.
Step 2:
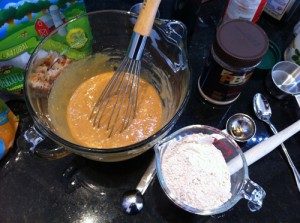
Add the sugars and wet ingredients together and mix well. Add in the PB2 and whisk until smooth. Mmmmmm, can you smell it?
Adventures in the Kitchen with Michelle
Step 3:
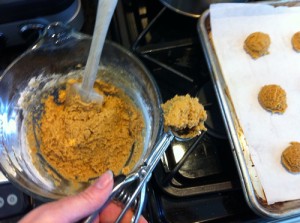
This stuff is super sticky…no fat remember! So, use the scooper and don’t completely fill it.
Adventures in the Kitchen with Michelle
Step 4:
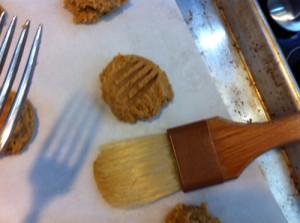
Use a fork brushed with butter or easier yet, dipped in a little water and smash them a bit just like normal PB Cookies.
Adventures in the Kitchen with Michelle
Step 5:
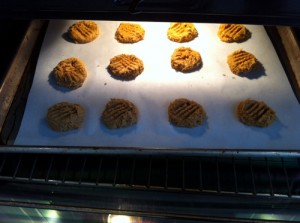
Aww, how cute – into the oven with you! For about 10 minutes.
Adventures in the Kitchen with Michelle
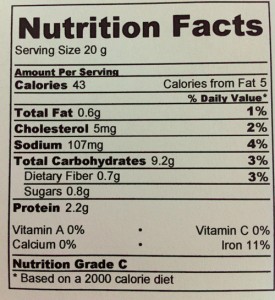
The Facts:
Can you believe they’re only 43 calories!!! Yea, a little dry and could be only slightly sweeter….but 43 calories, and how much fat???? OMG! Mwwa-HaHaHaHa!!!
Adventures in the Kitchen with Michelle
Finale:
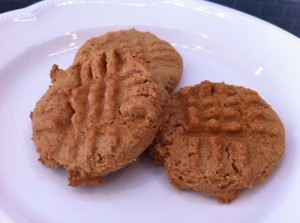
Look how yummy! Yes you CAN eat peanut butter cookies – and still fit into your skinny jeans. Soooo happy 🙂
Adventures in the Kitchen with Michelle
Michelle


Adventures in the Kitchen with Michelle, PB Krispies

The Boys here love having ‘cereal bar’ style things to snack on. Problem is most of them are fattening AND expensive. ‘Expensive’ mostly because if they’re healthy, then they’re small and then the Boys just eat two of them! I found this recipe in my Food and Wine Mag submitted by a pastry chef who found herself allergic to gluten – what a cruel irony! The boys like it better than regular Rice Krispie Treats…and so do I.

Peanut Butter Rice Krispie Treats:

3 Tbl Coconut Oil

1 – 10oz bag of marshmallows (about 40)

3/4 Cup Peanut Butter

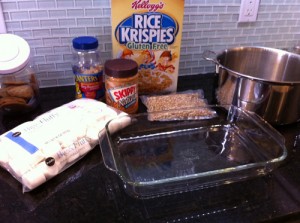
7 oz (6 Cups) Rice Krispies Gluten-Free with Brown Rice

1/2 Cup Peanuts*

1/2 Cup Pumpkin Seeds*

(* optional)

9 x 13 pan/dish, a silicon spatula, and a BIG pot.

Step 1: Get your stuff together. Oops, the coconut oil didn’t make the photo op.
Adventures in the Kitchen with Michelle, Peanut Butter Rice Krispie Treats

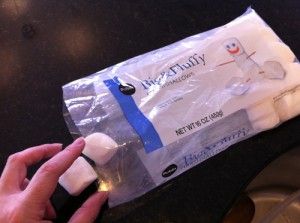
Step 2: Count out 40 or so marshmallows (about 3/4 of a standard bag). Better get a sample, those might be stale….No? Better check again. The ones at the bottom of the bag may be different.
Adventures in the Kitchen with Michelle, Peanut Butter Rice Krispie Treats

Get your huge pot on low, and put in the oil, and the 40 marshmallows. OK, maybe a couple more, if you’re adding nuts and seeds. While they’re melting, give ’em a stir, measure out the cereal and peanut butter. Better test those marshmallow again….and check my email….

Step 3: Sniff-sniff “Who’s making s’mores?” OMG – I AM! Ooooo, that’s right, sugar burns quick. That’s ok, keep stirring and forget about photos!
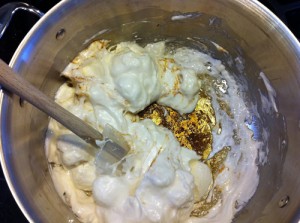
Adventures in the Kitchen with Michelle, Peanut Butter Rice Krispie Treats

Step 4: I use a silicon spatula to stir until melted, and add in the peanut butter, stir some more. At this point you’re wondering ‘Why not just use marshmallow cream?’. Because it’s different and doesn’t work right – I don’t know why, maybe it’s the powder on the outside, less corn syrup ? Who knows.
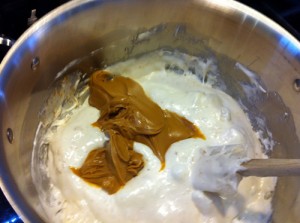
Adventures in the Kitchen with Michelle, Peanut Butter Rice Krispie Treats

Step 5: Turn off the heat and dump in the cereal…and fold in.
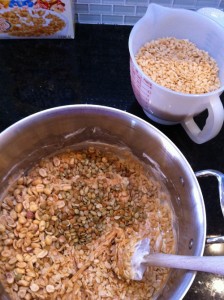
Adventures in the Kitchen with Michelle, Peanut Butter Rice Krispie Treats

Step 6: Don’t you love the way I say F O L D like it’s no big deal, right? Oh, no…if you were planning a big upper body workout later, forget it. When you’re done folding and pulling the stickiness off the bottom of that pan your arms will be toast! Get your glass dish and grease with coconut oil (I use what’s left on the Tablespoon) and dump.
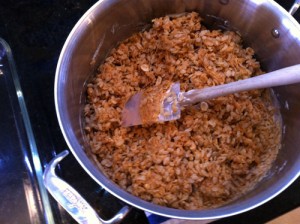
Adventures in the Kitchen with Michelle, Peanut Butter Rice Krispie Treats

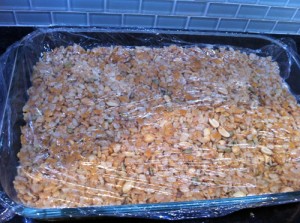
Step 7: Dump out of the pot and press into the pan/dish. I use wax paper, or plastic wrap and another smaller Pyrex dish for this. See how the corners of the pans fit – kinda like they came from the same mold. Yeah. Careful it’s Hot and Sticky…and not in a ‘Fifty Shades…’ kinda way. Ooooo, they look yummy, no….they have to cool first. The kids will come running ’cause by now the place smells like Willie Wonka’s closet! When they do, cut them into 24 and serve. Need another idea for these? Crumble some into partially thawed vanilla frozen yogurt and re-freeze…mmmmmmm or over your morning greek yogurt.
Adventures in the Kitchen with Michelle, Peanut Butter Rice Krispie Treats

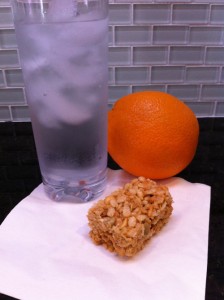
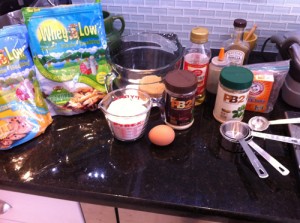
Finale: There you go – a perfect after-school, after-workout, coffee-break snack ! Not too bad at 165 cal/8 fat with the nuts, and only 132 cal/6g fat without. And like celery that burns more calories chewing it than it packs on…this’ll give you a work-out too.
Adventures in the Kitchen with Michelle


Adventures in the Kitchen with Michelle, Chocolate Peanut Butter Energy Bars

I think we probably all get magazines, yes? And invariably there’s a section of a couple of recipes. Some look pretty tempting, some not so much. One of my favorite mags is ‘Health’, yep that’s it, just ‘Health’. It runs somewhere between the ‘Shape’ magazine, minus the 17 year old spandex clad models, and ‘Whole Living’, that’s filled with recipes for detoxing your entire existence.

Late this summer I tried out an energy bar recipe in ‘Health’ and couldn’t believe how good it tasted for the calories and fat spent! Yummy! And when baked looked exactly like their photo! I’ve been making them for after-school snacks and post workout boosts off and on for months now, and my guys love them. And as you know I just can’t leave it alone, so this time I lightened it up a tad. I took them along on a recent day out with the K & K show (that would be Kathy & Kathryn) to Renningers Antique Extravaganza. A huge day long romp in junk land! Who-hoo! After a 2 hour ride and 2 cups of coffee, we were a bit peckish at about 10am so I pulled these jems from my little bag-o-tricks to fuel my friends shopping adventures. I was sure Kathy would like them, there is chocolate involved. But, was really pleased when I got the thumbs up from Kathryn, our resident health food connoisseur. Happy and healthy – what’s not to love about that! Wanna know how I did it? I thought you’d never ask!

chocbars

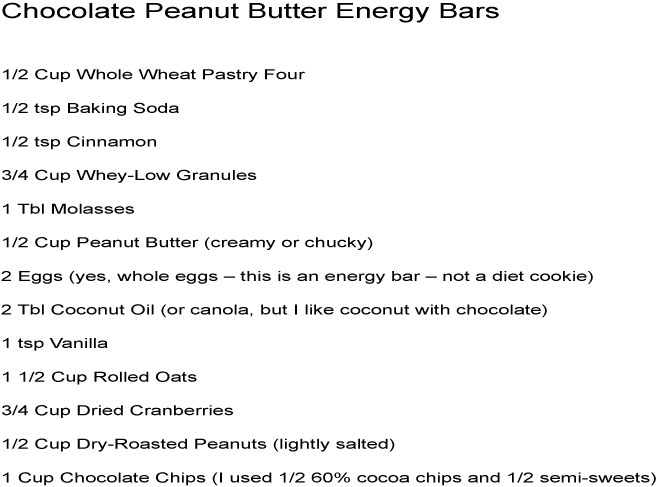
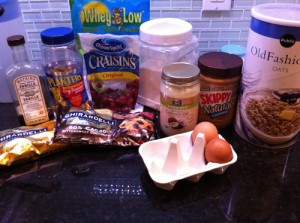
Step 1: Gather those goodies.

Adventures in the Kitchen with Michelle, Chocolate Peanut Butter Energy Bars

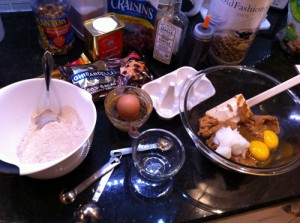
Step 2: Mix the Flour, soda, and cinnamon. I another bigger bowl combine the peanut butter, Whey-Lo, molasses, and coconut oil. Then add in the eggs and vanilla. Then add the flour mixture into the wet and give it a stir. Then add in the oats, cranberries, peanuts, and chocolate chips. The original called for dividing the chips, melting half and drizzling it over the completed bars – but I’m just too lazy for that these days!Adventures in the Kitchen with Michelle, Chocolate Peanut Butter Energy Bars

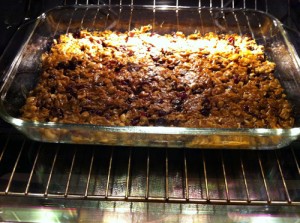
Step 3: You did pre-heat that oven to 350 right? No, well go do it and get out your 11×13 dish and spray with a little non-stick. Now spread the goodness in the pan/dish and and push it down nicely. Get all the edges too. Bake them about 20-25 min.

Adventures in the Kitchen with Michelle, Chocolate Peanut Butter Energy Bars

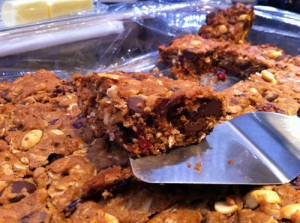
Step 4: Yummy! Make sure they’re very cool before cutting.

Adventures in the Kitchen with Michelle, Chocolate Peanut Butter Energy Bars

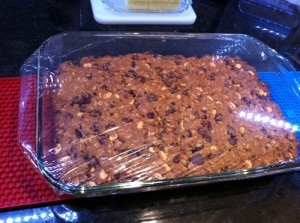
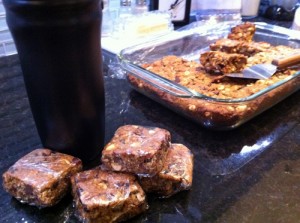
Step 5: See, soooo easy. Cut into 24 squares and there you go.

Adventures in the Kitchen with Michelle, Chocolate Peanut Butter Energy Bars Finale: Here they are all wrapped up for my day away – have coffee, will travel.

Adventures in the Kitchen with Michelle, Chocolate Peanut Butter Energy Bars

These really do have a between-meal holding power, and with chocolate. Must I say more!? Oh, how healthy are they? Well, the recipe analyzer says each one is a mere 124 cal/7.4g fat … but useable fat. With all the traditionally fattening things in this bar it should be way worse! Eggs, Peanut Butter AND Peanuts….really? No, really – try it, you’ll thank me.