Posts from Michelle
Posts from Michelle
Adventures in the Kitchen with Michelle, Red Peppers
This week I found myself up to my armpits in Red Peppers. Ahhhh – summer. Yes, most of the time they’re incredibly expensive, but this was a bumper crop that had to go. Normally, I just chop and freeze them. They’re great to add into a red sauce or salsa as an unexpected flavor. But there were just too many. Even after freezing several bags of them chopped, I still had 5 left. Now what? Hmm, you know, I love a roasted red pepper. I get them in jars and keep them on hand to add into hummus, and salads. Not to mention vegetarian lasagne is simply not the same without them. How hard could it be? Well, apparently, not very! Watch and learn my friends…
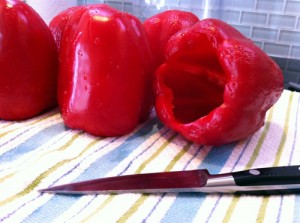
Step 1: First wash up and core your victims. Set them aside to dry.
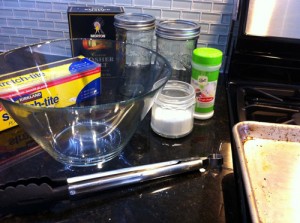
Step 2: Now gather the rest of the equipment you’ll be needing.
There are several ways to do this. Most rub them with olive oil and roast them in the oven. Some Put them on the grill outside and them soak them in jars filled with olive oil and sometimes a few garlic cloves. What I wanted was what I was used to using from the store. Those are suspended in a water solution. No, not just water. I guessed a bit and came up with the following.
In a pan, place 4 cups of water about 3/4 Tablespoon of both salt and sugar. Bring this to a boil. Later, just before jarring, I added in about a 1/2 tsp of Citric Acid (or in my case I had Fruit Fresh from my canning expeditions).
Now, get the oven on a preheat to 250deg and sterilize your jars. And start to roast those peppers.
Step 3:
If you’re the official marshmallow roaster in your family, then you’re sure to be the head pepper blisterer too. Light the fire and turn. Yes, they’ll sizzle and pop. Don’t be scared!
Step 3a: Ahh, see, nice black spots of char. Oh, you don’t like burnt marshmallows? Well, whatever – crank that flame and burn, baby, burn!
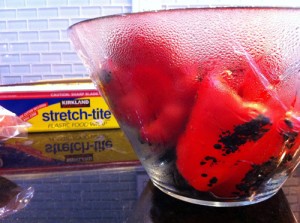
Step 4: Once you’re done, get them into a bowl and cover with plastic wrap. Careful, they’ll burn right thru if they’re flaming toasty. Which is why I don’t really recommend the plastic bag method, unless they’re already starting to cool. Either way, the steam will help peel away the unpleasant bits of charred skin.
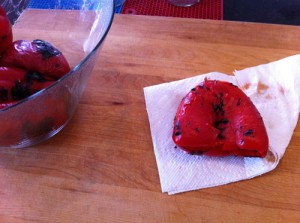
Step 5: Get them out and rub with a paper towel to remove some of the skin. Not all of it, that black stuff is flavah! Now cut them into quarters and lay in the jar. I got 2 1/2 peppers in each.
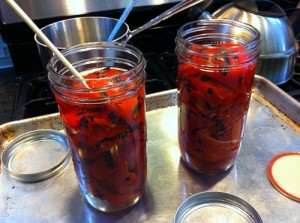
Step 6: OK, now we jar. I like the not-quite-a-quart jars, as they’re large, fit great in the fridge and just look cool. Slowly add the water mixture. I do this 1/2 cup at a time.
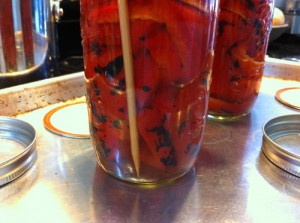
Step 7: I use a bamboo skewer to release some of the air bubbles I could see and continued to fill with the water mixture. Only fill it to the jar’s ‘shoulder’, under the threads.
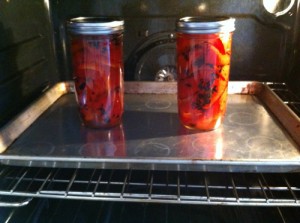
Step 8: Now lid and ‘process’ in the oven for 30 min. Those lids will pop – you’ll see.
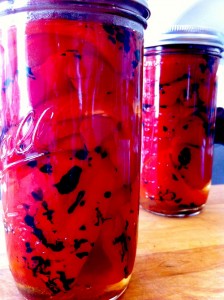
Finale: There, something new to do with all those peppers. They’re healthy, not swimming in olive oil, and a money saver too. Those little red devils can set you back nearly five bucks for a 16oz jar! No way! – Yes way! But these big jars hold 24oz. – cheeeep! And later when you use them, put the unused peppers into a small freezer bag and lay flat in the freezer. Because they go bad quickly. Then you can just break off what you need. Look at that, and you were just going to toss those peppers…oh-no, not on my watch.
Michelle @ www.badzoot.com
Adventures with Michelle, Rose Cutting
Last year I submitted a blog entry with a story about my favorite rose bush. A fabulous old rose that was saved from certain destruction, and resurrected from a bleak existence. 
I had done rose cuttings for years when living in Brooksville. My first introduction to starting plants from cuttings came from my Mom. She was always growing something green in a glass of water on a window sill. Then there was my GrandDad, who took up the hobby of gardening in his retirement. He traded his freon and industrial a/c gauges for fungicide and hand trowels. A bit over-the-top with most of what he did, he mixed his own potting soils and bug repellents. He had a special war on the Japanese Beetle as I recall. I also remember a love affair with a rose bush he had to leave behind in his native Pennsylvania. He said it was called The Seven Sisters. I remember it climbing all over a massive embankment studded with light pink roses in clusters of seven. The gruff old-timer brought some cuttings South and set to reproduce them. He intended them to climb on a fence at the new place in Florida, and they did. That was the first time I’d seen a plant grown from a stick. Fast forward to my own, first, home, a tiny cottage in Brooksville with a snarled rose, planted by the previous owner, and tied to a pecan tree instead of a trellis. Later I trimmed it and had fresh little roses all over the house. A bit of research found that it’s what’s known as, a Cracker (or China) Rose. Very tough, disease resistant and a perfect contender for a replication experiment. So, that’s what I did and there were little rose bushes all over, and made for lovely give-aways. But that was then and this is now. The rose I’m working with now is new to this trick – and it’s a cheap one.
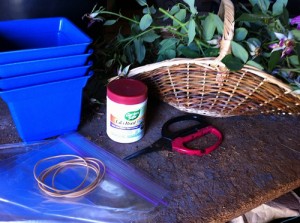
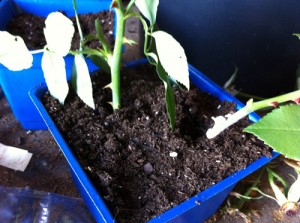
Step 1: Get some rose cuttings (beware of patent rules and bio-engineering that limits reproduction), a few pots, some potting soil (I like the Miracle Grow pre-mix) and Rooting Hormone. You can use honey as well, but I’ve not tried that. You’ll also need a clear plastic topper for the pot.
Step 2: Trim the cuttings to just a few leaves and cut the end at an angle.
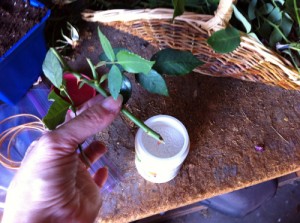
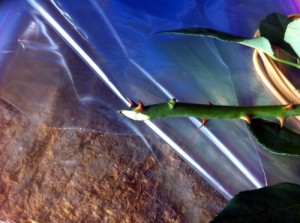
Step: 3 See the cut, there’s a bud just above it. Now, dip the cut end in the rooting powder.
Step 4: Use your finger and make a hole for each cutting. Put the cuttings in and cover with soil.
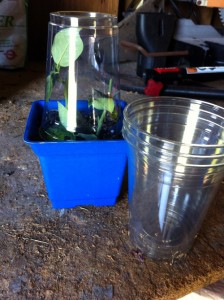
Step 5: Give them a good watering. Then make them a terrarium tent. In the first photo there were plastic bags and rubber bands, that is my normal style. Then I saw the kid’s plastic cups – perfect! I pushed the rim into the dirt and set them in partial sun to grow. That was in May. Keep in mind, the green leaves will fall off, that’s ok. The green stick will grow…the brown ones, not so much. A while later you can pull the top off.
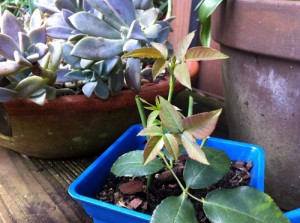
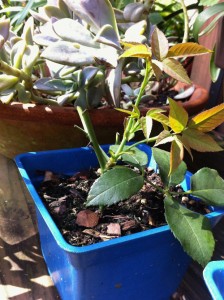
A month later (in June) there’s new growth! Nice… now, not all of them lived. Only about 50% made it. That’s ok, the ones that lived did really well.
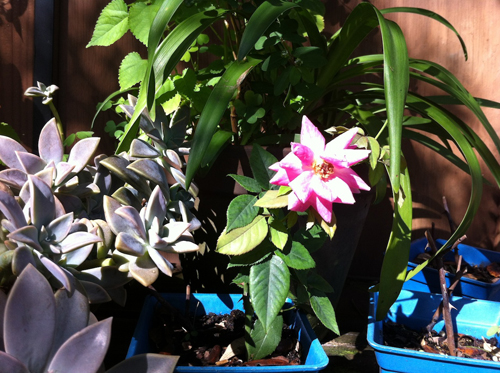
Another 30 days (in July), and not only is it a happy little rose plant – there’s a bloom! In fact I wasn’t paying attention and spotted a bright pink spot out by the garden shed and went to investigate. Wow – I missed it. This is the spent bloom on my little rose soon-to-be-bush. I’ve got just the spot for it to offset it’s parent. I just hope it gets to be as big and beautiful.
Next, begonias and hydrangeas, pineapples, mangoes….and Mom’s been telling me about the African Violets she’s been starting. I guess she’s moved on from those glasses of water in the windows – or not.
Michelle @ badzoot.com

