Adventures in the Kitchen with Michelle, Chicken with Preserved Lemon

A while ago I posted preserved lemons and I said I’d be back to show you what to do with them. A logical choice for the sweet and salty version is to simply lay a couple of slices on some fish (salmon is nice). Wrap in a pouch of foil and bake for 20 min or so at 350deg. A little rice pilaf and a salad on the side – so very good.

This recipe I pulled from Williams Sonoma and changed a couple of things. It was really tasty, and good for you too.

Braised Chicken with Preserved Lemons

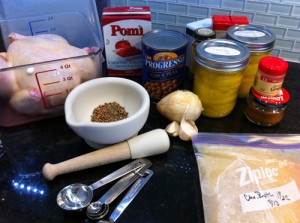
Step 1: gather up..

1 Preserved Lemon*

1-1/2 tsp Coriander Seeds

1-1/2 tsp Cumin Seeds

1/2 tsp Cinnamon

1/4 tsp Cayenne Pepper

1 Chicken (about 4# whole or cut up)

1/2 tsp Ground Pepper

2 Tbl Olive Oil

1 Yellow Onion, chopped

2 Garlic cloves, minced

2 tsp Tagine spice*

1 can (28oz) Diced Tomatoes, drained

1 cup Chicken Broth

1 can (15oz) Chick Peas (garbanzo beans) drained

Adventures in the Kitchen with Michelle, Chicken with Preserved Lemon

•Preserved Lemon; short cut. Slice a lemon very thin and layer in a dish with salt and let sit while the rest of the dish cooks. The lemon is added near the end.

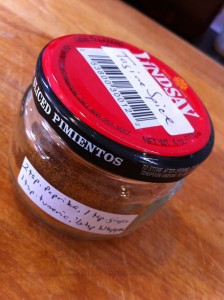
•Tagine Spice; You can buy this at W & S, but that’s a hour away so I made my own of standard pantry spices. I guessed at the amounts using the list from the product description. My Tagine spice Mix: 2 tsp Paprika, 1 tsp Ground Ginger, 1 tsp Tumeric, 1/2 Ground Blk Pepper

Adventures in the Kitchen with Michelle, Chicken with Preserved Lemon

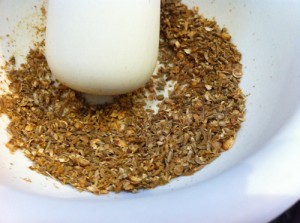
Step 2: Take the coriander and cumin seeds, and toast them in a small pan. Careful, just until you can smell them a bit and the cumin seeds turn a darker green. This changes their favor slightly and is way better than the ground versions. Crush them in a mortar pestle or a coffee grinder (whatever you use to grind stuff).

Adventures in the Kitchen with Michelle, Chicken with Preserved Lemon

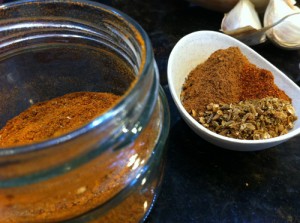
Step 3: Make up your Tagine Mix. Combine with the other spices in a small bowl.

Adventures in the Kitchen with Michelle, Chicken with Preserved Lemon

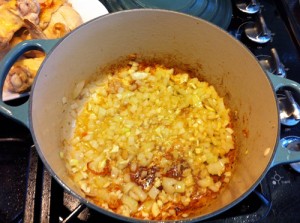
Step 4: Cut up the chicken and remove as much of the fat as you can and leave some of the skin. Heat the oil and brown the chicken in a dutch oven…a large pot, not a new kind of range… so if this is a French made pot, I guess it’s a French oven!? If you bought a whole chicken, cut it up and brown the back pieces as well. But then move them off to be cooked for stock – they don’t make for good eats at dinner. Set the chicken aside and sweat the onion and garlic. Then add the spices and sauté for just a few seconds. This ‘blooming’ step makes the spices come alive.

Adventures in the Kitchen with Michelle, Chicken with Preserved Lemon

Step 5: Add in the tomatoes and broth. Scrape the browned bits from the pot and then add the chicken back to the pot. Simmer for about 40 min.

Adventures in the Kitchen with Michelle, Chicken with Preserved Lemon

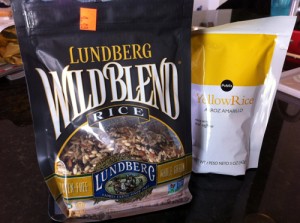
Meanwhile, decide what kind of rice to put on the side. Normally, I use standard yellow rice, but I thought I’d show you a new find. This wild rice combo is great all by itself. The package is pricey, but it goes a long way. This is really good along side grilled meat of most any kind.

Adventures in the Kitchen with Michelle, Chicken with Preserved Lemon

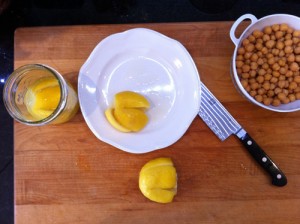
Step 6: Cut up the preserved lemon into a fine dice. Oh – the smell! So lemony…summer in a jar. The rind is almost gelatin like, and the salt has removed the bitter edge to the taste. Like nothing I’ve ever had before.

Adventures in the Kitchen with Michelle, Chicken with Preserved Lemon

Step 7: After the chicken has simmered, add the lemon and chick peas and cook another 5-10 min.

Adventures in the Kitchen with Michelle, Chicken with Preserved Lemon

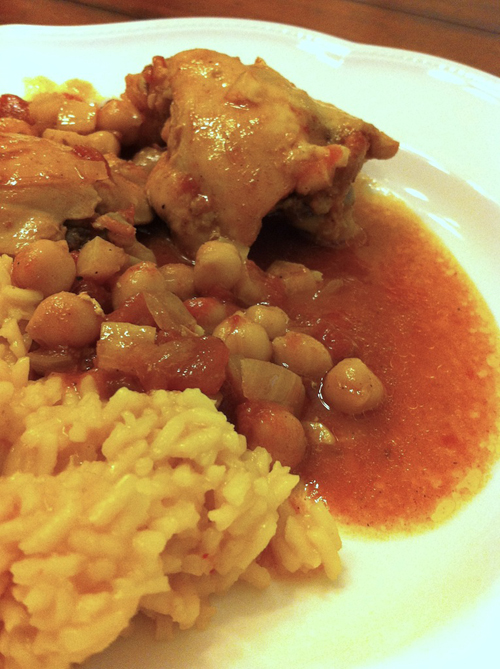
Finale: Plate it up and dig in. The chicken is healthy after the skin is pulled, and the meat just falls off the bone. This taste of Morocco is a nice diversion from the average weekday meal. And now you know what to do with that jar of preserved lemons you made.

Adventures in the Kitchen with Michelle, Chicken with Preserved Lemon

Enjoy.

Michelle @ www.badzoot.com


Adventures in the Kitchen with Michelle, Good “Kool-Aid”

Adventures in the Kitchen with Michelle, Good "Kool-Aid"

For as long as I can remember my Mom has been a bit of a health food nut. OK, these days we call them ‘foodies’ – whatever. So, my favorite ‘foodie’ gives me this recipe for her version of ‘that kid drink that comes in a little pouch and you add water and a pound and a half of sugar’. You know the one. I’m a skeptic in this because most of her recipes have to be tweaked for the average taste bud. Which is crazy because she makes incredible baked goods – just not for her to eat. For years (way before Truvia was out) she used those drops of stevia that taste like licorice and tried and tried to convince me that it’s ‘sweet’ – NOT. Tasting is believing here, thank you!

Turns out, this is good – I mean really good. This herbal and green tea concoction is good and strong to be poured over ice. Which means it’s great as a take along in that travel cup. And because there’s fruit in it, I’m tempted to add rum and tell myself it’s a healthy cocktail ! Here, I’ll show you what I mean…

I cut the recipe in half to fit into my oh-so-sweet antique ice-lip pitcher, but I’ll give you the full monty.

Step 1: Get 9 cups (or so) of water boiling. Plus one more cup at room temp – I’ll tell you why later. (2.5L)

Adventures in the Kitchen with Michelle, Good "Kool-Aid"

Meanwhile, gather up:

4 Celestial Seasonings Red Zinger, herbal hibiscus teas bags

5 Green Tea bags

1 Orange, sliced thin, seeded

Your choice of sweetener – or none at all

Adventures in the Kitchen with Michelle, Good "Kool-Aid"


Step 2: When the water is done boiling, pour it into your container. Mom makes hers in a pyrex pan and later pours it into a large ice-lip pitcher (looks just like that kid-drink!). Here’s a tea tip for you: add in a cup of room temp water, then add the tea bags. This keeps the super heated water from ‘bruising’ the tea. I never knew this. Learn something new every day.

Adventures in the Kitchen with Michelle, Good "Kool-Aid"

Here’s something else new – see that crazy lid, that’s a tid-bit I found at our new kitchen store (http://www.good4uproducts.com). It’s a silicon universal lid that looks like a leaf. I’m such a sucker for kitchen gadgets!!

Step 3: OK now let it steep for about 10 minutes. Neat how the red zinger pools at the bottom of the water.

Adventures in the Kitchen with Michelle, Good "Kool-Aid"

Step 4: Now remove the green tea bags, or they’ll get bitter later on. Leave the red zingers in the pitcher, add the orange slices and your sweetener of choice. Today I used agave. Although before that I did pour a glass and add my lemon simple syrup (YUM…makes monster Lemon Drops!).

Adventures in the Kitchen with Michelle, Good "Kool-Aid"

Finale:

Adventures in the Kitchen with Michelle, Good "Kool-Aid"

That’s it! Let it all set to get to be room temp before putting it in the fridge – your fridge will thank you. Pour over ice and enjoy. This is as good for you as it is beautiful and your waistline will thank you too.

Michelle

Check out Michelle’s projects on her blog, Badzoot!

Adventures in the Kitchen with Michelle, Cookbook Review

I have a few cookbooks….no, I’ve got a bunch of cookbooks. New ones, old ones, really old ones (did Fanny Farmer really skin a squirrel?!). Mom was telling me about a new one that’s out that she was enthralled with, ‘It’s All Good’ by Gwyneth Paltrow. Yes, I know some people have just had enough of how perfectly sweet she seems. I rather like her. When Mom and I were at Sam’s Club a few weeks later, she pointed it out to me and noted over and over about how many there were and now there was only three left. I picked one up and while looking it over another lady snatched one up. …and then there were two… Ok, ok ! I bought it. She’s right – I love it!

Adventures in the Kitchen with Michelle, Cookbook Review

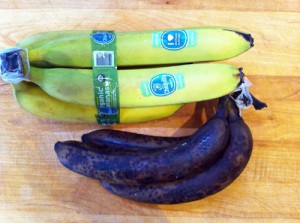
I enjoy reading cookbooks like novels and always fall for gorgeous photos. This is a lovely book. Healthy recipes for people who maybe aren’t complete health food nuts. She lists and explains the odd items that she uses and where to look for them. Everything from what to do with quinoa and a healthy chocolate cake and candy bars! I even made pickles from this book, but that’s another blog post. (they’re soooo good!!) I had some bananas in the fridge that were begging to be in a baked good of some kind, or frozen for smoothies. These blackened versions were just slightly softer than their fresher counterparts.

Adventures in the Kitchen with Michelle, Cookbook Review

This is one of the wonders of buying organic produce – it really is different. I had everything I needed and in a few minutes I had healthy muffins. Now, the note “everything I needed” means that even though she used ‘Cup 4 Cup’ gluten free flour, I used whole wheat white flour. Gluten isn’t a big problem in this house…hmm maybe it should be. Is that ‘glu’ the same glue that glues fat to my back-side???

I’d copy off the recipe, but as I’m typing, I’m not sure what the rules are for published recipes. Most everything I send your way is either mine, a severely manipulated version of a classic, or something that’s already posted to the Net somewhere.

So, look up this book – I’ve enjoyed it so far. Mainly because the things I’ve made actually taste good, and not ‘health foody’. You know what I mean. These muffins were so good, William The Teenager ate them after school and even had one with breakfast in the mornings, until they were gone. They were yummy with coffee too. That was another good thing about the recipe, it makes 12 so they’re gone before they’re stale. Not that they got a chance to be.

Adventures in the Kitchen with Michelle, Cookbook Review

That’s my review – 5 stars on this one. Now, it’s back to the kitchen, there’s that candy bar recipe that I’ve just got to try!

Michelle at Badzoot.com