Adventures with Michelle, The Flower Recipe Book

I like to consider myself the Mistress of Mediocrity. I do many, many things pretty well – I don’t do anything particularly well enough to be considered a Master of the subject. One thing I’ve always known that I am absolutely terrible at is floral design. Yea, I know…but I love my flowers and gardening, etc. And, oh yes there’s that extensive pottery collection of, you guessed it, flower vases and pots! Ahhh, to have one of those ‘still-life’ looking artsy arrangements. Oh, no, if I bring home flowers from the store they end up looking about like this.

Adventures with Michelle, Flower Recipe Book

Just tossed in a vase. Or trimmed and trimmed like the proverbial ‘haricut’ ending in stubby stems and looking for a much shorter vase. Ugh – I quit. If it didn’t fit in my Rose Bowl, I didn’t bring it home. One day, not long ago, while reading a cooking magazine (yes, cooking), I spotted a new book coming out called The Flower Recipe Book.

Adventures with Michelle, Flower Recipe Book

Really? I can follow a recipe. So, they had a pre-order special with Amazon and I went for it. Besides, I had the Jubilee Luncheon to decorate for (a good excuse). I’m so glad I did. Turns out, in addition to doing it poorly, I’ve been doing it backwards all these years ! It was fun to just read thru it.

OK, so here’s the odd part, I bought a couple of grocery store bouquets for the bridal luncheon and was all set to make little arrangements. Then the weather and other events put me so far behind the 8 ball that they never got done. -sigh- They were sitting lonely in the corner when Kathy pointed them out to me and I knew they’d be wasted. Noooo. Afterward, (like 4 days later) I got out my new book and was determined to make them lovely. I think I did ok for a beginner. Here’s what I did.

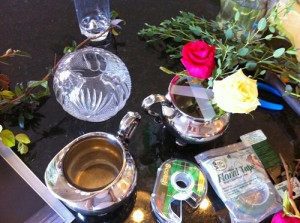
I’d planned to put flowers in my Mother-in-Laws old silver service, and it was all polished and ready to go. I also gathered my old favorite rose bowl. This was a $5 flea market item of depression glass. If you see one, buy it. They’re a easy way to display roses, and other flowers, that have short stems. Which are what you’ll find in most landscapes. They’re small and look sweet on a small table or night stand.

The book is written by some nice ladies that have a fabulous floral design shop in San Francisco. That means they have access to unbelievable fresh stems! I don’t…or do I? The bunches I’d picked up were the standard roses and alstroemeria, along with a mixed bouquet of whites. What I needed was something of interest. I walk by interesting flowers every day and never paid attention! That honeysuckle that I planted to greet my visitors with smiling blooms and wonderful scents, has tendrils extending out calling to be loved.

Adventures with Michelle, Flower Recipe Book

The hedges, as I forget, are loropetalums, that have burgundy leaves with sweet fuchsia blooms and they need trimming anyway…get a basket and the scissors.

Adventures with Michelle, Flower Recipe Book

Adventures with Michelle, Flower Recipe Book

I give The Flower Recipe Book 5 stars! The book explains what they use and why (maybe other books do too, and I just wasn’t paying attention). Then gives you a simple recipe to follow. Three styles for each flower they selected to showcase. It talks about using tape to hold stems upright – a lightbulb idea (why didn’t I ever think of that!).

Adventures with Michelle, Flower Recipe Book

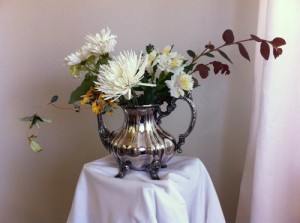
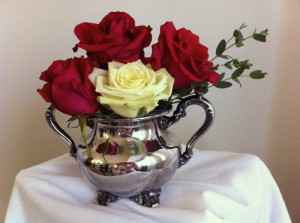
That’s really all I used, along with my clippers. I made 7 arrangements that morning and the flowers lasted another few days. There were roses at my bedside, flowers in the kitchen, and more for my desk. I also got one of those ‘still-life’ artsy groupings I’d always admired…it won’t make a Hermitage exhibit, but least it’s artsy to me.

Adventures with Michelle, Flower Recipe Book

Adventures with Michelle, Flower Recipe Book

Adventures with Michelle, Flower Recipe Book

Adventures with Michelle, Flower Recipe Book

Adventures with Michelle, Flower Recipe Book

Michelle at Badzoot.com
Adventures with Michelle, Floating Frame

Hi there,

I’ve been spending so much time in the kitchen I thought I’d do something completely different. Remember way back when, when I was redecorating the master bedroom, well I’m still not done. Mainly because I’m afraid I’ll run out of rooms to work on…there’s always the pool bath. I always forget about that one. That is until the neighbor boys come over to swim and use it. Then I think, “Ugh, I’ve not been in there for a month! Oh, well their backsides are dipped in chlorine anyway.” (I just hope they don’t tell their Mom’s)

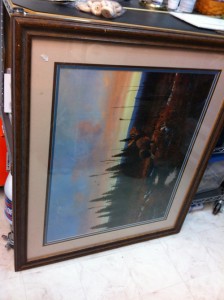
Hey, wait where was I? Oh yeah, the bedroom. So, as I’m on a continual budget crunch, I’m always on the hunt for some unsuspecting thrift store victim. Lucky for me so are my Mom’s friends. They bring her frames and weird art stuff all the time. She’d been cleaning out her back room (OMG don’t get me started) and she had some pieces that she had no room for and I have “…all those big white walls,…”. I traded her a batch of Cranberry Conserve’ that she loves, for this beast. And by beast I mean what’s probably the ugliest print art ever. OK, maybe not like a Velvet Elvis, but it’s a moose …..with a peach and country blue matt. Straight from the Goodwill. I think I’m a little sick just remembering it. Yes, there’s the photo we can all be sick together – you’re welcome.

That’s Step 1: Find a frame.

Adventures with Michelle, Floating Frame

Still, this was a well spent $10.00! This has potential…but first that moose has got to go. Turns out it wasn’t even a print. It was a cheap poster, so tossing it was done without remorse. Another problem was the size 30 x 36, somewhat square. I can’t afford another matt and that one is making my stomach turn. And I stiff haven’t decided on the art to replace it. How about a ‘float’, at least that’s what we used to call back when Mom had ‘The Studio’ and all that framing equipment. That’s when you float a piece between two pieces of glass. This can be tricky, but beautiful. Since I’d painted the walls in the bedroom with a lovely faux finish, this would work. The tricky part is it’s size. I’ve never done one that big before. (disclaimer: I did break one sheet of glass in the process)

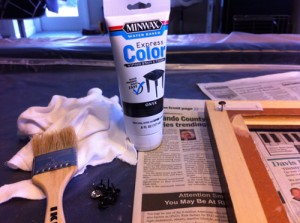
Step 2: Make the frame your own. Set the glass aside and clean up the wood. I decided to leave the velcro hangers on one side to help stabilize later. I decided to make it an espresso dark wood to go with the wood work in the adjoining bathroom. I picked up the Minwax Express Finish at Home Depot for a couple of bucks. Gell-Stain doesn’t come in black anymore or in small containers. This was a first attempt with this product. I like it a lot. Turns out to be a bit like thick gel-stain. You can still see some of the wood tone thru it. A black finish on a somewhat medium wood frame was perfect. I used gloves and the soft rag to apply (never needed the brush). See the tack in the corner? Yes, I use those to hold the frame off the newspaper while I work. Tip: stain the inside edge while you’re at it. If you forget to that’s ok, I did too.

Adventures with Michelle, Floating Frame

Step 3: I went over it twice then let it dry well. Afterward, sealed it with satin Minwax Polycrylic Clear Finish. There it is next to the Ikea brown-black frames bathroom. That’s a darn good match if I do say so myself.

Adventures with Michelle, Floating Frame

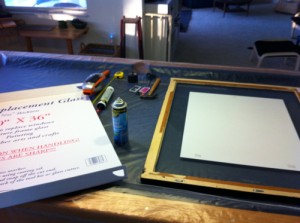
Step 4: Somewhere in the middle you need to pick up a second piece of glass. I got mine off the rack at Home Depot for under $20. (that’s after I broke the one from the glass shop)

Adventures with Michelle, Floating Frame

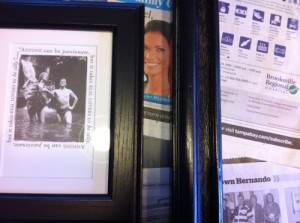
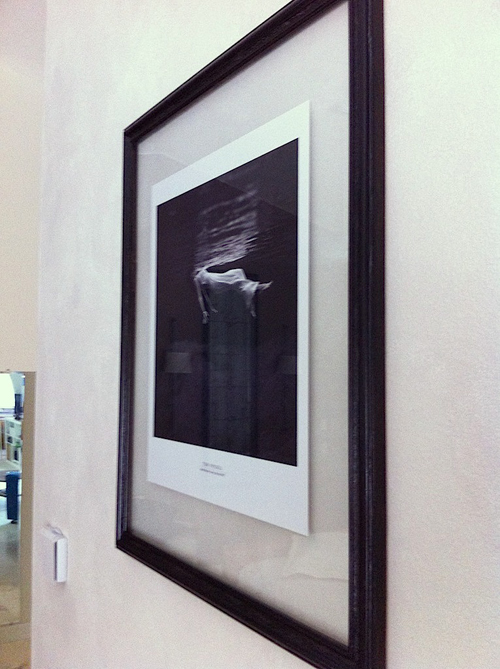
Now go find some art. I was in love with this 1940’s black and white of a woman floating in the Weeki Wachee river. Ethereal, soothing, a little erie – perfect. So, for $15 those nice folks at Amazon.com sent it to me in a tube. Turns out the paper was set up like a polaroid (yes, I’m dating myself …again!). It fit beautifully in the frame, after I trimmed the ‘fine print’ off the bottom. I also let it set overnight flattened under one of the pieces of glass.

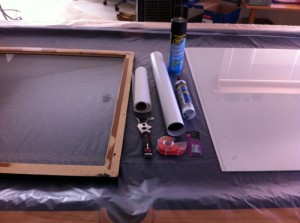
Step 5: Fast forward. Install alligator hangers along the top edge. I used three due to the weight. Clean both pieces of glass…clean them again. Center the art in the glass and place a couple of pieces double stick tape on the art. Very slowly, with help, lower the second piece of glass down, sandwiching the art. Take a deep breath and look for any specks. Since the art is now glued in place, if you need to re-clean or whatever, lean the whole frame on the floor on edge and ease ONE piece of the glass forward. Glass is strongest on edge.

Adventures with Michelle, Floating Frame

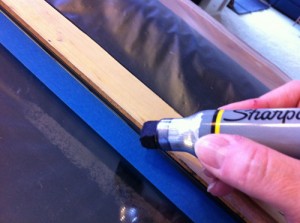
Step 6: This is where I’d forgotten about doing the edges. This only matters if it’ a extreme color change. See that blue tape? Run an edge around the whole piece, out about an 1/8″. Have your, oh-so-helpful-helper run a bead of black caulk (or whatever frame color) to hold the glass in evenly. After it’s dry, I ran around the edges with my Sharpie Magnum marker. Then pulled the tape.

Adventures with Michelle, Floating Frame

Step 7: In the corners I used glazer points (for windows). Before I installed them, I colored the face with my Sharpie. Then with a putty knife, I very gently installed them in the corners.

That’s it. Get some drywall anchors and hang it. Beautiful ! There she is floating on the bedroom wall. The shadow the art casts gives it a depth and the paint job looks like a perfectly matched matt. Could you do this with plexi – yes, but then it’s not glass. Just like Popov is not Grey Goose…and I’ve already been ‘cheap’ enough. (yes, I hate that iron hand rails too! That’s another blog.)

Adventures with Michelle, Floating Frame

Adventures with Michelle, Floating Frame

Michelle at www.badzoot.com
Adventures in the Kitchen with Michelle, Preserved Lemons

Michelle is back with a guest post! 

The wedding’s over and I’m back in the kitchen,… Earlier this week I’d made a chicken dish with lemon zest and capers. It was great. Then I’d thought this would be good with olives and preserved lemons… that is if I had preserved lemons! And, no, nobody that I know would actually have those in their pantry either.

Oh, look there’s a great big bag o’ lemons that I’d just bought at the warehouse club. (I’ve been going thru a lot of lemons lately) Hmmmm, come ‘ere I’ve got plans for you! Well, I HAD plans and now they’ve gone way off track. (oh, look a chicken….) But just how do you preserve a lemon? I know there’s salt involved, or was it sugar? Let ‘s go ask the Interweb!

Adventures in the Kitchen with Michelle, Preserved Lemons

There are a ton of sites showing how to do this, all of which were stunningly simple. But I also wanted to know if anybody does it with sugar. I kept searching, then I stumbled on a site for a restaurant that has a cooking school and curious little things on their website. At www.cafeclock.com they had 3 ways to do lemons, the standard preserved lemon, a spiced preserved lemon (and when I get some dried chiles I’ll be doing that one too), and lastly a candied lemon that they note “These lemons are Jewish in origin and aren’t generally something you see in the preserves stalls of the medina, although you might seem them in the Mellah.”,… What? Where is this restaurant?! Certainly not NewYork, with a comment like that. Oh, look a directions/Map page… MOROCCO!? Wow – this really is the world-wide-web (I forgot) So, these are really authentic recipes!!! I love the Web!

Grab your bag o’ lemons and lets have some fun. Best of all this isn’t an expensive experiment, so if you don’t like them toss ’em. But later I’ll show you how to use them.

First Clean those lemons. Oh, you haven’t been doing that – ewwwww! You don’t know where that zest has been! Get a veggie wash or just a brush and scrub them under some hot/warm water (melts the wax). Then they’ll be squeaky clean, literally.

Adventures in the Kitchen with Michelle, Preserved Lemons

Separate them by the recipe (4 for each), and prep. Also get some jars and lids into a boiling water bath to sterilize while you work with the fruit.

Café Clock Moroccan Preserved Lemons:

4 Lemons

Kosher or Sea Salt

Lemon juice if needed (fresh)

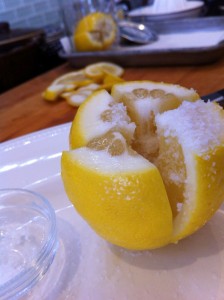
Step 1: Cut the top and bottom of the lemon flat. The cut in a quarter fashion, but not all the way thru. I squeeze some of the salt into the jar to make getting the salt in a bit easier. Then I pack salt inside them lemon and shove in the jar.

Adventures in the Kitchen with Michelle, Preserved Lemons

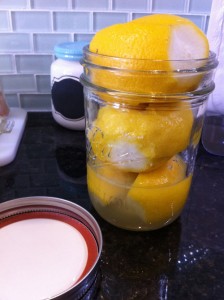
Step 2: Yes, I actually got 4 lemons in that seemingly tiny jar. Only after it sat a while (until I was done with the other recipes), did I top off with some extra lemon juice and lid the jar. The salt makes the lemons break down very quickly. Guess what – that’s it ! Preserved lemons – d o n e.

Adventures in the Kitchen with Michelle, Preserved Lemons

NEXT!

Keller Style Lemons:

OK, these are the preserved lemons that the Gastronomic God Thomas Keller (‘aaaaaahhh’) does. He uses them in recipes from his cookbook ‘AdHoc’ (which I don’t have – yet) Again, super simple. I changed it up a bit to make them pretty for the jar.

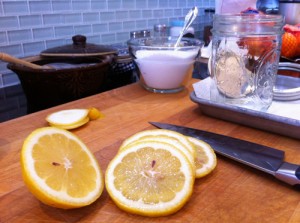
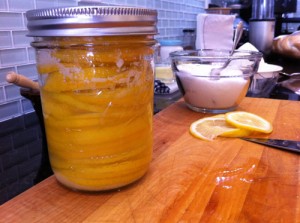
Step 1: Get together 1/2 cup kosher salt, and 1/2 cup sugar and mix. Now slice the lemons in 1/8″ slices, very thin – careful don’t cut yourself – there are lemons involved OUCH!

Adventures in the Kitchen with Michelle, Preserved Lemons

Step 2: Layer in the jar a sprinkle of salt/sugar mix, then slice of lemon, another sprinkle,…. And so on. I never had to add juice to this. As they piled up and sat the juices just oozed out. Mr. Keller layers them in a flat dish and they sit, but I just couldn’t resist stacking them like this. Although, that meant I had plenty of the salt/sugar mix left over. Now you know I can’t throw it away. Hmmmm, I’m thinking about a ‘scrub’…but that’s another Blog.

Adventures in the Kitchen with Michelle, Preserved Lemons

Both of these lemon recipes ask that they simply set out on the counter for a few days to a week to cure. (Madame Curie’s cabinet hard at work)

Last, but not least Café Clock ‘Candied Lemons’ ;

4 Lemons

3 1/2 cups sugar (yes – they’re c a n d i e d)

3 Cups Water

Step 1: Take the 4 lemons and get in some water and bring to a boil for about 3 minutes. Remove from heat and let them cool in that water. Go do something else,…like prep that chicken in the background for dinner (and yet another Blog post). OK, now they’re cool (make sure those jars are still good to go).

Adventures in the Kitchen with Michelle, Preserved Lemons

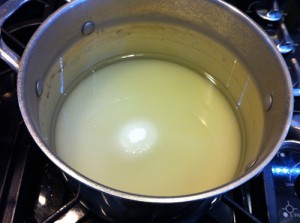
Step 2: Take 2 cups of the soaking water (you’ll see it’s lemony) and add in the sugar. Bring to a boil for 15 min. Careful, a low boil is good. Now go and cut the lemons into the same quartered fashion as the regular preserved lemons. I cut mine in a bowl because they were soft and juicy.

Adventures in the Kitchen with Michelle, Preserved Lemons

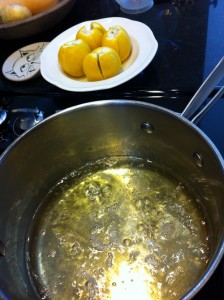
Step 3: After the sugar is ready, add the lemons and the juice from the bowl. Continue to boil for another 30 min, until the skin/peel is tender.

Adventures in the Kitchen with Michelle, Preserved Lemons

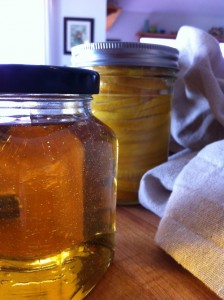
Step 4: Spoon the lemons out and place in a sterilized jar. Continue to boil the syrup for another 20 min on very low heat. Then add that syrup to the jars and lid. I had leftover syrup, so I jarred it too.

Adventures in the Kitchen with Michelle, Preserved Lemons

Then I tasted it – OMG! Lemon-Honeylike-Syrupy Magnificence!!! I want just that! I kept out a tiny bit that didn’t fit in the jar and it’s going over some vanilla frozen yogurt tonight. I don’t think it’ll be around long enough for a photo – sorry. I know my lemon drop martinis will never be the same! No, this is way better than the Lemon Lightning Marmalade I subjected my Christmas dinner guests to. In, it’s defense its good too, but only ON something like a biscuit. By itself on a spoon it’s for someone who lost a bet! (sorry Shirley).

Adventures in the Kitchen with Michelle, Preserved Lemons

So here they are – a bag o lemons some salt, sugar and time. How pretty. How delicious? I have to wait too, like a week! Ugh, the candied one’s I’m not to touch for 10 days. There’s always next week’s blog. You’ll just have to stay tuned.

Adventures in the Kitchen with Michelle, Preserved Lemons

Michelle

By the way, Michelle has her own blog now.  Check it out at www.badzoot.com!