Adventures in the Kitchen with Michelle

That crazy Michelle sent me this post for “diet” sugar cookies. I fully believe that life is too short to eat “carrots at Christmas”. (Like all those fitness magazines like to advise you on avoiding weight gain by eating the low cal stuff on the buffet). But I will be making these cookies after the feasting season!  I did get to do a taste test–after consuming about a million calories at Michelle’s Christmas dinner!  If you ever get invited to Michelle’s for any meal–don’t turn it down. She is the best chef ever. Seriously, and she loves to cook!  And her mother loves to bake. No wonder I’m no good at either. Why bother?  Anyhow, here’s Michelle’s lo-cal sugar cookies that I will make laaaaater.  KT

I’ve been just bakin’ my little fingers raw – and watching my waistline expand a bit. That’s ok, January’s coming, and I’ll catch up. But to tide me over the holiday season I went looking for a sugar cookie that I could eat along side the boys and their sugar and shortening encrusted jewels. I surfed the Net and found a couple. Really? A couple – that’s it? Decidedly, the idea of a cookie that’s primarily sugar, butter, flour, and eggs….like a flat little Pound Cake, will be hard to convert. That combination will pack on The Pounds for sure. So, I thought I’d try out those ‘couple’ of recipes I found…..NOT ! For shame – how dare they even label them cookies! I feel like posting a nastygram on their sites – these were like vanilla flavored dog biscuits! Yuck – I’ll go without thank you.

And then desperation sets in and the Christmas music carries me to the kitchen to plot my revenge.

I will admit this was a challenge. Although the steps are really the same as other sugar cookie recipes, there are two things about this one. First, after the dough is made you must wrap it in plastic and let it rest for at least a hour (I left mine overnight…cause I had other cookies to make!). Second is, when rolling it out, only roll it once. It will warm super quick and become hard to handle. OK, ready… here’s what I came up with:

recipe

Step 1:Cream together the butter and Whey-Low, add in the vanilla and egg whites and get it smooth. Get the dry ingredients together and then add to the wet stuff.

Step 2: Get the dough into a ball on some plastic wrap, the flatten into a disc and get into the fridge. This delicate dough needs all the help it can get.

Step 3: When you’re ready, heat the oven to 375deg. Roll them out carefully and cut. Any dough left just roll into a gum ball sized ball and put on the cookie sheet instead of attempting to double roll this dough – I tried it and I lost the battle! (Actually, I set it aside and kneaded in some slivered almonds and baked them up. And those were good too.)

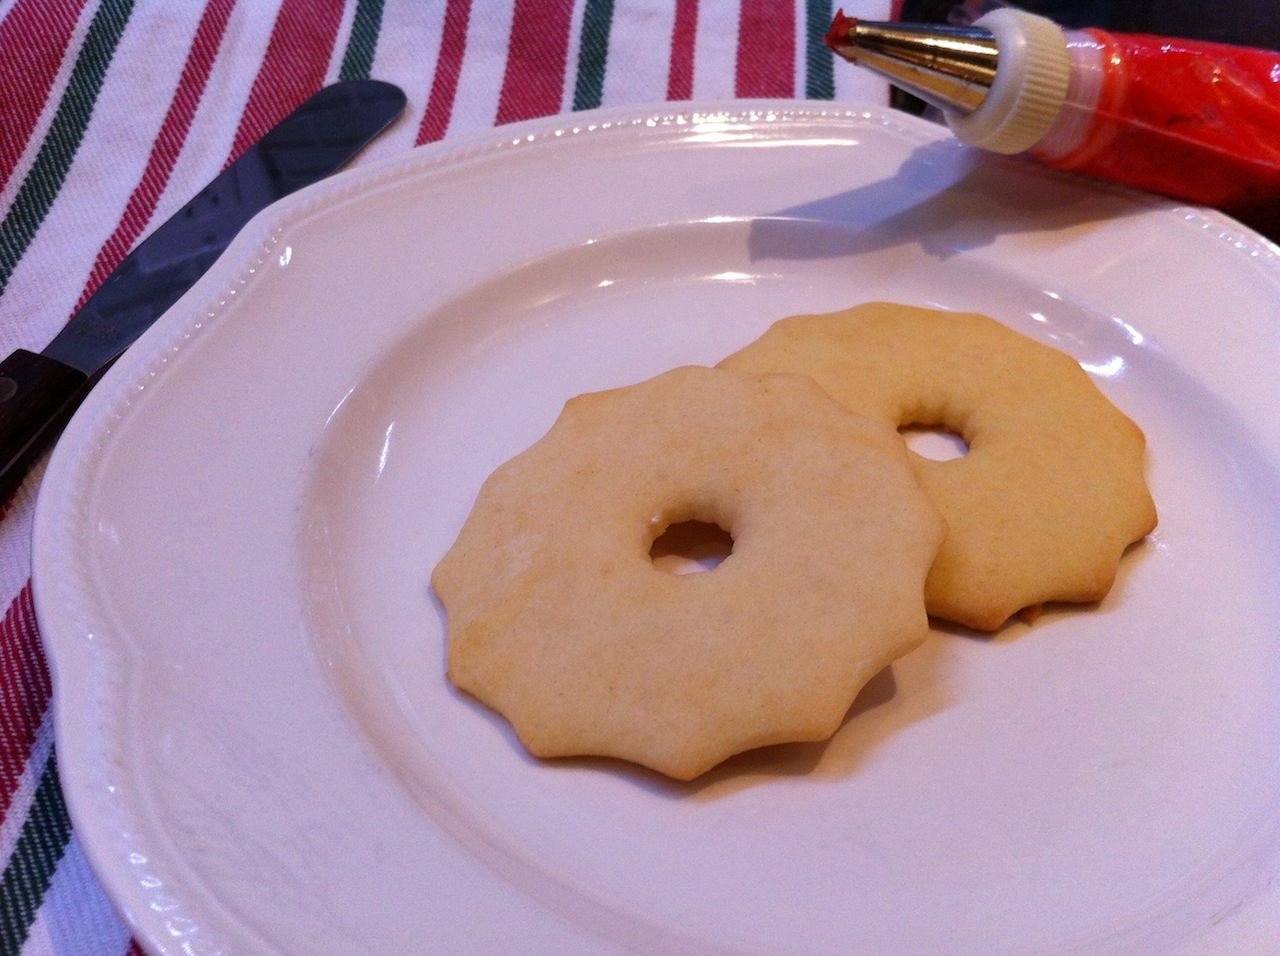
Step 4: There they are. Or are they? Can you tell the full fat sugar cookie – no? It’s the one on the bottom, slightly more brown. Let them cool and eat ’em up. Ooooor, make up a glaze of powdered sugar, milk, and vanilla (or just water) and drizzle over them. (Yes, Whey-Low comes in powdered sugar form too, and it’s good) You could even color it and feel all festive and stuff.
Sugar Cookie 2

And the Recipe Analyzer says…… 45 calories and 2.6 g fat!! And these are 2 dozen, regular size cookies, not those tiny diet ones. Yes, I hate making those recipes for lo-cal cookies and find out the batch makes like 48 of them the size of a quarter! Now, I can settle in with my kerchief and my cookies (cause they’re good!) for a long winters nap….

Happy HolidayTo All – and Happy Baking You Little Elves!

Michelle

Cookie Man 2

Cookie Man 4
William Approved!
After eating a gourmet Christmas dinner prepared by Michelle  followed by pumpkin roll and Christmas bread baked by my sister, I tested Michelle's low-cal cookie.  Yum.  But not as good as full fat full sugar pumpkin roll and Christmas bread!  Decadent!
After eating a gourmet Christmas dinner prepared by Michelle followed by pumpkin roll and Christmas bread baked by my sister, I tested Michelle’s low-cal cookie. Yum. But not as good as full fat full sugar pumpkin roll and Christmas bread! And William is eating a Magic Bar. Decadent!  KT


Bedroom Redo – Step 4

Here’s another step in Michelle’s master bedroom redo.  You can also check out step onestep two and step three!

By the way, today is Michelle’s BIRTHDAY!  Happy B’day Michelle!

Mirror

Once again, here I am recounting the steps to my bedroom redo. This was a fun one. I love weird projects (surprise!). Now that the room’s painted I need something on that massive wall next to the armoire. I was thinking about a big mirror – because on the opposite wall is a big window. And besides, that’s what I saw in a book. Yes, I need to stop reading those damned things!

I set about looking for an old window that I could replace the glass with mirror. So, I went cruising my favorite building surplus and junk shops and was a bust for weeks. Too big, too small, way too expensive…. Then one day I stopped into the old Sarges lot (now called the Bargain Warehouse) and spotting the perfect victim. It was a huge old door insert that had really had it. The edging was loose and one of the exterior glass pieces was completely missing. It was leaning against a shipping container encrusted with old mud and algae about 6″up and the glass that was there was streaked and dirty. Looking like a Katrina victim long forgotten, it was just my kind of junk! I gave them $45 for it and ran for the truck (and lots of blue tape).

Step 1: Get it home. When it arrived home, I somewhat sneaked it into the garage to have Jon come in going “What is THAT?” (hee hee) I then explained My Plan and he thought, well – ok and agreed to assist. (silly Jon, he should know better by now…at least it’s just a window and not an entire old house!)

Bedroom Redo - Mirror

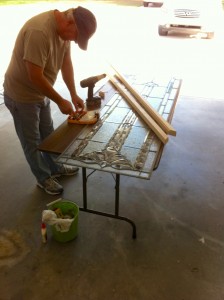
Step 2: Get a frame for the beast. Did I mention it’s 80″ tall? A trip to Home Depot for some surprisingly straight 2 x 2’s and some tiny moulding trim. Jon cut the frame as I asked, with a rabbet cut to hold the edge of the glass and it’ll be secured in the front with the tiny trim.

Bedroom Redo - Mirror


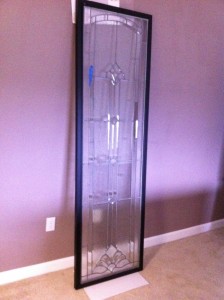
Step 3: There it is, waiting for its paint job. We removed it and I painted the frame pieces separately. Primed and then painted with the matte black paint used on the other furniture jobs. I spray painted the inside edged with a silver (reflective) metallic paint I had from another project.

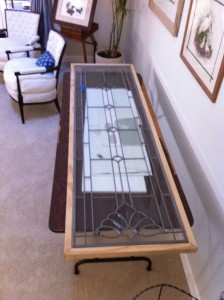
Step 4: Dry-fit the piece. See the trim pieces used to hold it in – perfect.

Bedroom Redo - Mirror

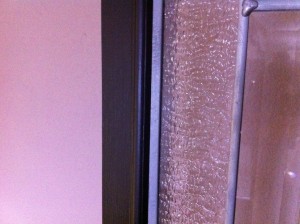
Step 5: Corner braces were a must – this thing weighs in at 75 – 100 lbs! See the inside edges are silver like the leading.

Bedroom Redo - Mirror

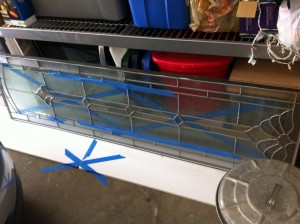
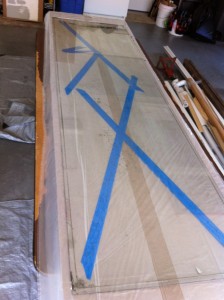
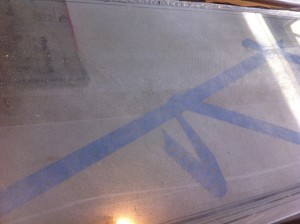
Step 6: Here it is awaiting the next step – the mirror. Yes, the blue tape is for the broken piece of glass – I told you it was junk!

Bedroom Redo - Mirror

Step 7: OK, there’s only one sheet of glass – it’s tempered, but very thin. It’s filthy. I had to use a razor blade and every cleaning product I had – and I’ve got ’em. I never did get off some something that had run down the glass and dried on. Fine, then, I’ll just antique it anyway!

Bedroom Redo - Mirror

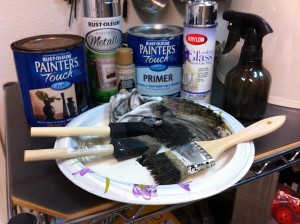
Step 8: Gather your weapons – These are what I used on the frame as well. The hand sprayer is filled with 1/2 & 1/2 vinegar and water. Note the tiny spray can of Krylon Looking Glass Paint, this is a must ($10/can Amazon). It actually makes a mirror. I went online and discovered that you can do your own mercury glass – and that’s perfect!

Bedroom Redo - Mirror

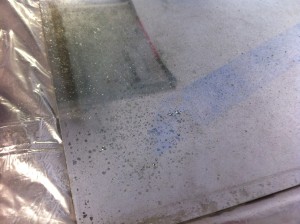
Step 9: Spray the glass with a fine mist of the vinegar & water mix.  Wait a minute and then blot the water/vinegar up with a rag.  Then follow with a coat of looking glass paint, repeat 3 or 4 times. Please promise me, if you try this, that no matter how bad your day has been you’ll open a window with this stuff! The smell is unreal! Like the worst spray paint and nail polish remover with a a little epoxy thrown in for flavor! Wow.

Bedroom Redo - Mirror

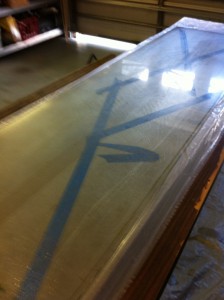
Step 10: The blue tape’s on the opposite side so you can see it disappear with each coat.

Bedroom Redo - Mirror

Step 11: How cool – it really works!

Bedroom Redo - Mirror

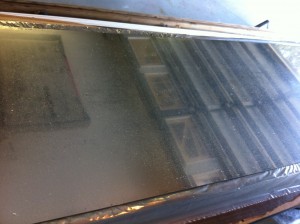
Step 12: Last coat – yes, that’s the open garage door reflected in the new mirror, and the blue tape’s invisible!

Bedroom Redo - Mirror

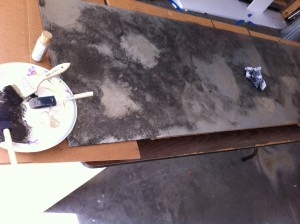
Step 13: OK, now we have to finish it off. I got a craft paint in a metallic champagne gold and mixed it in with the black paint I’d been using everywhere else. Then I painted it in spots on the backside. Let it dry and sealed it with a coat of clear spray paint.

Bedroom Redo - Mirror

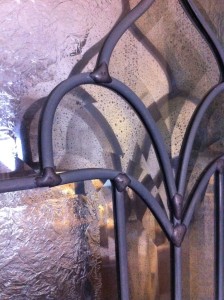
Step 14: Shadow-box mounted behind the leaded glass it really finishes it off. It really looks antiqued, and the streaks of unremovable gunk just add to the character!

Bedroom Redo - Mirror

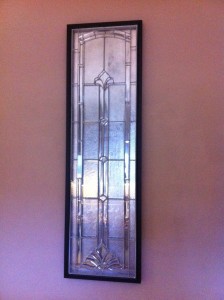
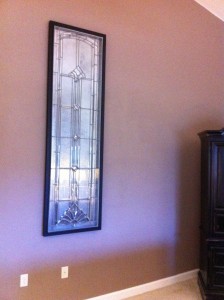
Finished: Here it is. We mounted some masonite to protect the mirror and hung it with a Z-Bar because it was so heavy. Definite Wow-factor! And certainly something I’d see in the Resto Store someday. I’d guess they’d want more than the $100 in materials it cost me.

Bedroom Redo - Mirror

Bedroom Redo - Mirror

Another piece to the puzzle down. Now I need something on either side of it…but that’s another blog.

Whew – this would’ve been a funnier Blog Post if I wasn’t so damned tired after all that!