Well, there’s always scalloping. And hitting the local bars.
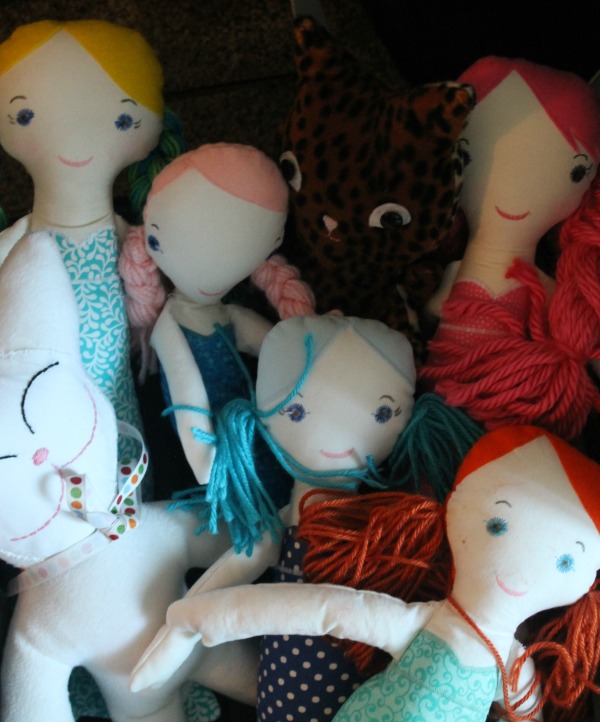
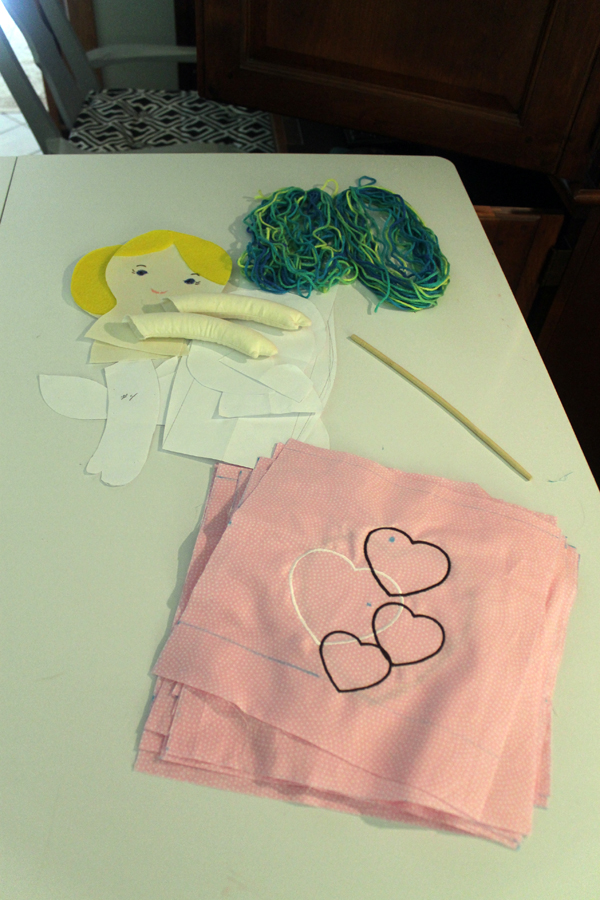
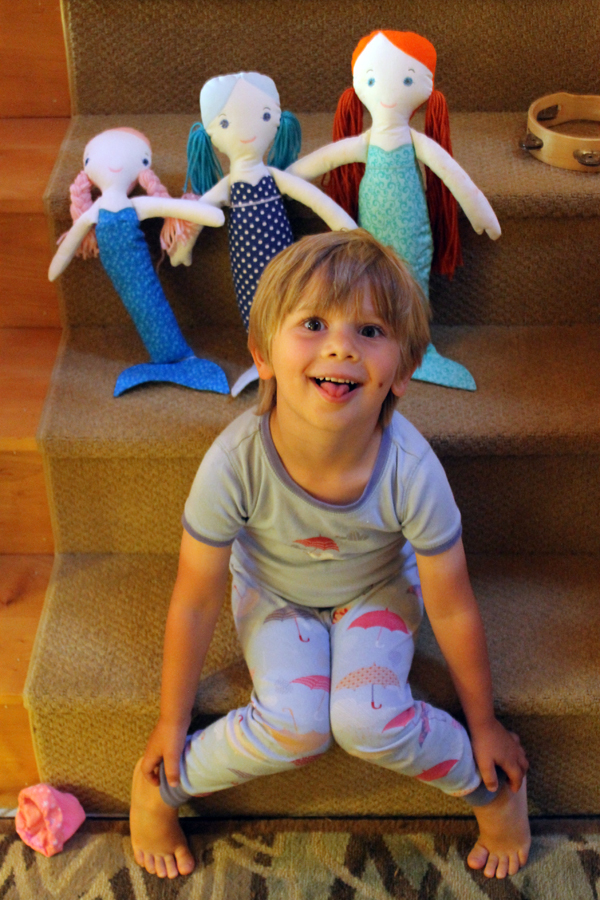
I’ve been designing a mermaid doll pattern for my mermaid-loving granddaughters. Despite the three girls suggestions and advice, they haven’t been very pleased with the results yet. And that’s why I didn’t have a DIY post yesterday. Still need some adjustments.
Hopefully I’ll get back into the routine next week and have a post.
Hey, it’s summer! And things are a little more laid back, right?
Okay. I got to admit, I’m not the most organized person. Terry just walks into my office and shakes his head.
But it’s not really disorganization. It’s more like clutter.
Because my head is cluttered.
Therefore my office/sewing room is cluttered.
I always have two sewing projects going and strewn about in the sewing corner.
Making some mermaids and a heart quilt.
Then there are the websites to update and the community groups I’m involved with. That requires layers of paper.
Plus all those silly day to day things (like paying the bills and cleaning, fortunately since Terry retired I don’t cook anymore)
You get the idea. I’m a busy person! With stacks and stacks of stuff!
But I really want to be be clutter-free.
Especially in my head.
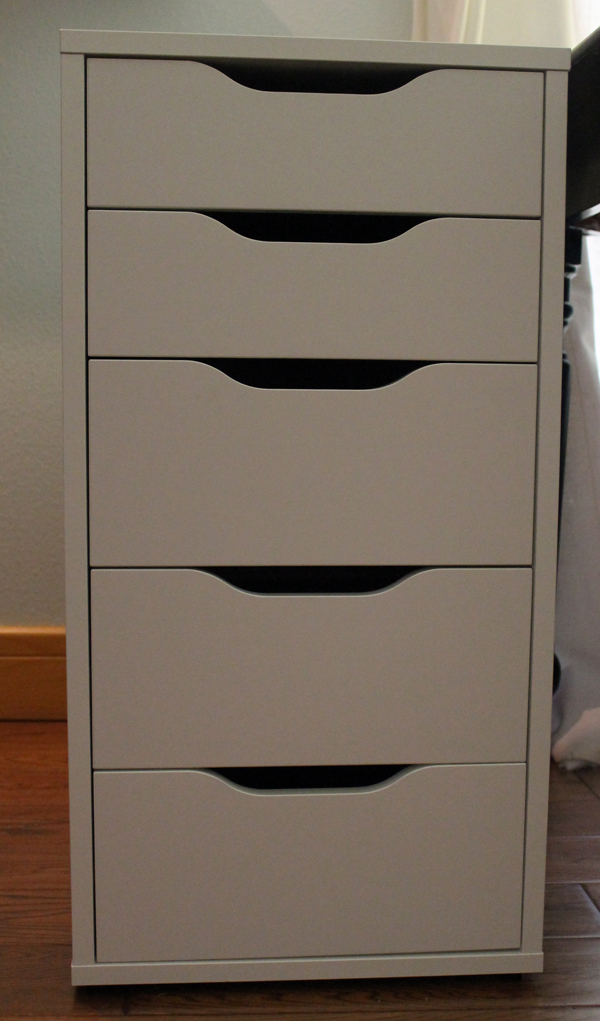
I got this cabinet from Ikea last year. Ikea calls it Alex. I call it Perfect!
And I love love love it.
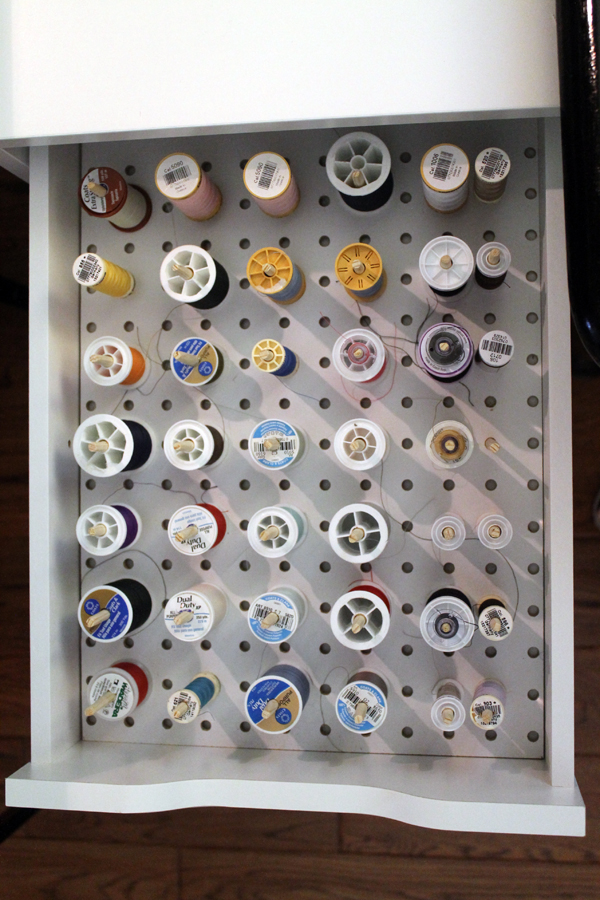
I keep all of my necessary sewing paraphernalia in there. Like thread and feet and needles and measuring tapes and…..
it would have really been perfect if I could have stored the bobbins on top of the spools of thread. I just like to have them matched up so I can just pull them out without hunting for the right bobbin.
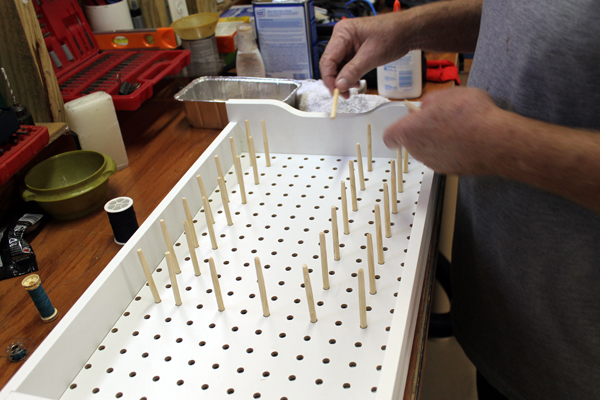
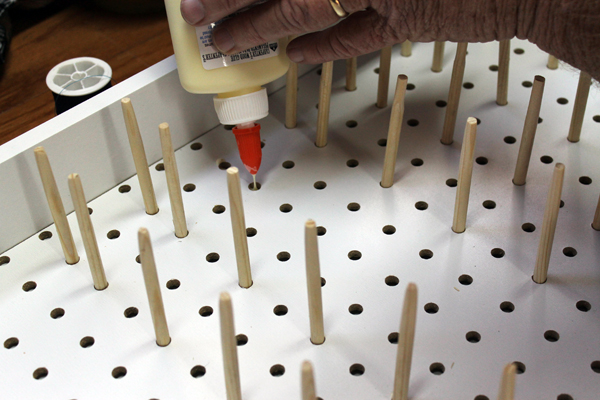
I had this case but the inserts weren’t long enough to put the bobbins on top.
So I told Terry what I really really NEEDED. And (after he was done cooking for a moment) he made it!
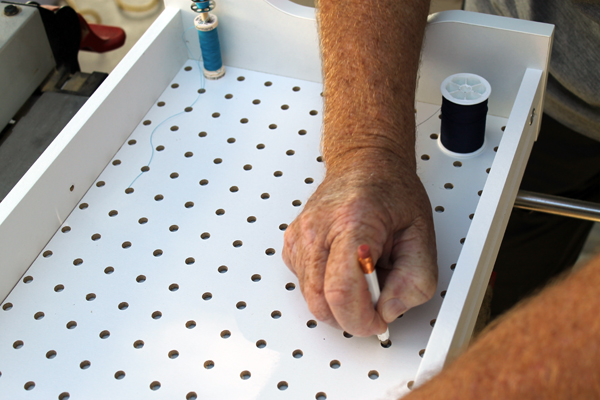
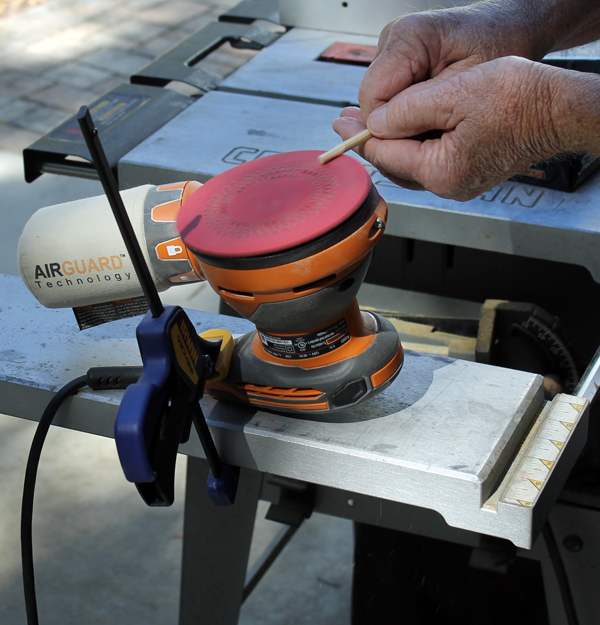
Terry cut pegboard to fit the drawerThen cut dowels that were long enough for both the spool of thread and the bobbin.Figured out how far to space the dowelsSanded one end of the dowels down so the bobbin would fit on it. (That’s my sander although I don’t use it often anymore!)Set the dowels up with the right spacingAnd glued them in!Perfect!
Jack was here last week and decided I needed some help with the thread and squeezed every spool he could find in and around the dowels. I think it’s a little better my way!
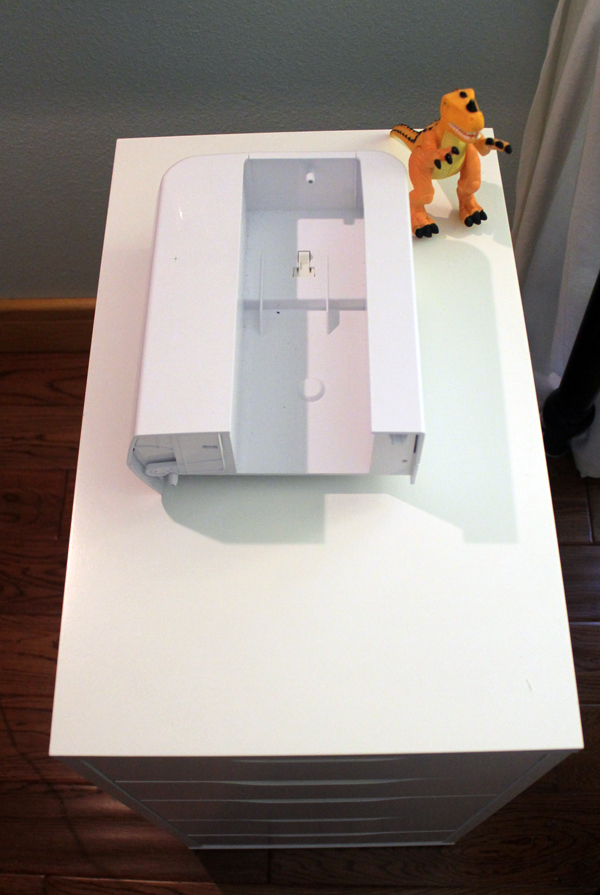
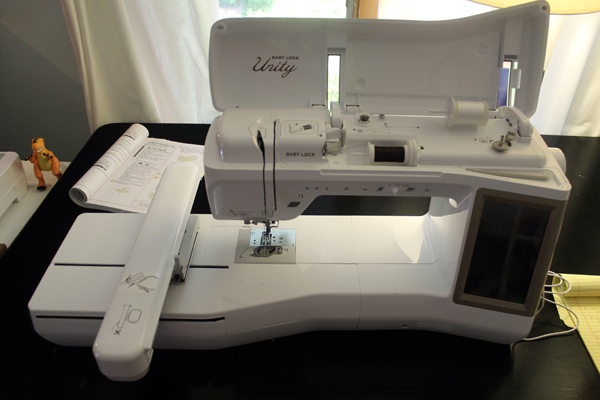
Jack is being very silly in this picture. Someone forgot to pack his pajamas so he had to wear these way too small ones that I had tucked away. He was very happy to help me with my spools of thread but was not happy that Grandma was making mermaids instead of puppies!I usually have the embroidery unit for the sewing machine here but it’s on the machine right now. It’s very big and cumbersome. Not sure where I should store it. Jack also wanted to know why I had a dinosaur!
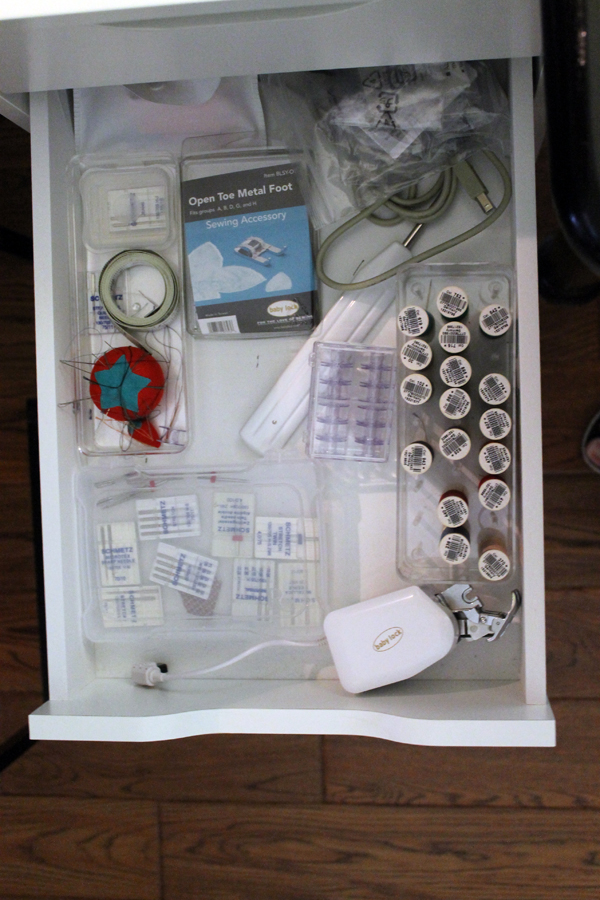
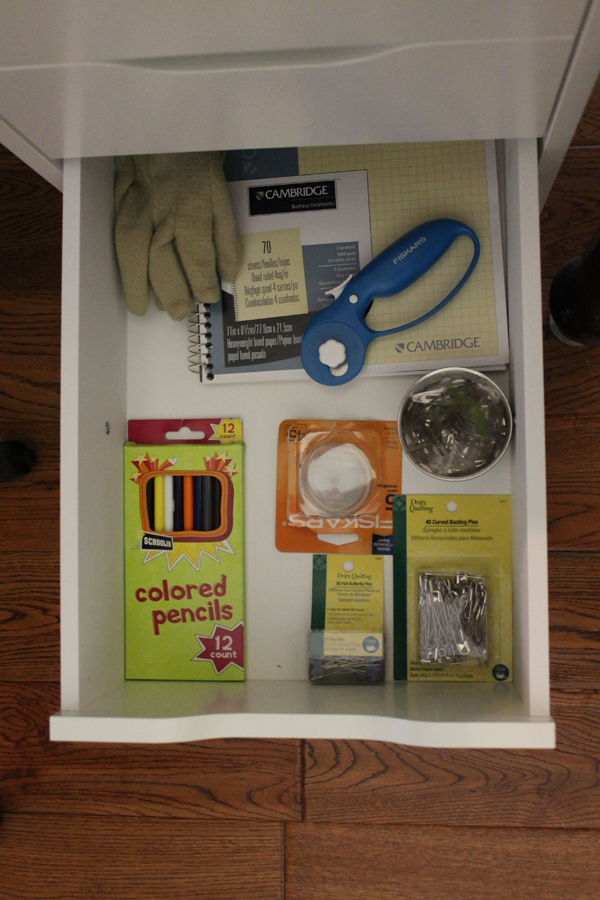
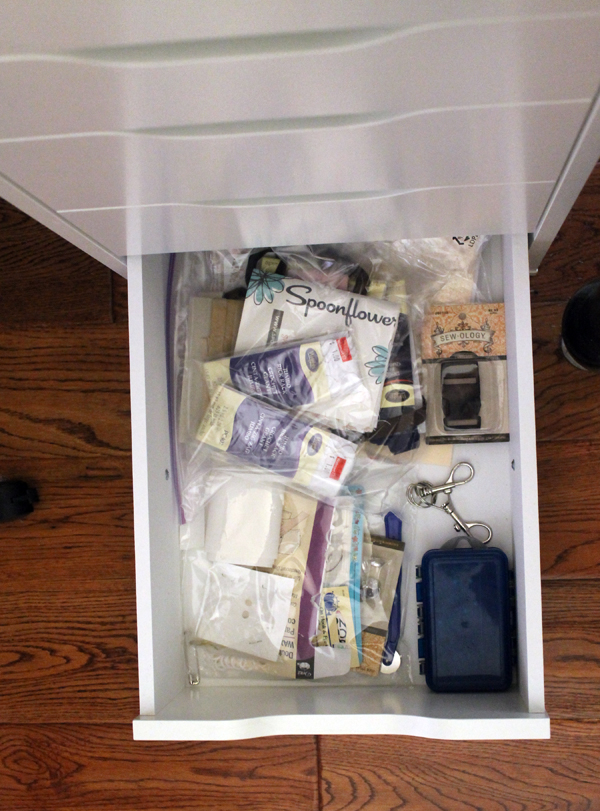
Here’s the machine with that embroidery unit! And the instruction booklet. Still need to refer to the manual!Might as well reveal what’s in the drawers! The second one is regular sewing stuff. Those are the spools of thread that Jack tried to squeeze in. He’s such a big helper!This is where I keep all the stuff that goes with the embroidery unit. There’s usually more in there but I’m using it. So much stuff with the new machine! Bobbin thread, embroidery thread, frames, stabilizer. I had NO idea!This is where I keep things for quilting. Graph paper and colored pencils are very important for my quilting process! And yes, it really is that neat!And here’s my “junk” drawer. Where I put those necessary sewing items that do not fit any specific area.
And I hope you noted I still had thread in two of those drawers. So I possibly need a special thread drawer for all of the embroidery thread! And one for the extra thread that didn’t fit in my special thread drawer although Jack tried really hard to cram it in.
And I JUST WENT TO IKEA YESTERDAY! A new Alex for me! More work for Terry!
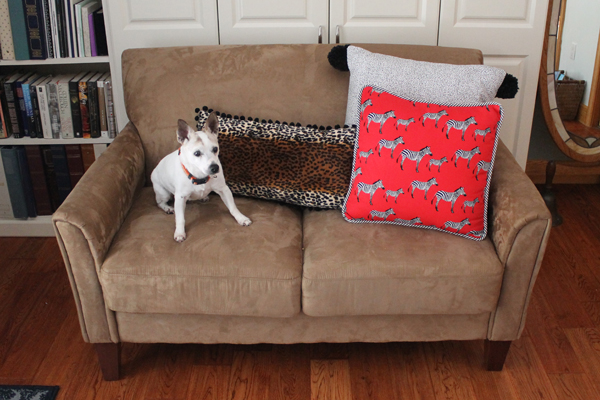
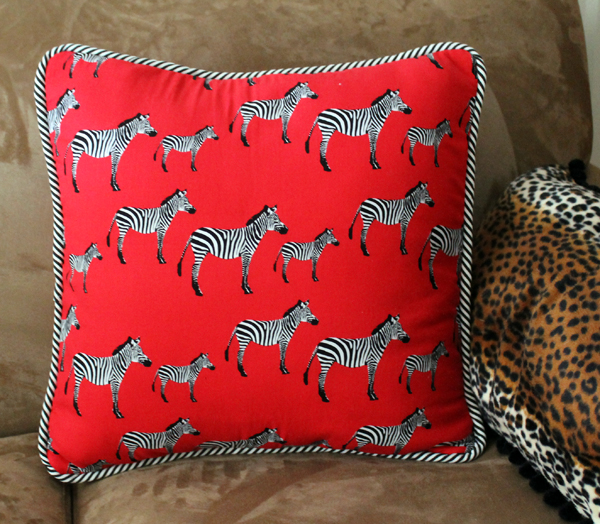
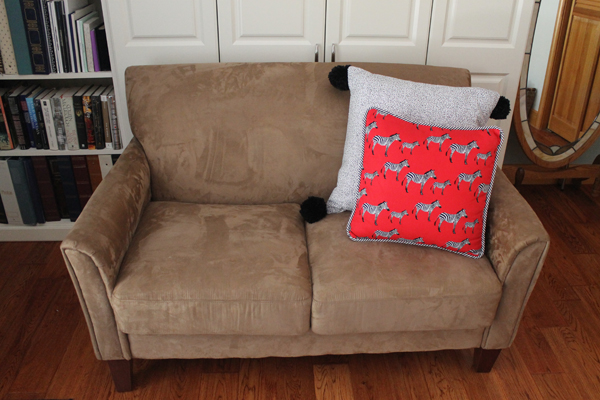
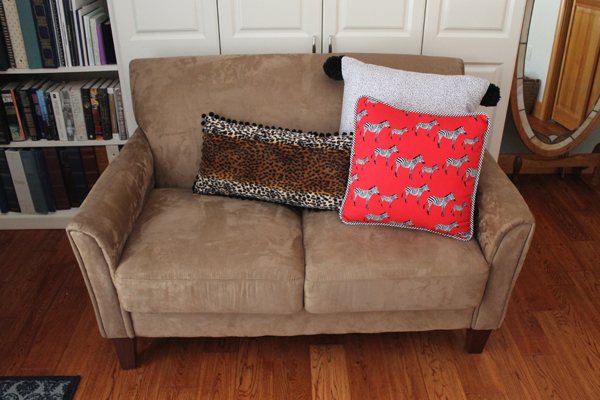
Then there was the zebra pillow with striped piping.
Very Cool Zebra Pillow with Black Pin Striped Piping
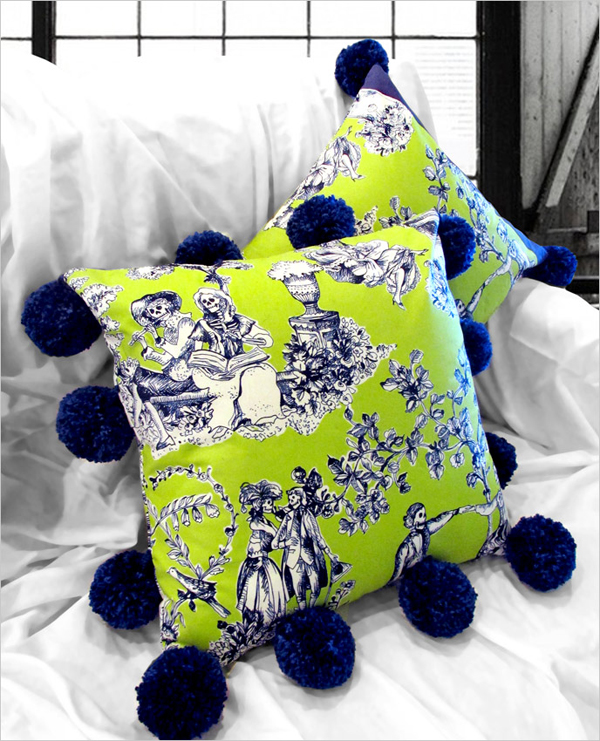
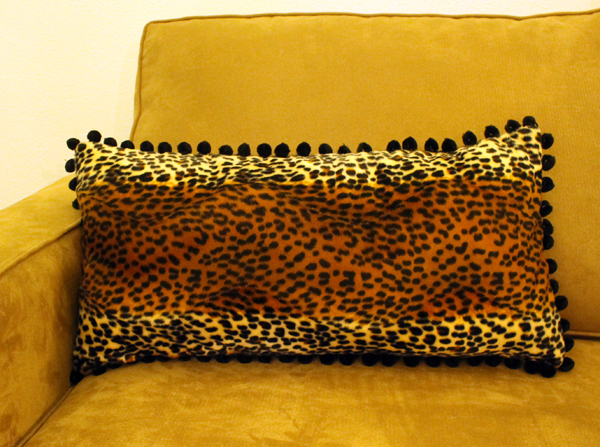
And then I got sidetracked and never posted about the third pillow. But finally, after all this time, I put a post together about the coolest pillow of all!
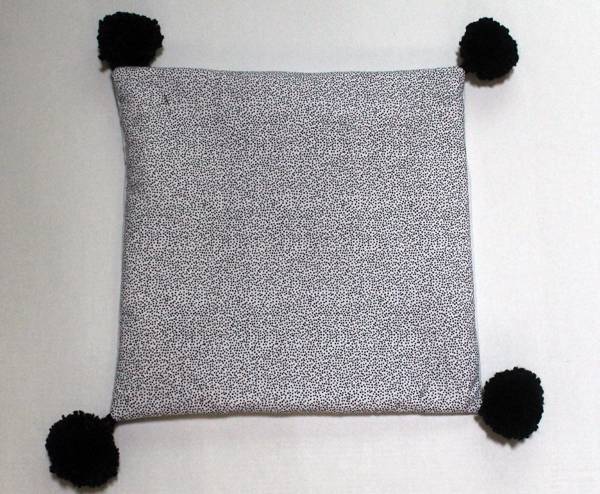
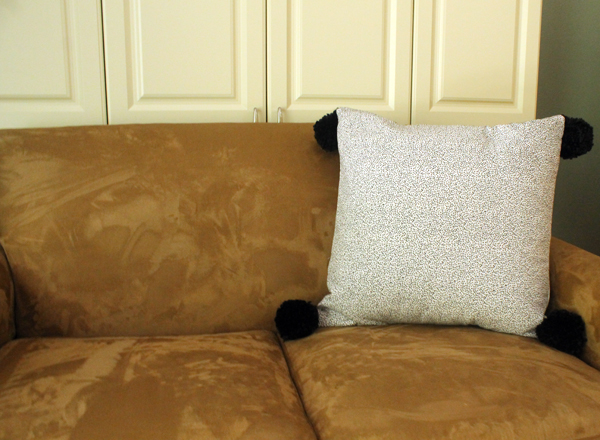
I present a pillow with GIANT POM POMS!
That goes perfectly with the two other cool and funky pillows!
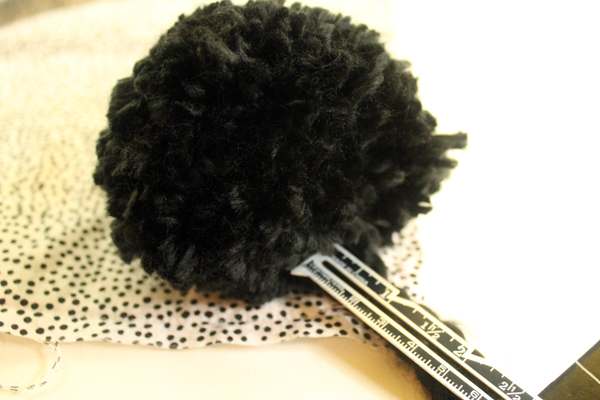
I did some searching on Pinterest and found instructions to make pom poms with a piece of cardboard or by just wrapping it around my hand.
They came out very scraggly. And I wanted Perfectly Perky Pom Poms.
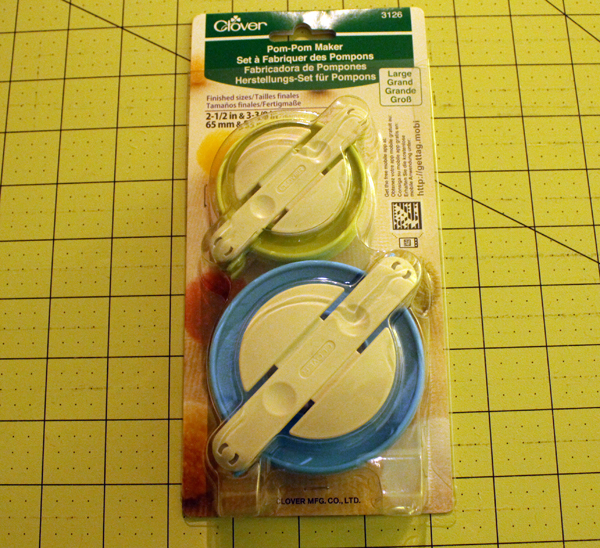
So I bought this Clover Pom Pom maker.
The instructions were a little vague on the package but right about the same time, sew4home.com came out with almost the identical pillow that I wanted to make! (Great minds think alike!)
Gotta say that I love that fabric and it might find a place in my home during Halloween!
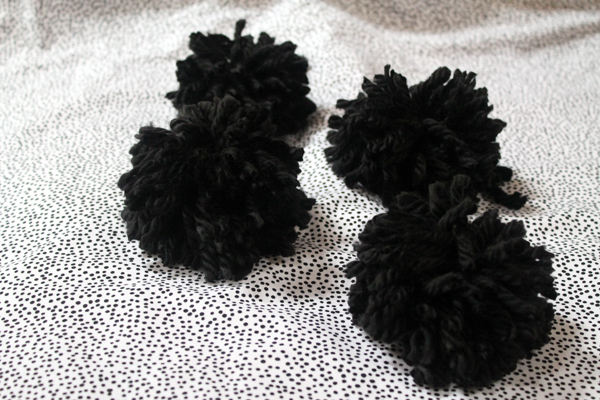
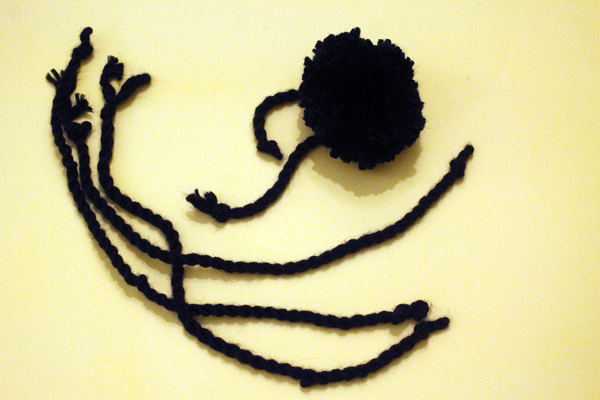
In the same post on sew4home, they added an easy step by step tutorial on making the pom poms. There was also a link to a video to make twisted cord which was also incredibly easy and made a nice sturdy tie for the pom poms.
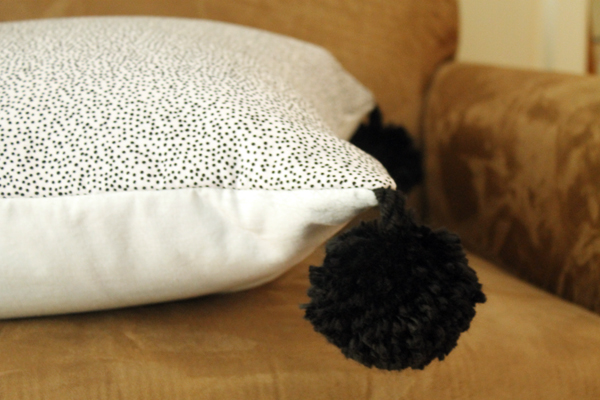
Perfectly Perky Pom PomsHere’s what twisted cord looks like when it’s finished.
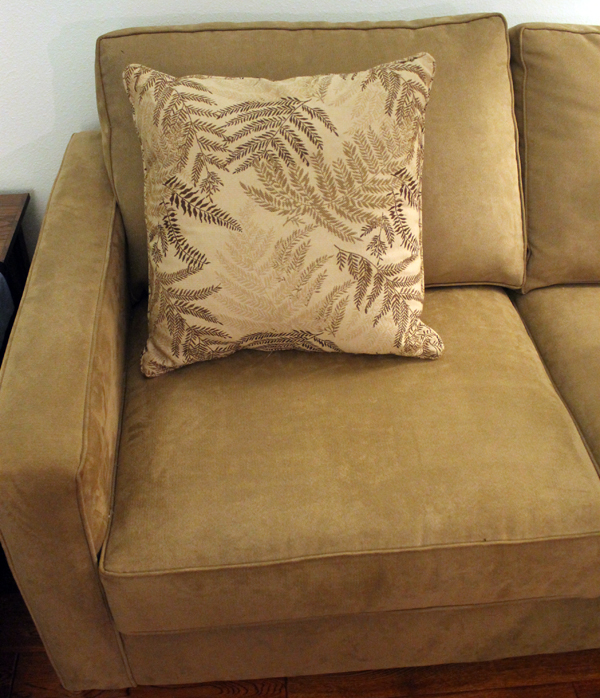
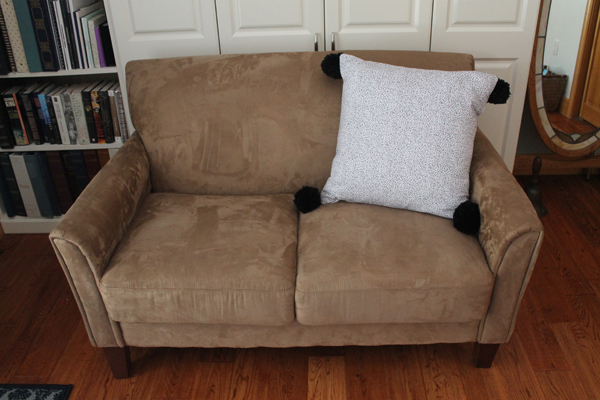
I had a pillow that had never been used. Came with the sofa and was just too ugly to put out.
This pillow needs a facelift!
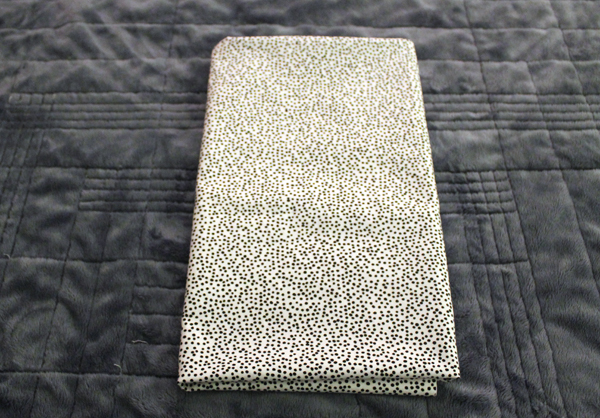
I also had this fabric that I bought for binding a quilt. Or the lining of a tote. But I thought it would make a great funky pillow, too.
This is White and Black Dot from Timeless Treasures. I did a search for it on Fabric.com and it’s not available anymore.
I’m trying to be frugal with it, so I just used this fabric for the front and a white linen blend for the back that I had in my stash.
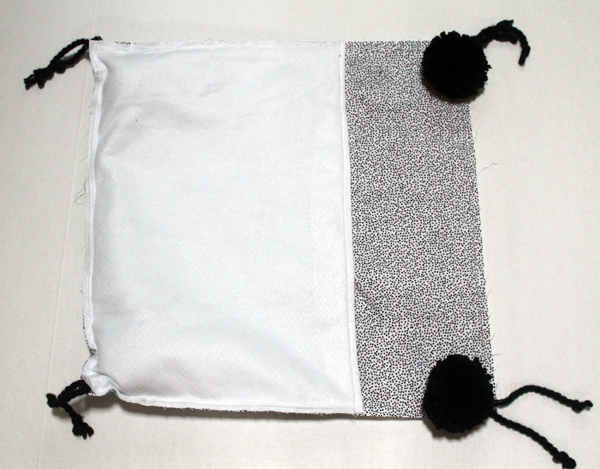
I’m not going into great detail on how I made the pillow. It’s just an easy envelope style.
Because it is a quilting fabric, I lined it with fleece. The pillow I was covering was 21″ square so I cut the front fabric and front fleece to 22″ square to allow for a 1/2″ seam allowance. For the back I cut 2 15″ x 22″ pieces plus the same size in the fleece. Sew the fleece on the wrong sides of the fabric, then trim. For the back, turn under 1/2″ and then another 1/2″ then stitch on each side.
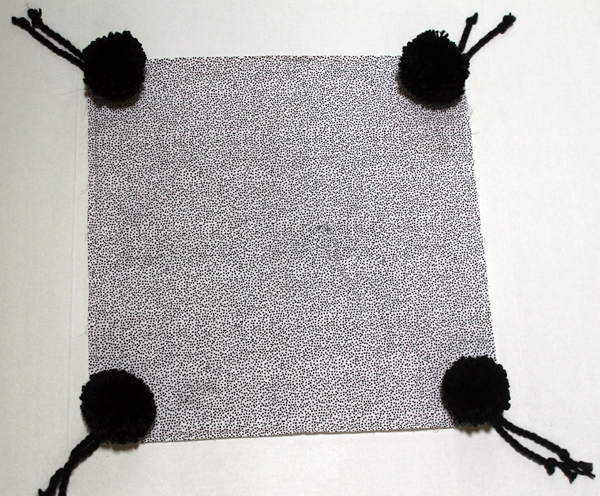
The important thing is the placement of the pom poms. I put mine 1 1/2″ from the corners then stitched them down. I used my zipper foot to sew on the back pieces.
1 1/2″ from each corner
One side onAnother side onTurn right side outCool and Funky Giant Pom Pom Pillow!Goes great with my perfectly perky pooch!

 And I love love love it.
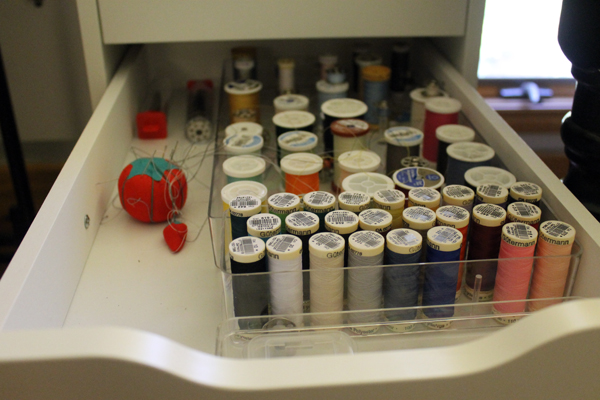


 I did some searching on Pinterest and found instructions to make pom poms with a piece of cardboard or by just wrapping it around my hand.