Adventures in the Kitchen with Michelle

Michelle is tempting us with a new recipe for football season!

Ahhh, October and football food….mmmmm. Pulled pork sandwiches, yummy, ugh nooooo – You’ve seen those greasy cousins of the gut bomb that the men inhale! Sure they taste good, all that fat laden pork swimming in a sea of bar-b-que sauce piled high on a puffy white bun. Hmm, ‘You are what you eat’ – puffy white buns. Yea, got em – don’t want ’em. Let’s fix this. With some more help from my fitness friend Jillian Micheals (did I say friend? No friend would kick my ass like that! I know I asked for it – and I love it), I’m sending you this counterfeit comfort food. It really is good, give it a try. 

Waist Not Pulled Chicken

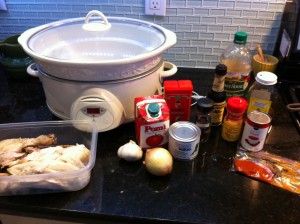
Step 1: First we need the ingredients. For my pot today I have some leftover chicken that well, didn’t turn out so well. So, I tossed it in the fridge and knew I’d make it work (because you know I can’t throw out food I can fix) Best for this are chicken thighs, skinless. Or whatever chicken’s on sale. Did I mention I’m cheap too?
Waist Not Pulled Chicken
Step 1
2 1/2 lb Chicken (skinless)
1 can (17oz) Tomato Sauce
1 Small Onion, finely chopped
1 clove Garlic, minced
4 can (4oz) Chilies, chopped
3 Tbl Cider Vinegar
2 Tbl Honey
1 Tbl Paprika (I like smoked)
1 Tbl Tomato Paste
1 Tbl Worscestershire Sauce (really Mr.SpellCheck, you know how to spell that one! Good Luck)
2 tsp Dry Mustard
1 tsp Chipotle Pepper, ground (or less…kinda hot)
1/2 tsp Salt

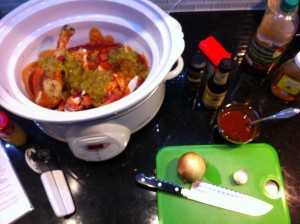
Step 2: Put the chicken, and the next 4 ingredients into the crock pot. Set on low for about 5 hours – or for however long you’ll be at work! If yours has an auto-shut off, great. Then set it to about 2 hours before you think you’ll be home.
Waist Not Pulled Chicken
Step 2

Now, take the rest and in a little bowl mix together like a sauce and pour over the chicken and tomato sauce, give it a bit of a stir to mix it up. If you’re pressed for time, hold the chicken for last, toss the lot it all at once, give it a stir and then put in the chicken.

Step 3: Walk away – yessiree, just walk away. Go do something fun or whatever. 
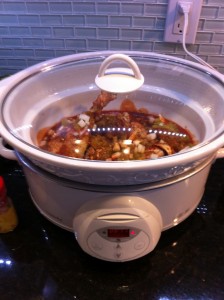
Waist Not Pulled Chicken
Step 3

Step 4: Oh good, you’re back. Smell that? OMG! Yuuuum!
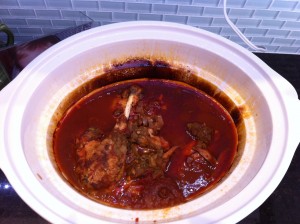
Waist Not Pulled Chicken
Step 4

 Step 5: Pull the bones out with a fork and shred the meat.
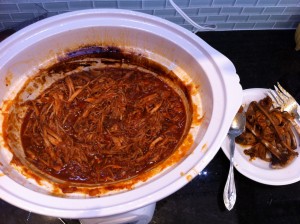
Waist Not Pulled Chicken
Step 5

Finale: There you have it. Jillian’s site says this should be 184 calories, and 8g fat. For the photo I’ve got one of the Publix bakery rolls, any big whole grain roll will make it a man-sized meal. And, yes, if you’re from The South, you can put a pickle on it. I really enjoy it on one of those little flat deli sandwich rolls,…or just put on a bed of salad drizzled with ranch (lo-cal of course). Those chips are Cape Cod Reduced Fat chips – heavenly. I guess it isn’t really ‘counterfeit comfort food’ if it’s real…and really good for you!

Waist Not Pulled Chicken
Finale

Michelle

I’ve made pulled chicken before.  How can it be fake if it’s real and yummy and everyone gobbles it down?  I’ll have to try Michelle’s recipe since it’s even lighter than the one I used.  Bucs are on a winning streak and this would be good to munch on during the next winning game!

KT


Adventures in the Kitchen with Michelle

I received the latest Veranda magazine in the mail yesterday and there was that armoire that Michelle was recreating in Tuesday’s post!  Great job Michelle!  And while Michelle was working on that lovely piece, she was also in the kitchen making dinner.  Ultimate multi-tasker!

I’m a busy girl. Now, I’ll tell you that I’m just putzing doing nothing but keeping Jon out of trouble – or getting him into some. (hee hee) I lie. This week, because I’ve been losing my mind over a real estate short sale nightmare, I’ve decided to do something BIG to keep my mind someplace else. Jon’s happy that it just involves paint and not a sledgehammer or a sawz-all. So, he’s letting me run wild, smiling and nodding as I go along.
 
But I digress, all this remodeling leaves me little time in the kitchen. So soon I forget what it was like when I worked 8 hours in an office came home to a fussy baby, help make other building decisions and deal with family issues. And you know my family, they’ve got a lot of issues. Geez, I’m like semi-retired now – NOT!


The other day I received my newest Coastal Living Magazine and it reminded me of a southern favorite I’d let slip from my main soup-group. See, I’m no Crock Star – I’m more the Soup Nazi! And I love Frogmore Stew, ewwww what an awful name. Now we call it a Lowcountry Boil. Yes, Mr.SpellCheck, it’s ONE word – welcome to Florida. On busy remodeling days, I know I’ll forget all about dinner and panic at about 4:30 with no plan (and I have to have a plan). But there’s always the ingredient list available in my pantry and freezer for this one. I make mine more healthy and lower fat than normal, and it’s just as tasty . So, ya’ll git you yer crock pot out and let’s us do up a Lowcountry Boil. (yes, I know – I hear the sirens from the grammar police from here)


Lowcountry Boil – The Busy-Girls-Short-Cut Version
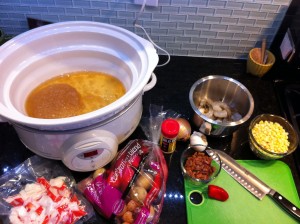
Step 1: It’s still morning so, gather the goodies – see, the pot already has frozen chicken broth thawing. Set it to low for however long you’ll be busy.
Lowcountry Boil
Step 1
1/3 Cup Bacon pieces (I keep some in the freezer, because I need bacon grease without the bacon sometimes. The guys can sprinkle them in eggs and I only have to stink up the kitchen every couple of months)
1 small Onion, chopped fine
1/2 Pepper – Yellow, Red or Orange, chopped
3 cloves, Garlic, minced
1 tsp Seafood Seasoning (aka Old Bay)
4 Cups Chicken or Veggie Broth
2 Cups Water *(to cook the shrimp tails in for a seafood broth)
4 Potatoes, cut up or little creamers (about 1 lb. or 1 1/2 lb)
1 cube Chipotle Seasoning (or 1 canned chipotle pepper diced..not a pantry staple here)
1 1/2 Cup Corn, frozen
Salt & Pepper to taste (add later)
1 1/2 Lb. Shrimp, frozen jumbos, peeled and deveined – thawed
1 Cup of another seafood if you like (I happen to have imitation crab that need to go)
1/2 Cup Frozen Peas
Step 2: Toss it all in the pot, except the shrimp and peas. When shrimp cooks too long it gets tough and rubbery. Pull the tails off (and shells if there are any) and put the shrimp back in the fridge. Cover them – they stink!
Lowcountry Boil
Step 2
Step 3: Put the tails in a pot (if you have time) with the water and cook up for 5 or 10 min. Then strain broth into the crock and toss the tails. Or just use 2 more cups broth.
Lowcountry Boil
Step 3
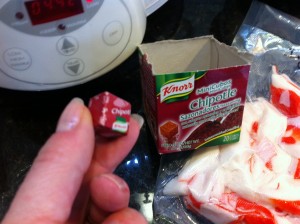
Step 4: While those tails cook, lets look at this little number. I keep these Knorr blocks on hand for all kinds of dishes that need heat, but not take-your-head-off heat. And they don’t spoil so add them to your pantry – they don’t take up much space.
Lowcountry Boil
Step 4
Step 5: I’ve been buzzing around all day with that crock pot on low. Add salt & pepper now. Many of the ingredients have a salty taste after stewing all day. Garlic, OldBay, Knorr blocks are all salty. And maybe you’ve got full salt broth…or maybe not. Now I’m ready to serve. Pull the shrimp and toss in along with the frozen peas (for color mainly). When the shrimp are pink, they’re cooked.
Lowcountry Boil
Step 5
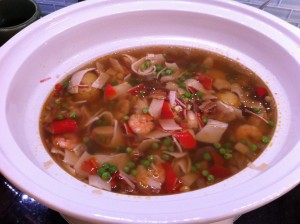
Finale: Look at that healthy Soup Nazi creation – yes, there is soup for you! Pretty as the magazine shoot, with less calories. No extra butter or bacon fat needed here. But you may need some sweet tea and a side of crusty bread. Aaahh, the South comes to you wherever you are. Y’all enjoy.
Lowcountry Boil
Finale

Michelle

Another yummy recipe from Michelle!  If I had all those ingredients in my cupboards, freezer and fridge, Terry would think someone else was living here!
KT

Adventures in the Kitchen with Michelle

Michelle brings us “Michelle’s Lazy-Healthy-Girl Mashers” this week:

Last week I ‘did potatoes’, by that I mean I made my semi-annual batch of mashed potatoes. My guys love mashed potatoes, as most men do,…ok I love them as well. What I don’t love is making them. What a pain – and for one meal, really!? Sometime ago I ran out of my Masher stash and had to resort to the frozen Red Bag from the store for a recipe. I was very disappointed. Not only were they pricey, they were cut pieces of potatoes that I had to mash and flavor myself anyway. The alternative was the dried nastiness from a box. In my world there’s just something wrong with potatoes from a box,….right up there with powdered milk, (I shudder – eeww – only for recipes and the hurricane box ). I had always been told that “You can’t freeze potatoes, they get weird”‘. Well, another thing I’m used to dealing with in my world, and that’s the word weird. The way food companies deal with weirdness, is chemicals. Specifically disodium dihydrogen pyrophosphate. Now, I thought that it might be a benign additive that just sounds scary. Not really. After a Google search, I discovered that it’s linked to all sorts of ‘weird’ ailments and reactions. Wow – that’s some awful stuff! Hmmm, all to keep potatoes from turning ugly during processing. With all that fancy industrial equipment at their disposal, they still rely on chemicals (cheap bastards). Well, I’ve got my own arsenal of culinary weapons, and I’m not afraid to use ’em. Let me show you what I’m talking about.
 
Michelle’s Lazy-Healthy-Girl Mashers:
 
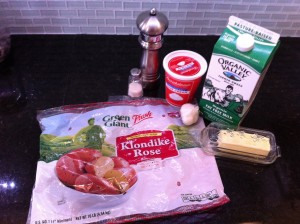
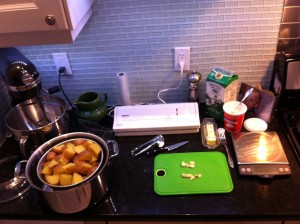
The Cast: I buy a 10 pound bag of the Klondike Rose potatoes at Sams Club when they’re in season. These potatoes are like Yukon Golds. They have a buttery flavor and smooth texture on their own. Reduced Fat Sour Cream. NOT fat-free (yuck). A little real butter. Why? Because it’s real and a little goes a long way. Garlic, again a little makes the whole batch awesome!
The real stars for this show are my massive stand mixer, but ANY mixer will do, just mash in batches. As well as my Food Saver (seal-o-meal), or you can use zip-loc bags or any other airtight freezer packaging.
Adventures in the Kitchen with Michelle
Step 1: Boil up all those potatoes. I cut them into a big bowl of water first and drain off some of the starch. That helps keep the ‘foam’ from forming and boiling over in a big mess. Also, potatoes don’t have to cook at a rolling boil. Just bring them up to a roll and back it down to a strong simmer for about 20 min.
 

Adventures in the Kitchen with Michelle
Step 1
Step 2: Gather your staff, and drain off the potatoes in 2 batches. Mainly because 10 lbs is just too much to deal with all at once.
 

Adventures in the Kitchen with Michelle
STep 2
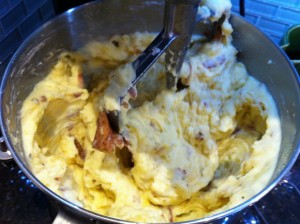
Step 3: Get them, peel and all into the Mixer, while hot. S l o w l y, break them down.
Adventures in the Kitchen with Michelle
Step 3
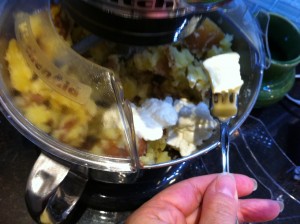
Step 4: Now add in what you like. I only use 1 TBL butter, per half. Yea, that’s it! Then I add, 1/2 of the container (about 8oz.-per half) Red.Fat Sour Cream. I’ve used greek yogurt in the past which is ok for dieters, but I erroneously served them to guests and even I was like “What’s IN these potatoes?” (bitter)  Add kosher salt, and fresh ground pepper to taste. Then I press about 1 clove raw garlic per half. NOT the jarred minced stuff. Thin it with FF milk. The Boys can add calories later with their butter and gravy! But these mashers, even I can eat.
Adventures in the Kitchen with Michelle
Step 4
Step 5: Look at that yumminess! Now, I like my mashers lumpy with peels to eat with a fork – I don’t even own a ricer! That’s just me. I take the two batches from the mixer back into the big boiling pot and give it a turn by hand so the flavors are even.
Adventures in the Kitchen with Michelle
Step 5
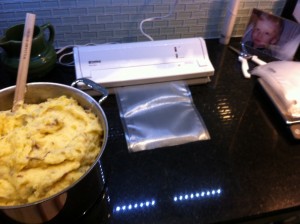
Step 6: Here’s the techno part of the deal – bagging. Seal up 10 bags, and fold the tops down.
Adventures in the Kitchen with Michelle
Step 6
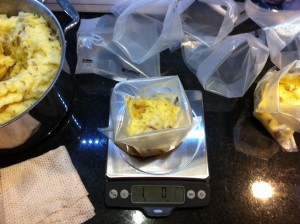
Step 7: I use a scale, you don’t have to. I put them into 1 lb bags. That’s one meal, or use 2 for Shepards Pie topping, 3 if there are guests for dinner.
 

Adventures in the Kitchen with Michelle
Step 7
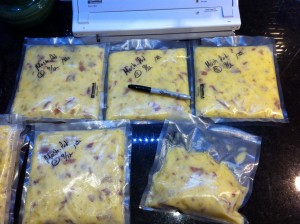
Step 8: Mark them and lay out flat. Get them into the fridge to cool before freezing.
 

Adventures in the Kitchen with Michelle
Step 8
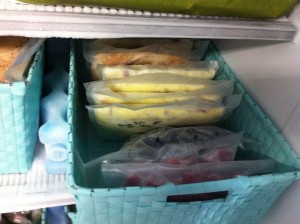
Step 9: Lay them flat to freeze hard, then stand up in storage. See, like little yummy books.
OK, now let’s thaw them….
 

Adventures in the Kitchen with Michelle
Step 9
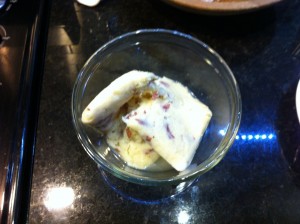
Step 10: This is a package of potatoes nearly 3 months old! After a few minutes in warm water, break it up into a bowl to microwave (do not drain off the water).
 

Adventures in the Kitchen with Michelle
Step 10
Step 11: After about 5 – 7min. Give them a stir, they will be watery, and grainy . Nuke them a little longer until the water is re-absorbed and they’re once again creamy, thick and sticky.
 

Adventures in the Kitchen with Michelle
Step 11
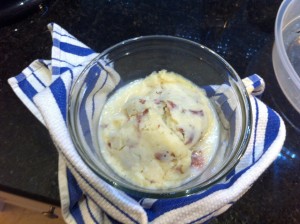
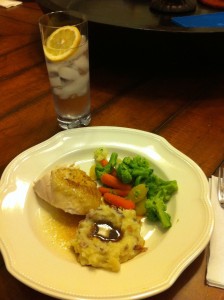
Finale: There they are, in all their glory. An addition to a healthy baked chicken dinner and took less time(to re-heat) and money than the store bought, chemical laced version! This seems like a lengthy process, but it really isn’t. I do up potatoes so infrequently and normally do other things while they’re boiling, etc. Speaking of money, I estimate the cost at about $1.50 per pound. With about 1/2 of the expense in the freezer bag. If you go with re-useable ones the cost is about .84cents per pound. Then you can save your disodium dihydrogen pyrophosphate allowance for tater-tots and McD’s fries!
Adventures in the Kitchen with Michelle
Finale