Adventures in the Kitchen with Michelle

Continuing the Al-La-Palooza week, here’s Michelle with an alternative to that leftover wedding cake!

So, Al-La-Paloosa is over and my favorite, and very healthy and very thin Auntie has brought me Wedding Cake leftovers. OMG – it’s like Night of the Living Dead Diet. It sit’s in it’s box and moans and growls and calls to me! It’s cut up in pieces, bleeding it’s orange buttercream trimmings…Nooooooo! OK, well maybe just a piece of the white cake…. AGH! Then it leaps from the container, completely unprovoked I might add, and lands on my face! UmmmNummNuuuuum! I can’t take it. I got so many compliments on my new slightly smaller waistline that I’m even more empowered to go further…then there’s that damned cake. Back! Back to the freezer I say! OK, where was I? Oh yea, my diet…that ginormous cake had three flavors, one of which was a dark chocolate with fudge filling. Complete chocolate overload – and I’m Jonsing bad! I need a fix…where’s my mixer?  Let’s go.
 
Chocolate Wedding Cake Zombie Apocalypse Cookie
 
Step 1: Gather the cast of characters, and light that fire (350 please)
 
1/2 Cup Truvia Baking Blend
1/2 Tbl Molasses
2 Tbl Butter, melted
1 Egg white
2 Tbl Applesauce
1 tsp Vanilla
1/2 Cup Whole Wheat Pastry Flour
1/2 Cup Dark Cocoa Powder
1/4 tsp Baking Soda
1/8 tsp Salt
1 tsp finely chopped walnuts
1/4 tsp Instant Espresso *
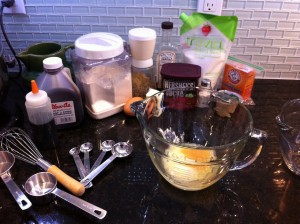
 

Adventures in the Kitchen with Michelle
Step 1
Step 2: You know the drill, mix the wet and then mix the dry and add the dry into the wet…but here’s the *optional flavor enhancer.
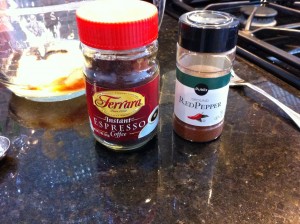
 

Adventures in the Kitchen with Michelle
Step 2
Step 3: I chose the espresso powder this time. Take the powder in a tiny pinch bowl or shot glass – I know you have one or two! – and add a couple drops of warm water to dissolve. Or you can bring the heat with a pinch of cayenne pepper! Oh yes it plays very well with chocolate! Careful, a little goes a long ways. (but not both together – we’re enhancing the flavor, not masking it)
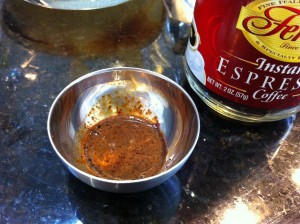
Adventures in the Kitchen with Michelle
Step 3
 
Step 4: A little dusting of walnuts. If you’re going the hot pepper route, use toasted pecans.
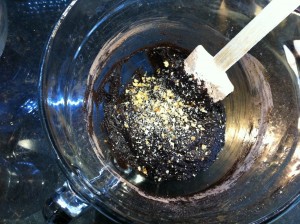
 

Adventures in the Kitchen with Michelle
Step 4
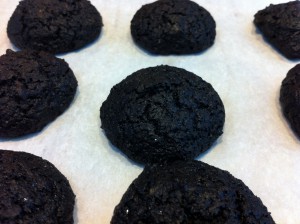
Step 5: You did heat the oven to 350, right. OK, use that small cookie scoop and get them in the oven for about 10 min. There they are…smells like a wounded diet. NOT !
 

Adventures in the Kitchen with Michelle
Step 5
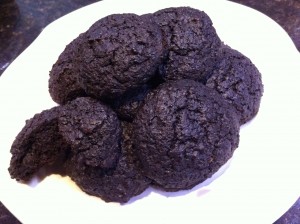
Step 6: Check that out! These are moist and soooo satisfying. A bit more calories than my other healthy numbers at 72 cal, but I’m competing against fudge filled cake! Unfortunately, mounded on a plate they resemble Godzilla’s head! Hmm, let’s fix that…
 

Adventures in the Kitchen with Michelle
Step 6
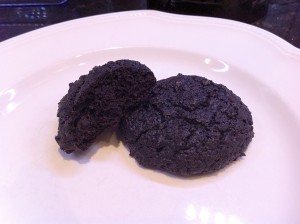
Step 7: That’s better. Like a soft Oreo…NO, I will not make icing for them!…but I may put one with a tiny bowl of vanilla frozen yogurt. Take That Wedding Cake Zombie!!! (doesn’t taste a thing like brains – please don’t ask me how I know that)
Adventures in the Kitchen with Michelle
Step 7

Ohhhhh, sounnds good!  Sorry about wedding cake leftovers but it couldn’t stay on my island any longer!  Everytime the toddler came through the kitchen she said “caaaaaake” which meant cake for breakfast, lunch, and dinner.  Also gave a hunk to my neighbor with four kids and she called me evil as Maggie and I walked by her house yesterday!  Just trying to be neighborly!

KT

Adventures in the Kitchen with Michelle

It’s Wednesday and Michelle is posting about yummy Creamy Italian Salad Dressing.


OK, who out there remembers ‘Creamy Italian’ salad dressing?! Yea, me too. Buying it these days is a whole other matter. I went to my local store thinking no sweat, there are tons of dressings out there. Many of which are lo-cal and I’m sure there’s a good one to try…try again. My store had only one, yes one creamy italian and it was full fat. The produce section has some nice creamy dressings, but not all of the ones made with yogurt make my List of Faves (kinda bitter). Back over in the dressing isle, there was an entire section devoted to Ranch dressings. Various versions, full fat, some fat, no fat, zesty, regular, on and on. And a bunch of ‘creamy’ dressings with ingredient list that read like a Monsanto stockholders report. It seems the Creamy Italian has apparently fallen out of fashion. ‘Sigh’.  You know what came next – you bettcha – I hit The Pantry and came up with one of my own (with a little help, of course).
 
The Recipe:
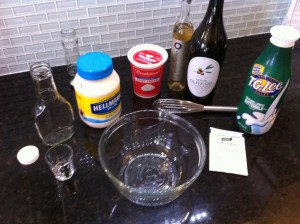
1 Envelope Good Season Italian Dressing Mix
What, did you think I actually made the spice mix too! – Silly! Now if I was Martha…which I’m not…I’d be all, “…and I went out to my herb garden and picked some oregano, then hung it out to dry in the potting shed. After 3 weeks it was lovely and ready for…” 3 WEEKS!? Fast Forward – ok, where was I? Oh, yes Dressing Mix – if you ask me nice, I’ll post a ‘Copycat version’ ’cause they’re not giving that GS dressing mix away either. (or is it GD dressing mix! ouch)
 
1 Tbl Olive Oil (the good stuff)
1 Tbl mild Wine Vinegar (I used Champagne, White is fine too)
2 Tbl Lo-Fat Mayonnaise
1/4 Cup Buttermilk (lo-Fat)
4 Tbl Fat-Free Milk
1 Tbl Reduced Fat Sour Cream


Creamy Italian Salad Dressing
Step 1
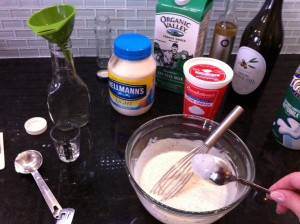
Next, whisk it all together. This dressing needs the olive oil and the vinegar or else it’s just a weird version of Ranch, and I can get that at the store. Check the consistency. A good creamy dressing and any gravy/sauce should coat the back of a spoon. Note the creamy ingredients, fat-free is for milk ONLY. Fat-Free mayo and sour cream are horrible and your dressing will be too.
Creamy Italian Salad Dressing
Step 2
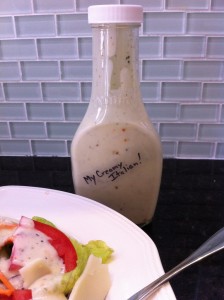
Now, funnel into an 8oz bottle. You know I never toss a perfectly good glass bottle…ok, maybe not ‘never’. Label and enjoy! (but remember to shake it, because the mayo will separate a bit after a few days)
Creamy Italian Salad Dressing
Step 3
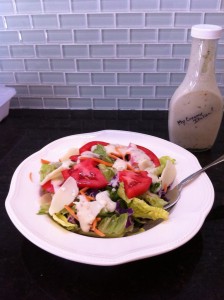
And do you know why you can enjoy it so much? Because it’s only 33 calories and 2.9g of fat for 2 Tbl, and cost less than the $1.49 avg for 8oz. bottle ! Yea, baby – believe it!   
Creamy Italian Salad Dressing
Yum!
Buon appetito!

Adventures in the Kitchen with Michelle

Yay!  Michelle’s back in the kitchen and whipping up a bunch of healthy and light pumpkin cookies.
Still feels like summer even with the calendar saying that it’s October 3rd.  But that doesn’t stop me from giving the green light to all things associated with our upcoming cooler season. That said, I am a self proclaimed “pumpkin freak” ! I love all things pumpkin, from candles to pies to throw-pillow slipcovers! I am sooooo ready for Fall I can’t stand it. When Will asked if I’d make Pumpkin Cookies one day last week I couldn’t run to the pantry fast enough. I made not one, but two batches (ok, I made three, but one turned out to be like dog biscuits). For the guys, I made a regular recipe of Pumpkin Cookies, and for me I changed it up and made them 1/2 the calories and a tiny bit o’ fat version. I’m not thinking The Great Pumpkin will be showing up at my house this year,…because he knows I’ll just make cookies out of him. So, Linus, you’ll have to use that blanket as a crying towel ! (bwah-ha-ha-haaaaa!) ‘Cause we’re bakin’ cookies!
 
Michelle’s Pumpkin Cookies:
 
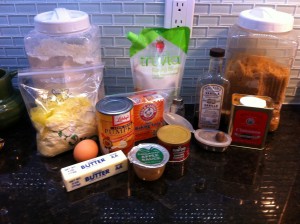
The Cast…
1 Cup Whole Wheat Pastry Flour (found it cheapest at the health food store bulk section)
1/2 tsp Baking Soda
1/2 tsp Baking Powder
1/2 tsp Cinnamon
1/4 tsp Nutmeg
1/4 tsp Salt
1/3 Cup Truvia Baking Blend
2 Tbl. Light Brown Sugar
3 Tbl Applesauce
2 Tbl Butter, melted
2/3 Cup Canned Pumpkin
1 Egg White*
1/2 tsp Vanilla
 
Glaze is optional.
Adventures in the Kitchen with Michelle
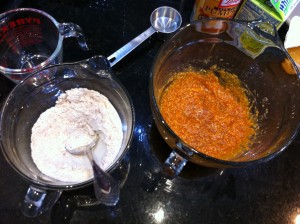
Step 1: Mix the dry, mix the wet separately.
Adventures in the Kitchen with Michelle
Step 1
 *Note: The cast lists an egg white. I used a real egg white instead of the carton ‘Egg Whites’ and it made a big difference – I don’t know why, but it did. So, I’ll be saving those carton Just Whites for the morning omelette and feeding that extra egg yolk to the Boys. We don’t just toss those yolks – waste not! Here’s another thing I’ve discovered. Eggs are not the size they used to be. Along with everything else, the price goes up and size goes down. I don’t care what the egg people say, those cartons of large eggs lie! I buy Jumbo eggs and use them as ‘large’. Not having the right amount of egg will ruin a baked good. Yes, I buy brown eggs too (Publix Jumbo Brown). They taste better (to me). Each one’s a bit different. One shell has more freckles, one’s shell is thicker, maybe ones misshapen, or smaller, one yolk stands up higher… that means they’re not standard factory fed chickens. The ones in the cheap cartons, where they’re labeled ‘large’, but are so small the move inside the carton wells. They’re white and the shells are nearly see-through. Some even crumble as you break them, and have pale, flat yolks – you’ve seen ’em. Don’t bother – Just what did they feed those animals? I will say that the fancy carton “Vegetarian Fed, Omega-3,…etc.” don’t taste any better to me, but I feel better about eating them. Now, if you know where to get some real farm eggs…run, don’t walk and score some of those golden yolks for a Sunday Sunny-Side Up! Today, though, just try and use an extra-large egg white.
 
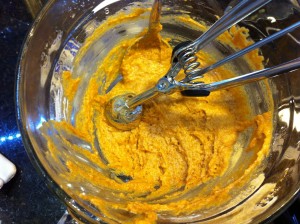
Step 2: Get them all together and get out that cookie scoop. What do you mean you don’t have one yet?! Ugh…ok, or a soup spoon. Heat that oven to 350deg.
 

Adventures in the Kitchen with Michelle
Step 2
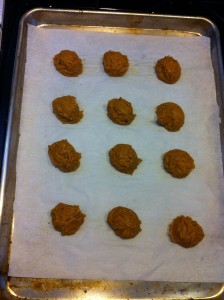
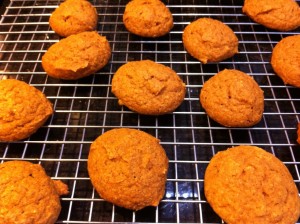
Step 3: Mound them up on the cookies sheets and bake 8 – 10 minutes.
Adventures in the Kitchen with Michelle
Step 3
 Step 4: There they are! (I’ll miss the Great Pumpkin for sure) Can you spot the full-fat version? Yup, it’s the front right hand one.
Adventures in the Kitchen with Michelle
Step 4
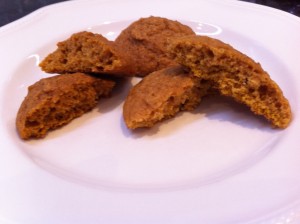
 Step 5: So, here’s the texture difference…yeah, I didn’t see any either.
 

Adventures in the Kitchen with Michelle
Step 5
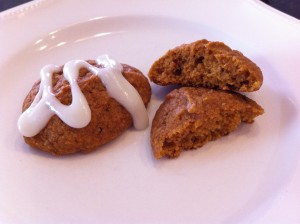
Finale: A little cream cheese glaze and that’s it! The guys love them too.
 

Adventures in the Kitchen with Michelle
Finale
My glaze: 3/4 cup Powdered Sugar, 4oz. Neufchatel Cheese (lo-fat cream cheese)softened, 1/4 tsp vanilla, 1/2 tsp lemon zest* – beat together. Thin as needed with FF Milk.You can hold back on the lemon and add to taste. Or, use it thick as icing instead. Tasty, and notice – no buttah. 
 
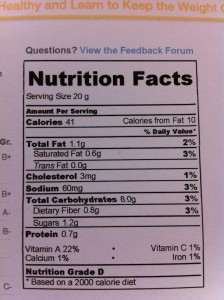
Here’s the proof. Makes 24 cookies at 41 cal each(without glaze) Not to mention the ingredients are good for you – the Great Pumpkin wouldn’t lie about that. No, I didn’t harvest The Great Pumpkin for cookies – I’m saving him for Pumpkin Roll – but that’s another blog!
Adventures in the Kitchen with Michelle
Thanks Michelle!  I actually got to taste these cookies, along with a few other varieties that Michelle had just happened to pull together Saturday afternoon.  The cookies were still warm in the container that she brought with her!  Courtney, a small person that was here last weekend, and I had to taste test all the varieties.  All Yum!  Now I’m being very good and having one cookie a day!  Gotta make sure I fit into my dress at the Al-La-Palooza!
KT