iPad Case

I’m headed out on a trip this weekend!  Terry and Maggie will be fending for themselves–probably eating pizza while watching a golf tournament.  I finally get to use the overnight bag that I made several weeks ago.  You can check it out here.

So I decided I needed to make an iPad case to match my overnight bag.  Won’t that impress my fellow passengers? Didn’t take long since I have everything I need and had already made it before.  What took long was documenting the steps just in case somebody else would like to make one.  Writing clear instructions is much more difficult than sewing! (Not saying that these are clear instructions.)

So, for those whose eyes roll up into their heads when they see my sewing directions,  here’s a pretty picture of my new lovely iPad case and matching overnight bag.  So pretty.

iPad Case

First you’ll need 2 different fabrics–one for the outer and another for lining.  I used an upholstery weight fabric that would be suitable for pillows from Premier Prints for the outer fabric. The last time I made the case I used denim for the lining but my heavy duty sewing machine could barely get through all the layers, so this time I used muslin for the lining. You will also need fleece and Velcro.

Cut the outer fabric, lining, and fleece 12 1/2 “ wide by 24” long. 

iPad Case

Baste wrong side of outer fabric to fleece, ½” from all edges.  Trim fleece.

With right sides together, stitch lining to outer fabric, leaving about 4” for turning.

Trim corners .

Turn fabric right side out.

Press.

Topstitch ¼” from edge on one of the narrow ends, this will be the top of the interior pocket.

iPad Case

Cut 9 ½” of Velcro

Stitch one side of Velcro,  1” from all edges, on the lining side, opposite end that you just top stitched.

Stitch the other side of the Velcro on the right side of the outer fabric, 3” from the edge that you top stitched.

Turn the topstitch side up 8 ½” for the interior pocket.

iPad Case

Topstitch ½” from all edges, make sure that you catch in the section you left open for turning.

iPad Case

Easy Peasy.

While this gives my iPad a little bit of protection, it’s mostly for pretty.  I wouldn’t drop it and expect the iPad to survive!  That’s just my little disclaimer!

iPad Case


Adventures in the Kitchen with Michelle, Lo-Sugar Healthy Strawberry Jam

Strawberries are a big deal here in central Florida. During January, February and most of March you can find them everywhere. Early berries, I find, are rarely very good. Not to mention pricey! The road-side sellers asked $25.00 for a flat this year…what!!? I’ll wait, thank you. Patience is rewarded in this. After the season is in full swing people get tired of strawberry everything – pies, scones, smoothies,…. And the berries get a bit smaller and not quite as pretty. That’s perfect. Because I know that those gigantic berries that they advertise as being sooooo wonderful are not what they seem. Sure, they’re good for dipping in chocolate – and that’s about it. Like grocery store tomatoes, they lack substance and flavor. Oh, they look photo perfect, but take a bite and they’re white inside, sometimes even hollow. Like a beauty queen that can’t add. NEXT! You see, the strawberry, we sometimes forget, started out as tasty little wild things. Over the years farmers have bred them to be more marketable and easier to deal with. To do that you have to give something up, like the tomatoes, and other crops, flavor is the first thing to go. Oversized, camera-ready firm flesh – tastes like sawdust. If you shop Whole Foods, you’ll notice the organic ones don’t look like that. But it’s too far to drive, and too much money. So, I wait. Smaller berries, later in the season are just sweeter (it seems), and because they spoil faster the market sellers need to move them fast which equals cheaper. This past Monday I picked up a 1/2 flat of the super smelling little lovelies at the farmers market for 5 bucks ! I came home, cleaned them up and the next day made some fabulous jam. I even have some left to slice up over my frozen yogurt treats. What a bargain! Three quarts of lo–sugar healthy jam for a little more than a 5 spot – yeah baby. Oh, you want to know how… OK, you’ve seen me do this all before and I’ve learned a new trick to share. So go and get some sweeties and meet me in the kitchen.

Adventures in the Kitchen with Michelle

Lo-Sugar Healthy Strawberry Jam

First you need jars – whatever size you like and get them clean and sterilized. My dishwasher does a good job for me. Then I have a pot of boiling water in the stove for the funnel and scoop. I’ve been sterilizing in the oven as of late, which is great for Ball jars. Although, I have found that plastic handled items don’t exactly ‘sterilize’ themselves at 250deg in the oven – they kinda melt. Not so good.

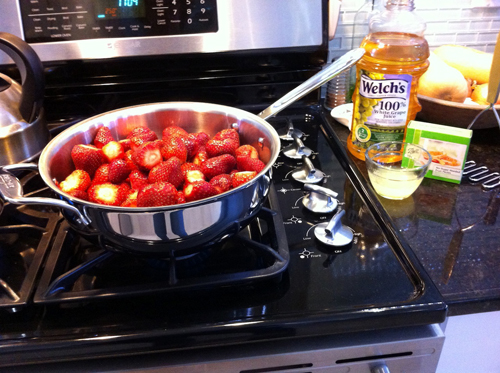
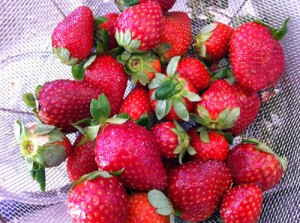
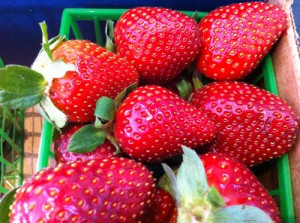
Now, you did go and get some great berries, yes? See, these are perfect Plant City Florida Strawberries. Not too big, perfect shape, not white and green under the tops. Maybe a soft spot here and there. I think I had two or three over-ripe berries to trash in the whole batch.

OK, what else:

Adventures in the Kitchen with Michelle

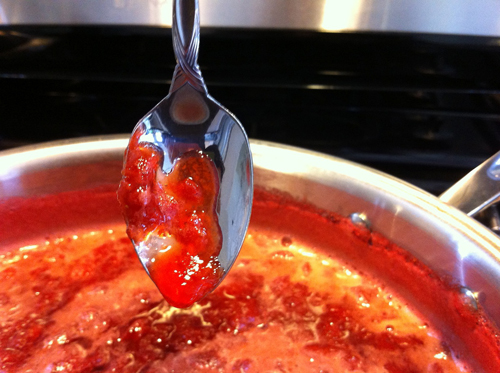
Get some spoons and set them in the freezer. I’ll tell you why later.

And heat your oven to 250 deg.

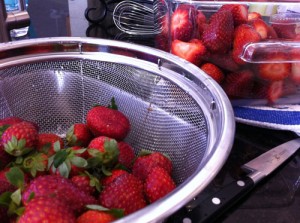
Step 1: Stop drooling over those things and get ’em cleaned already! (but they’re so cute)

Adventures in the Kitchen with Michelle

Step 2: Cut off the tops and measure out about 4 lb. of berries. For me it worked out to about 4-1/2 of the little green baskets. Rinse them well and rub off some of the seeds from the outside. No – you do not need some fancy huller tool either.

Adventures in the Kitchen with Michelle

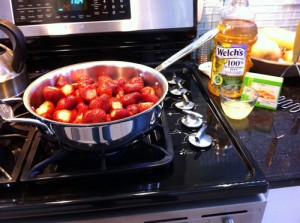
Step 3: Now get your 4 quart pan or pot. Slice the berries coarsely into the pot. Get the grape juice and berries started on low.

Adventures in the Kitchen with Michelle

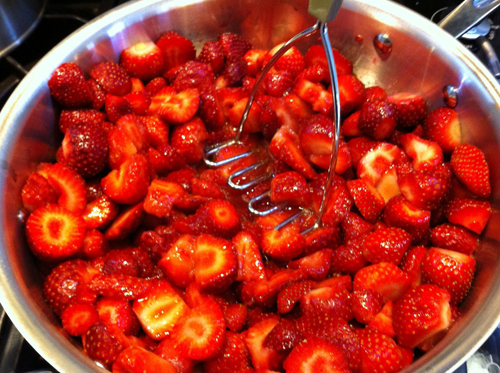
Step 4: Since these aren’t cranberries or blueberries, they’ll need some help breaking down their juiciness. The potato masher works great for this.

Adventures in the Kitchen with Michelle

Step 5: Oooo, there’s a nice mash. Now add the pectin, lemon juice, and sweeteners. You can add more or less as you like. Remember it’s jam here, not just a jar of smashed fruit.

Adventures in the Kitchen with Michelle

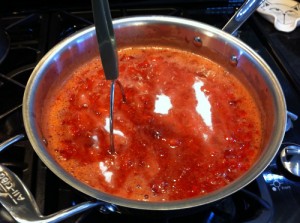
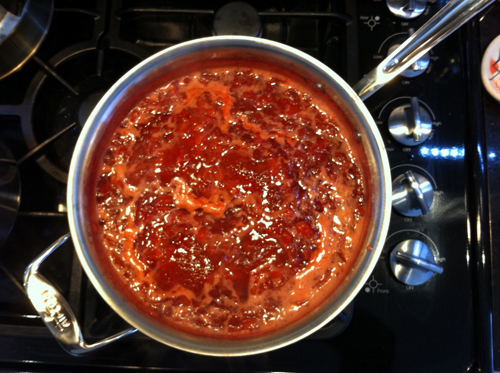
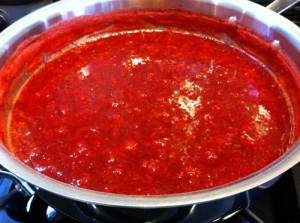
Step 6: Let it boil (simmer) for about 20 min or so, stirring often. Not too high or it’ll burn or boil over. As it is there’ll be foam to scrape off with a rolling boil. (As I took this photo, I thought, you know that whole over-head shot is so nuevo,…but what happens when I drop my favorite toy into the sweet bubbling lava!!!? – Hmmm, you may not be seeing many more of those shots)

Adventures in the Kitchen with Michelle

Step 7: OK, remember those spoons. Get one and take a test dip and see if the berries have become jam or still thick sweet juice. This is good. It actually stayed on the spoon long enough to get a photo. Which is way longer than an actual ‘test’ should take.

Adventures in the Kitchen with Michelle

Step 8: You’ll want to skim off the foam – it doesn’t look very tasty.

Adventures in the Kitchen with Michelle

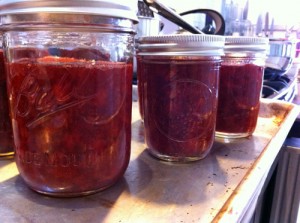
Step 9: Get those sterilized jars filled. And lid them ‘finger tight’.

Adventures in the Kitchen with Michelle

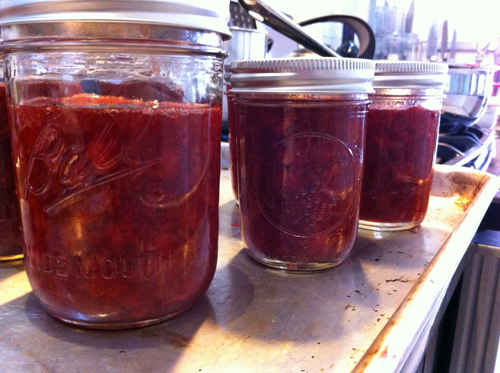
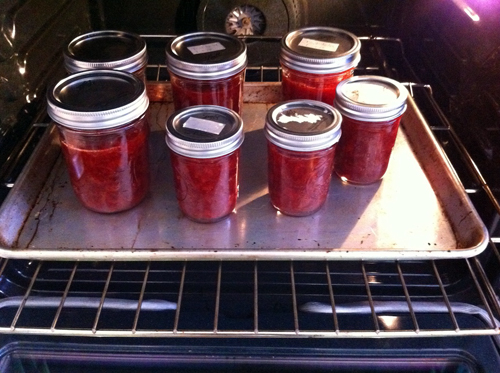
Step 10: Place on a cookie sheet and get them in the oven for 30 min. No pot of scaling water this time. This is the new trick I learned – see what happens when you read books! Yes, that’s a motley crew of jars with reused lids, but these aren’t give–aways. These are aaaallll mine!!

Adventures in the Kitchen with Michelle

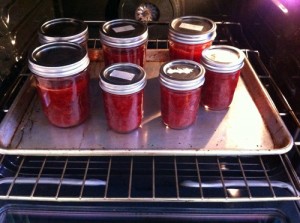
Step 11: When they’re out, listen for the pop. Look for the dimple to ensure a perfect seal. Even the reused lids worked. As they cooled I noticed that mine wanted to separate a bit on the bottom. I just gently rolled each one and they continued to cool and jelled just fine.

Adventures in the Kitchen with Michelle

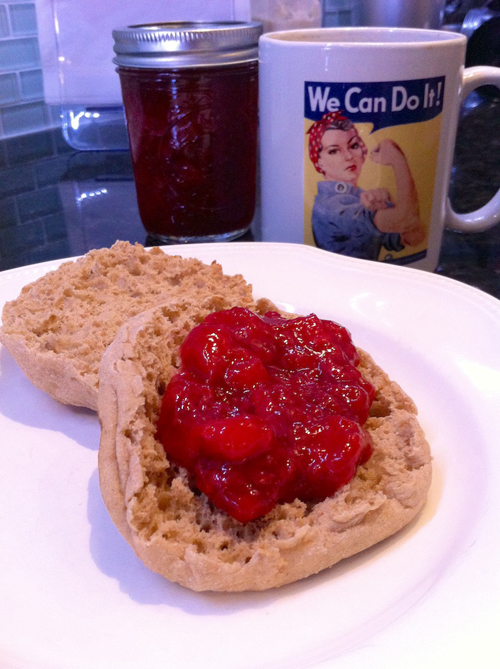
Step 12: After they cool, the next morning you can have healthy strawberry jam. Homemade! So easy, even my coffee mug agree’s “We Can Do It!” – and so can you.

Finalex

The Great Chicken Wing Quest

I really try to put a positive spin on all my adventures, especially ones I do for the Chronicle Online.  If you read my post last week, you may have thought that it was rather bland.  I’m not a restaurant critic so I try to keep my personal opinions to myself—at least on the Chronicle!

My Chronicle Online Blog post was about our quest for the best chicken wing place in Citrus County.  Our first stop was the Cove Pub and Grub in Inverness.  I had been to the Cove many years ago, before they built the new one.  I remember having a great time. 

On this visit we went there with two other couples.  We’d had a fun day of checking out Lake Pana and all its fish camps, bars and restaurants.  The Cove was supposed to be the highlight of the tour.  We got there about 3 pm and we were practically the only ones in the place.  The server acted like she was doing us a favor by waiting on us.  We may have been on the loud side because we were all very happy, but hey, this is a bar!  Not fine dining. 

Most of us ordered wings, fries, and beer.  How hard can that be?  It took forever for the food to come out, there wasn’t much there, and it really wasn’t all that great.  When another group of six came in, they were seated right next to us.  Really?  This place is huge. 

Quest for the Perfect Chicken Wing Place
The Cove

We  joked with the other group (they had cake so we wanted to be friends).  One of the women resembled Paula Deen so everyone started calling her that and she was funny until she suddenly asked me my political affilitation.  When I replied, this woman turned UGLY!  I’m not putting her picture here because I’m afraid she’ll track me down and set fire to Perfect.   I have fears. 

A few weeks later Terry and I went to Lollygaggers on 19 just south of Crystal River.  We’ve been there a few times and it’s a really nice sports bar with a lot of TVs.  Although we made sure we went after the lunch rush, the place was slammed.  And there was only one server besides the bartender.  She told us that they stay busy until 3 pm.  Although it was crazy in there, the server was pleasant and quickly took our orders.  It took a while for our wings to show up but I expected that since that’s got to be a little kitchen!  The wings were really good and our one order of fries was huge.  I would go back there again—just a little later in the day. 

Quest for the Perfect Chicken Wing Place
Yum, Wings at Lollygagers
Quest for the Perfect Chicken Wing Place
Lollygaggers

Last Thursday we finally made it to Coaches in downtown Inverness.  We have walked by this restaurant many times but never went in because the windows are all black–I really couldn’t tell what was in there.  But once we went through the doors, we were pleasantly surprised.  It’s very light and bright, has two pool tables, and 40 beers on draft!  And our server, Christine, was great.  There weren’t many other diners but we didn’t get there until about 2 pm.  I’m assuming most of their customers are from the courthouse and local businesses and lunch hour was long over.  Christine noticed my camera right away and after we had eaten our wings and drank our beer, we told her about the blog.  She was so sweet and let me take her picture.  In the future, when we are downtown Inverness, we will be going to Coaches.  And I think I’ll be taking Andrew, our future son-in-law, when he’s here in a few weeks.  40 BEERS ON DRAFT!

Quest for the Perfect Chicken Wing Place
Coaches
Quest for the Perfect Chicken Wing Place
Christine, Best Server Ever!

And the quest continues…..