Adventures in the Kitchen with Michelle
Michelle and I have decided to do a couple of days a week of posts dedicated to healthy living. On Tuesdays, I’ll be doing a post on something fitness, diet related, or maybe try to cook without burning.
Michelle loves to bake and cook and does it quite well. She is very knowledgeable about healthy ingredients and how to make them work together and will be posting her healthy living ideas on Wednesdays. This week she has taken the original recipe from King Arthur Flour’s website, which was already full of good stuff and made it even better.
You can find the original recipe here: http://www.kingarthurflour.com/recipes/take-10-super-cookies-recipe.
And here’s Michelle with her variations:
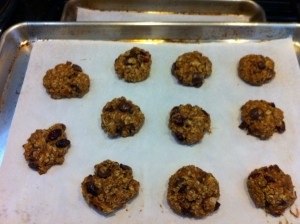
It was not a good day for the ‘Burnt Food Gods’ – they’ll just have to wait. Since it’s let’s-be-healthy month or year, I found this cookie recipe on one of my favorite cooking sites, King Arthur Flour. Take 10 Super Cookies have 10 incredible ingredients for fighting cancer/disease http://www.kingarthurflour.com/recipes/take-10-super-cookies-recipe . And, as you know, I can’t leave anything alone and I changed up a couple of ingredients. That also means that they ended up not looking like the picture perfect cookies from the website. Anyway – let’s get baking.
Step 1: Gather the goodies together. Shred up some baby carrots (very moist). This is a one-bowl recipe (I like less mess). I exchanged Whey Low Gold for the brown sugar, and Coconut Oil for Canola Oil (because I don’t like canola oil taste in cookies). This brings the calories down slightly, but make them not have any spread when they’re baked.
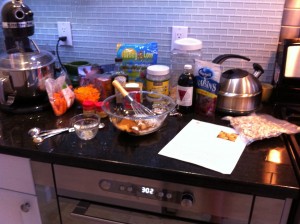
Step 2: Add in and mix the ‘small piece’ ingredients.
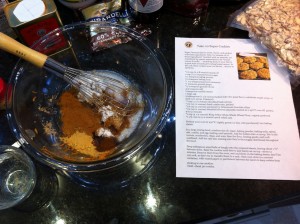
Step 3: Fold in the chunky bits. I used the Ghiradelli 60% chocolate chips, cause they’re better for you. I didn’t toast the almonds because I’m l a z y. Also, I actually have Boiled Cider that the recipe calls for ( http://www.kingarthurflour.com/shop/items/boiled-cider-1-pint ). It’s like a thick apple syrup. It’s worth having – your apple pies will never be the same! I think I need to find a way to make an Appletini with it. Yummmm, but that’s another Blog.
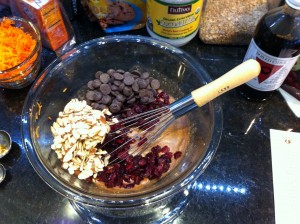
Step 4: Fold in the oats last.
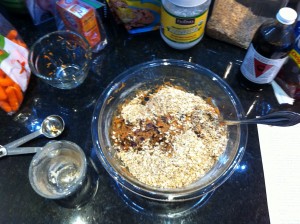
Step 5: Did you heat that oven? Get out your cookie sheets and parchment paper. And…your small ice cream scoop. It makes perfect size cookies. (soooo Martha)
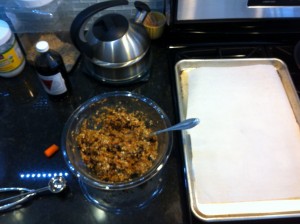
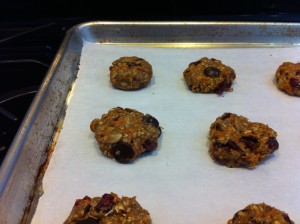
Step 6: Since I exchanged the oil and sugar, you’ll need to form the cookies prior to baking. If you don’t exchange, just scoop them onto the sheets like most any other oatmeal cookie, and they’ll be lovely. But we’re all on a diet so, get ready to get sticky!
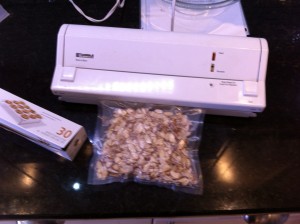
Step 7: While they’re baking, clean up and put away the almonds. Money Saving Tip: I buy nuts at warehouse clubs because they’re cheaper that way. I then use my Food Saver to keep them airtight for months! I’ve had this little gem for more years than I can count – it’s paid for itself over and over.
Step 8: Here’s the little Take-10 Super Cookie nuggets! These are way too healthy for Christmas Cookie Day, but are great crumbled into greek yogurt. Also over vanilla fro-yo with a drizzle of that Boiled Cider! Jon and William actually really like them, Will’s little buddies, not so much.

Thanks Michelle for another yummy recipe. Looks like Will is really suffering while testing out your latest batch! Looking forward to next weeks post!
Eat to Live Part 2
Oh My God! (OMG for those that only speak Internet) I am so glad it’s Tuesday. No more vegan in my life! Last week I posted that I was starting a vegan diet based on the “Eat to Live” plan. https://ktgreendesign.com//eat-to-live/ Yeah, I said I could do anything for seven days, but life is too short to eliminate cheese.
I did pretty well sticking to vegan. (I had eggs on Sunday because we always have eggs on Sunday. Tradition is more important than diet–especially on Father’s Day!) We eat a lot of broccoli and cauliflower here already and I added peppers, summer squash, carrots, and mushrooms . A salad for lunch every day of spinach, romaine and garbanzo or black beans. Smoothies for breakfast with soy milk and fruit. Another smoothie at night for dessert with silken tofu, cocoa powder, frozen black cherries and soy milk.
But forget that whole “Eat to Live” diet plan. Dr. Oz, you are wrong. This crash diet sucks. Some of the things that Dr. Fuhrman, the doctor behind the plan, recommends avoiding are dairy products, meat, processed foods, sweetener–artificial or real, salt, coffee and alcohol. My problem with that list is that I really like coffee and happy hour starts at 5.
The good doctor also suggests you read his entire 716 page book before starting the diet. I still have to finish 1 1/2 books of “Fifty Shades of Bad Writing” so I just skimmed his book. Four fruit servings a day and unlimited vegetables. The main source of protein are beans. Agave nectar is really bad! Also, no cheese–did I already mention that?
But after a week of my revised “Eat to Live”/vegan diet plan, I did lose three pounds. By limiting Maggie’s treats and leftovers (she didn’t go vegan), she lost one pound. Two more to go for both of us!
I will continue on a less restricted diet for another week. Mostly vegetarian, I’ll try to avoid processed food, and will continue to cut back on the salt. I don’t think I can cut back anymore on Maggie. She already spends a good part of her day crying at the pantry door. I’ll let you know how we do next Tuesday!


