Adventures in the Kitchen with Michelle, Pickles!

Happy End of Summer! It’s been a long, hot one, and it’s still H O T !A few weeks ago there was a family adventure to the cooler climes in North Dakota. One of the souvenirs brought back were some home grown cucumbers. A whole bunch of them. These are not the kind you find in the grocery stores, all waxy or wrapped in plastic. No, these were garden fresh with crunchy, prickly skins – delicious.

When life gives you cucumbers – make pickles! And since we’ll be minus our North Dakota contingency, these garden gifts needed to be pickles for our family Labor Day burger/bbq fest! I can’t even begin to tell you how many recipes there are on the Net for pickles. People have been pickling things before there was even a thought of a cookbook or a fridge. I’ve been enthralled with my latest cookbook find, ‘It’s All Good’ by Gwyneth Paltrow and have been making her version of Bread & Butter pickles. They are fabulous. Not too sweet and not much vinegar harshness. Eat ’em right out of the jar good! As we all know there are rules on that whole copyright thing, so you find your own mix of spices and follow along.

DIY Bread & Butter Pickles

Step 1:

Get some garden goodness together of a pound of cukes and a small onion. In the past, I’ve used the English (seedless) cucumbers. They worked very well, and were easy to find year round. No, I did not use the whole gigantic onion from the photo! Then find your favorite spice blend. This one includes turmeric, which is so good for you. The recipe I made also used honey instead of sugar, and white wine vinegar which made it milder.

Adventures in the Kitchen with Michelle, Pickles!

Step 2:

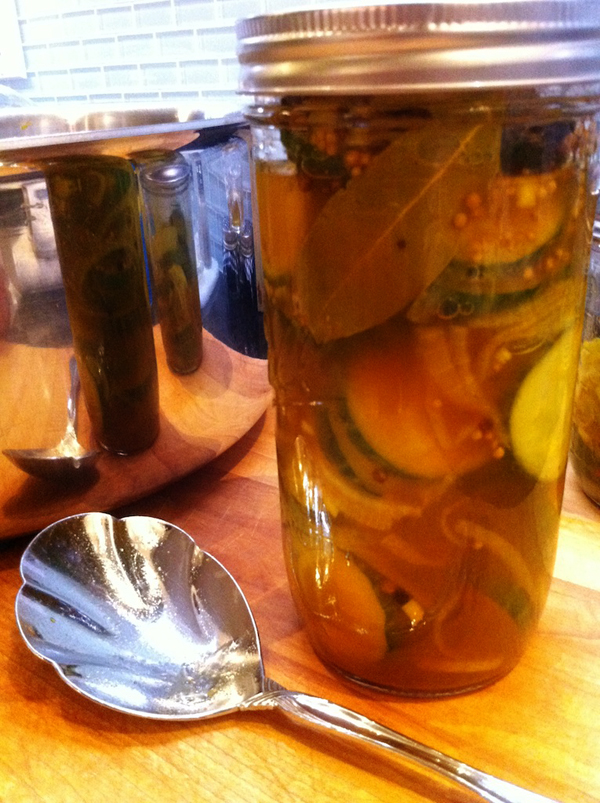
Slice up the cucumbers and onion and float in some ice water with a bit of sea salt for about 2 hours. You’ll need time to contemplate your storage vessel anyway. So, go clean up an old Mayo jar (I know you’ve got one somewhere) or one of those Ball canning jars that are good for storing everything from pickles to extra hardware from that piece of Ikea furniture you put together last week! Oh, yea, I know you saved that leftover bag of screws and bits….cause I know I do.

Adventures in the Kitchen with Michelle, Pickles!

Step 3:

OK, so the 2 hour mark is creeping up and it’s time to get serious. Get a big pot, like a dutch oven, put in the sweetener, vinegar and spices and bring up to a boil to get the flavors to come together. There isn’t much liquid so this’ll happen quick. Then turn it off so as not to boil away all the liquid while you go and get the real stars of the show added.

Adventures in the Kitchen with Michelle, Pickles!

Step 4:

Drain the veggies and add to the pan.

Adventures in the Kitchen with Michelle, Pickles!

Step 5:

This is where you discover why you needed such a big bottomed pot for just a bit of stuff. Get the heat back on, bring to a boil and stir the cukes around. The extra surface area means that everybody gets a turn in the flavor broth. Just a minute, this is all very quick. Then turn off the heat.

Adventures in the Kitchen with Michelle, Pickles!

Step 6:

That’s it! Seriously, you can make pickles in minutes (well, after the icy swim). Get them jarred and pour the liquid in. Pack those babies in the fridge and look for some yummy lunch to have them with. No, I do not do pickles at breakfast.

Adventures in the Kitchen with Michelle, Pickles!

Finale:

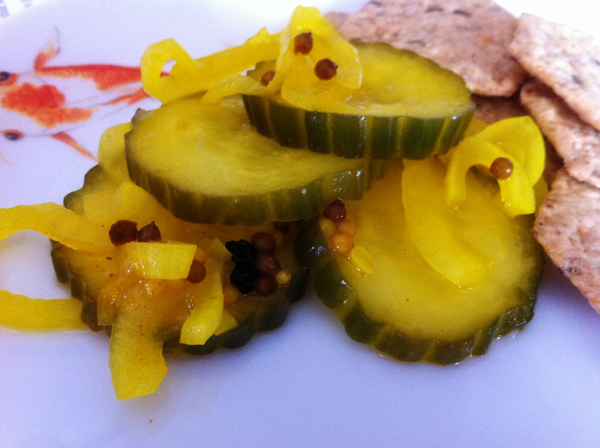
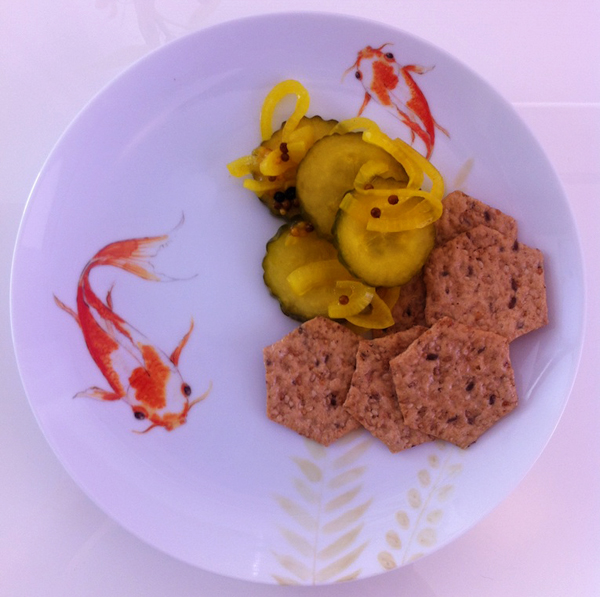
I ate mine with some multi-grain crackers for an afternoon snack. I’d never eat supermarket pickles like that. OK, maybe I would those tiny kosher dills from the fridge section. But factory made Bread & Butters are just soooooo strong, you wonder if there’s a vegetable in there anywhere. These are crunchy, and mild, and won’t last long.

Adventures in the Kitchen with Michelle, Pickles!

Adventures in the Kitchen with Michelle, Pickles!

Adventures in the Kitchen with Michelle, Pickles!

Enjoy!

Michelle

Adventures in the Kitchen with Michelle, Red Peppers

This week I found myself up to my armpits in Red Peppers. Ahhhh – summer. Yes, most of the time they’re incredibly expensive, but this was a bumper crop that had to go. Normally, I just chop and freeze them. They’re great to add into a red sauce or salsa as an unexpected flavor. But there were just too many. Even after freezing several bags of them chopped, I still had 5 left. Now what? Hmm, you know, I love a roasted red pepper. I get them in jars and keep them on hand to add into hummus, and salads. Not to mention vegetarian lasagne is simply not the same without them. How hard could it be? Well, apparently, not very! Watch and learn my friends…

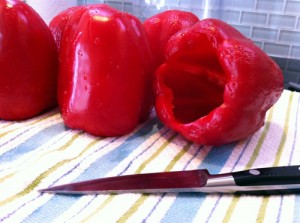
Step 1: First wash up and core your victims. Set them aside to dry.

Adventures in the Kitchen with Michelle, Red Peppers

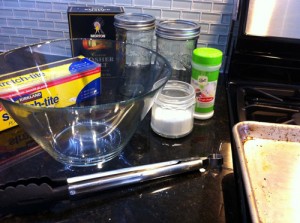
Step 2: Now gather the rest of the equipment you’ll be needing.

Adventures in the Kitchen with Michelle, Red Peppers

There are several ways to do this. Most rub them with olive oil and roast them in the oven. Some Put them on the grill outside and them soak them in jars filled with olive oil and sometimes a few garlic cloves. What I wanted was what I was used to using from the store. Those are suspended in a water solution. No, not just water. I guessed a bit and came up with the following.

In a pan, place 4 cups of water about 3/4 Tablespoon of both salt and sugar. Bring this to a boil. Later, just before jarring, I added in about a 1/2 tsp of Citric Acid (or in my case I had Fruit Fresh from my canning expeditions).

Now, get the oven on a preheat to 250deg and sterilize your jars. And start to roast those peppers.

Step 3:

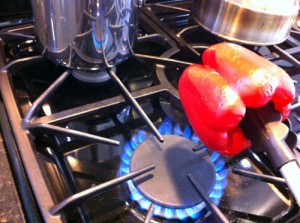
If you’re the official marshmallow roaster in your family, then you’re sure to be the head pepper blisterer too. Light the fire and turn. Yes, they’ll sizzle and pop. Don’t be scared!

Adventures in the Kitchen with Michelle, Red Peppers

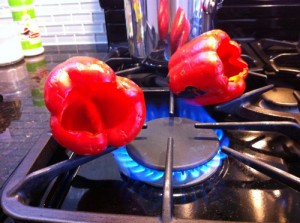
Step 3a: Ahh, see, nice black spots of char. Oh, you don’t like burnt marshmallows? Well, whatever – crank that flame and burn, baby, burn!

Adventures in the Kitchen with Michelle, Red Peppers

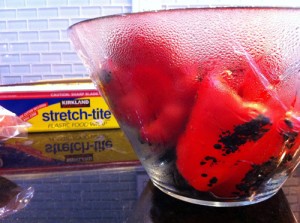
Step 4: Once you’re done, get them into a bowl and cover with plastic wrap. Careful, they’ll burn right thru if they’re flaming toasty. Which is why I don’t really recommend the plastic bag method, unless they’re already starting to cool. Either way, the steam will help peel away the unpleasant bits of charred skin.

Adventures in the Kitchen with Michelle, Red Peppers

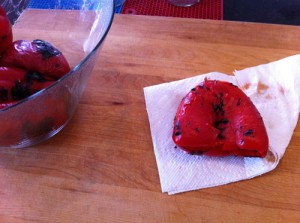
Step 5: Get them out and rub with a paper towel to remove some of the skin. Not all of it, that black stuff is flavah! Now cut them into quarters and lay in the jar. I got 2 1/2 peppers in each.

Adventures in the Kitchen with Michelle, Red Peppers

Step 6: OK, now we jar. I like the not-quite-a-quart jars, as they’re large, fit great in the fridge and just look cool. Slowly add the water mixture. I do this 1/2 cup at a time.

Adventures in the Kitchen with Michelle, Red Peppers

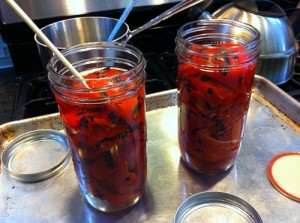
Step 7: I use a bamboo skewer to release some of the air bubbles I could see and continued to fill with the water mixture. Only fill it to the jar’s ‘shoulder’, under the threads.

Adventures in the Kitchen with Michelle, Red Peppers

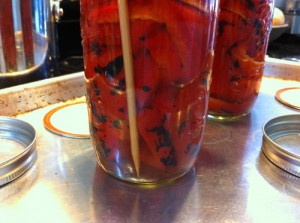
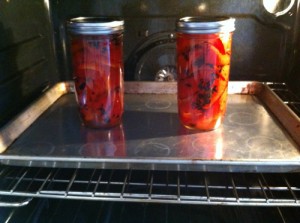
Step 8: Now lid and ‘process’ in the oven for 30 min. Those lids will pop – you’ll see.

Adventures in the Kitchen with Michelle, Red Peppers

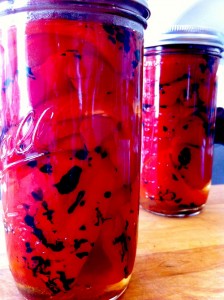
Finale: There, something new to do with all those peppers. They’re healthy, not swimming in olive oil, and a money saver too. Those little red devils can set you back nearly five bucks for a 16oz jar! No way! – Yes way! But these big jars hold 24oz. – cheeeep! And later when you use them, put the unused peppers into a small freezer bag and lay flat in the freezer. Because they go bad quickly. Then you can just break off what you need. Look at that, and you were just going to toss those peppers…oh-no, not on my watch.

Adventures in the Kitchen with Michelle, Red Peppers

Michelle @ www.badzoot.com

Adventures in the Kitchen with Michelle, Make your own Yogurt!

I am a fan of yogurt. Surprise! Yes, my Mom started this love affair when I was very young. She had one of these Salton yogurt makers. We’d wait for that tangy custardy stuff not knowing that if we’d breathe a word of it at school we’d be laughed out of the lunchroom. “You eat spoiled milk – yuck! Weirdo!” Yeah, ok – whatever. I kept quiet and continued to ladle on the honey and down that creamy goodness. Then I got a little older and things changed. As I moved on I bought yogurt at the store. Suddenly there was a ton of it – but my Foodie Mom warned me that this was a processed version and was filled with factory tricks using sugar and cheap jam. Nooooo. It really wasn’t anything that I remembered. It was smooth, but thin. And she was right, there was so much fruit syrup in it that there was no tang left – and wasn’t the tang part of what made it good for me? Yet again, homogenized for all those kids in school who’d teased me and now they’re all grown up and it’s a fashionable shopping cart accessory! Ugh. Then came Fage… (aaaaah – I’m a complete junkie) Greek yogurt! Now that’s closer to what Mom made – and I can add more or less jam. And where’d they get that honey? It’s fabulous! And the price? Ooooo, not so fabulous. It’s $1.50 each…times 4 per week…times 52 weeks…WHAT?! $300/per year in yogurt? Wait, didn’t I see a yogurt maker for sale somewhere? Hmm, $50 for one like Moms or, wait for it, the new fancy schmancy one is $130! But it’ll cook it and then cool it too. Seriously? People have been making yogurt in various forms since probably before the dawn of cheese. (Honestly, before there was cheese – was life really worth living?) Off I went to see about making my own, in my way, in my own little jars. Come along and bring your candy thermometer.

Yes, You can make your own Yogurt!

Step 1: Gather the goodies…it’s a super short list! Milk – Yogurt (starter) – Pan – Thermometer – Jars … seriously, that’s about it. Oh, and a stove is helpful. Adventures in the Kitchen with Michelle, Make your own Yogurt!
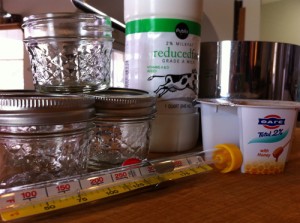
Now, here’s where the 4,000 internet posts when all over the map. The milk. Some said don’t use Ultra Pasturized milk, then some said that it’s the best to use and you can skip the first heating step…ack! Just get some milk. I didn’t complicate things. I normally drink Organic Valley milk (fabulous!!), but it’s ultra-pasturized. There’s no raw milk to be had. So 1 quart of non-RBST 2% was my choice. I don’t do whole milk – too fattening. The fat-free wasn’t a good choice for my first venture out either. Besides, I like a little fat in my yogurt – thank you.

Step 2: The little jars. Hmm, do I make it first and then transfer it into portioned jars? Or do I make it in the jars from the start? Let’s do both. I have these 4oz jars from all my jam making. Now, let’s see how much is actually in the store bought yogurt container. It can’t possibly fit in that tiny jar?! Can it? It does. These little Ball jars are $8.50 or so for a dozen. Perfect. Now, don’t eat that package the way I did – you have to save some for the new yogurt!
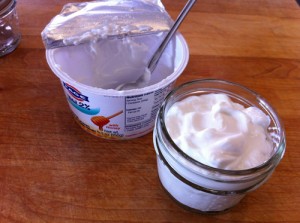
Adventures in the Kitchen with Michelle, Make your own Yogurt!

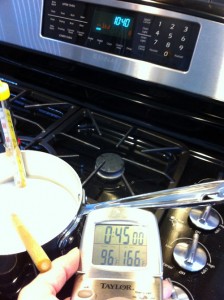
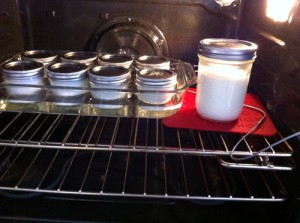
Step 3: Get your milk into a pan and clip on the thermometer. Bring it up to a scald, slowly. Which is about 190 – 200 deg. NOT a boil. Meanwhile, figure out what you’re going to use to keep it warm for the next 7 – 8 hours. Yes, I did say ALL DAY. Yet again the Internet has as many ideas on that as I have gray hairs and now I’ve got some more. Ugh. As I was stirring the milk, I glanced up at my stove control panel….hmm, this beast has a Proofing function. Isn’t Proofing the raising stage of bread while yeast grows….same thing. Just to be sure I laid my meat thermometer on a silicon pad to check the temp. Not quite warm enough. Back to the Manual…the Drying function is 100deg. Bingo!
Adventures in the Kitchen with Michelle, Make your own Yogurt!

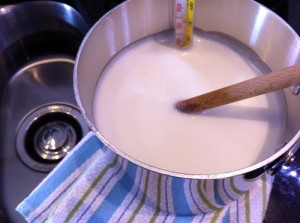
Step 4: Ok, now the milk is warm enough. You have to cool it to 120 deg. I’m an impatient person – surprise. So, I set the pot in a little cool water while I got the jars ready.
Adventures in the Kitchen with Michelle, Make your own Yogurt!

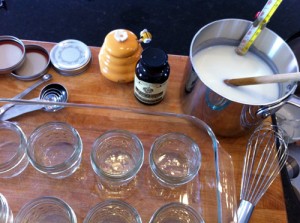
Step 5: I set the jars in a dish to make a water bath. You don’t have to, but everyone else that sets them in a cooler with warm water, or a crock pot with water,… Besides, I think it’s just good insurance for even heat distribution. (at this point I haven’t paid attention to the fact that the oven has the convection fan going…for even heat distribution…duh) Anyway, take about 2 – 3 Tablespoon of your favorite yogurt (see, I told you not to eat it all), but use the plain version, and whisk it into the milk. Then just pour it into the jars.
Adventures in the Kitchen with Michelle, Make your own Yogurt!

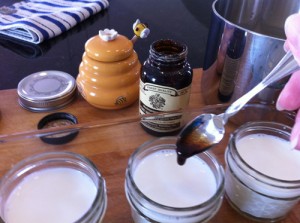
Step 6: At this point I took a couple of jars and added a tiny spoonful of vanilla paste. Later, this proved to be a very good idea. Vanilla paste is a miracle substance to be added to all things that require the scraping of vanilla beans – or anything else vanilla flavored. It’s awesome!
Adventures in the Kitchen with Michelle, Make your own Yogurt!

Step 7: Get ’em cookin’. I left the thermometer in with them so I could check on it from time to time. I am a rookie at this.
Adventures in the Kitchen with Michelle, Make your own Yogurt!

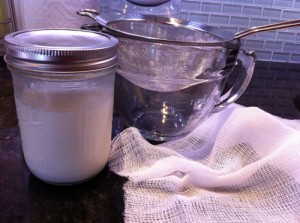
Step 8: And the next day… ok, well, I did take them out of the oven and into the fridge that evening. I dealt with checking on them the next morning. Wow – look at that y o g u r t. mmmmm This bigger jar I’d reserved to make Greek yogurt out of. To make it, you simply strain the water out. I got a little cheese cloth, a bowl and strainer. Easy.
Adventures in the Kitchen with Michelle, Make your own Yogurt!

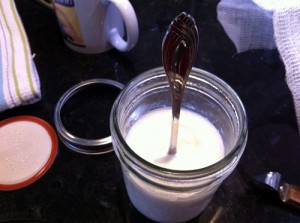
Step 9: Before I dumped it into the strainer, I thought I’d test it first for firmness. OMG – the spoon stands in it ! (At that point I had to let out a ‘pirate laugh’ because I was so pleased with myself – it worked!)
Adventures in the Kitchen with Michelle, Make your own Yogurt!

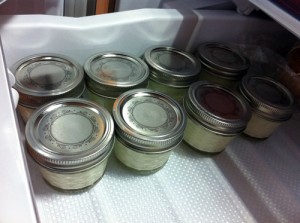
Step 10: Here are the other little guys in the fridge. How many is that? There’s 8 little gems and for how much? Let’s see, the milk was $1.85 and the Fage starter was $1.50 and I ate most of it (oops). The jars I already had, but they cost $.75 each and are reusable. Then there’s the extra jar of yogurt I used for the Greek style, which I didn’t add to the count. This is so hard to calculate. We’ll just call it at $2.00 for a batch – divided by 8 – is $.25 ! A QUARTER. Period.
Adventures in the Kitchen with Michelle, Make your own Yogurt!

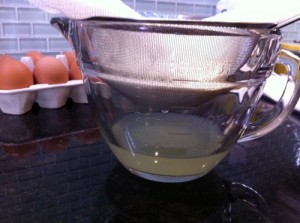
Step 11: After 45 min on the counter there’s Greek Yogurt!
Adventures in the Kitchen with Michelle, Make your own Yogurt!

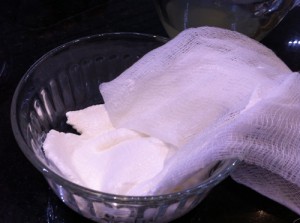
Step 12: I thought the cheesecloth would be a mess. Instead, the yogurt just rolled out into the bowl, like cheese. I gave it a whip to make it smooth and voila. Hmm, how do you say that in Greek? Well, Google Translate says it’s π???????????? (LOL…yet another pirate laugh!)
Adventures in the Kitchen with Michelle, Make your own Yogurt!

Finale 1:

Adventures in the Kitchen with Michelle, Make your own Yogurt!

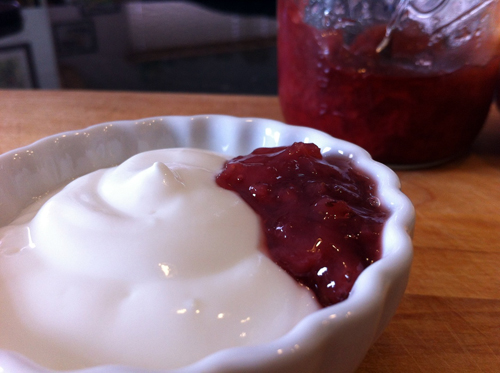
That’s it guys: Here’s the final product. This photo was taken after the yogurt was already at room temp, and had to wait for me to take a half dozen photos and it still held it’s shape. Some homemade jam, and I’m in love! The taste? Smooth. Next time I’ll cook it longer – like overnight. The longer it sets the more tang there is. This was reminiscent of crème fraiche. I would soooo put this into an ice cream maker – but that’s another Blog post.

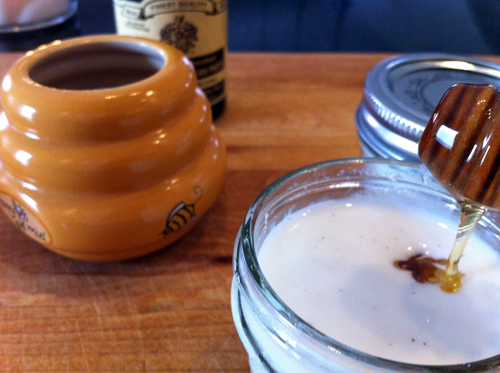
Finale 2: Remember that vanilla paste ? … oh, yeah a drizzle of honey is all it needs.
Adventures in the Kitchen with Michelle, Make your own Yogurt!

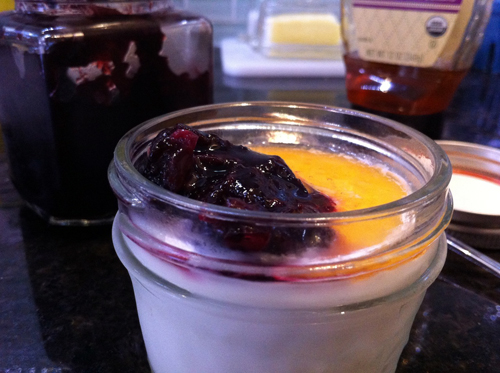
Finale 3: Here’s this morning’s with blueberry jam and honey. I like the way there’s enough room in the little jars to add a topping and put the lid back on.
Adventures in the Kitchen with Michelle, Make your own Yogurt!

You too can do this ! Save yourself TONS of money. And I know you’ve seen the commercials, or maybe your Dr. told you, or Dr.Mom – yogurt makes your tummy happy in so many ways. So, why not do it yourself and add in what you want to it. Homemade jam, honey, agave, vanilla paste, lemon marmalade, grated ginger and honey…oh yeah baby..the list goes on an on and on ! Enjoy.

Michelle @ badzoot.com