DIY Tea Towels

I love cute retro tea towels, aprons, and pot holders at Anthropoligie, Pottery Barn, West Elm, Crate and Barrel….and all those other cool stores.  But Zowie!  That stuff can be expensive.  But that’s just a challenge for me to recreate them a bit cheaper.

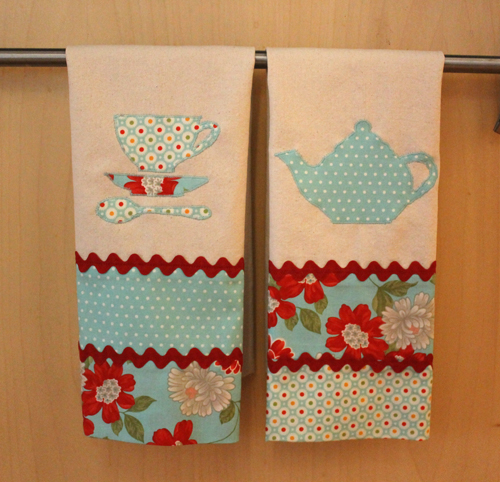
How cute are these?

DIY Tea Towels, Moda fabric

And I plan to make some matching pot holders–but that’s next week’s DIY!

Whenever I’m starting on a new project I always do a lot of research on Pinterest.  I found many tutorials but nothing quite what I wanted–I didn’t want any open seams on the back that might fray–so I just made my own instructions.  I also looked for a cute applique to add and what could be better than tea-related items for a tea towel?  Got the graphics from Sew4Home.  One of my favorite sewing websites.  I’m always amazed that I can get this stuff for free!

INSTRUCTIONS

I’ve made tea towels in the past and just used finished towels that I bought at Jo-ann’s. 
DIY Tea Towels, Moda
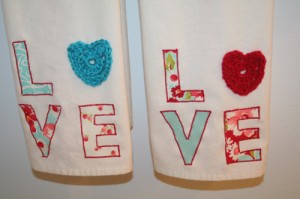
I was in a crocheted hearts obsession stage when I made these. I’m over that. But I still love Moda–those prints are from one of their charm packs.

But this time I wanted to use Moda Woven Toweling.  It comes in yards and is finished on both selvedge edges so it can be cut to any length.   I bought the toweling from www.fabric.com and I also bought 3 different Moda prints from our local quilt shop, Tomorrow’s Treasures

DIY Tea Towels, Moda fabric
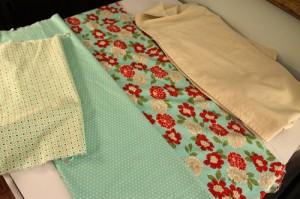
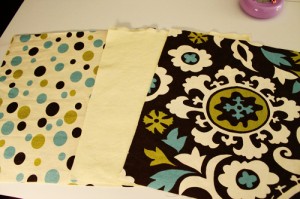
3 Moda prints plus toweling

Always wash and dry fabric, toweling, and rick rack for shrinkage. (Tip– wash and dry small items like rick rack in a lingerie bag so it doesn’t get tangled.)  The toweling started out as 16” but shrunk to 15 ¼”. I’m using a ½” seam.  Any size towel can be used, just make sure to adjust the width to be 1″ wider than the towel.

For each tea towel cut:

20 ½” length of toweling

2 strips of print A, 16 1/4” x 4”

1 strip print B, 16 1/4” x 7”

Cut 2 pieces of rick rack, 16 ¼” long

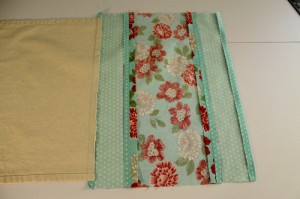
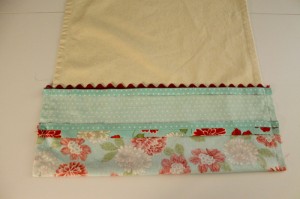
Pin the two strips from A to the large strip B. Right sides together.  Sew.
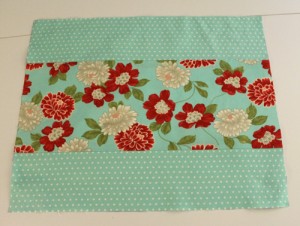
DIY Tea Towels, Moda fabrics
Strips sewn together.  I’m calling this the “color strip”

Press seams open.

Center the color strip on towel fabric, right sides together, the color strip should be ½” wider on each side than the towel.  Stitch, press seam down.  Press raw edge of strip under ½”

DIY Tea Towels, Moda fabrics

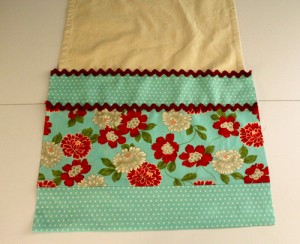
Time for the rick rack.  Center it on the right side of the top two seams of the color strip.  Stitch.

DIY Tea Towels, Moda fabrics

Fold color strip right sides together up to meet seam on towel.  The ½ “ pressed edge will meet the seam.  Line the seams up on the color strip.  Sew ½ “ seams along edges making sure not to catch in the towel sides.

DIY Tea Towels, Moda fabrics

Turn color strip right side out.  Pressed edge of color strip should be on seam of towel.  Stitch edge.
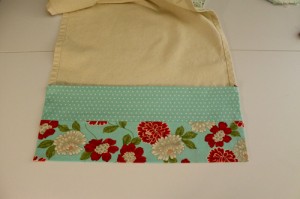
DIY Tea Towels, Moda fabrics
This is the back of the towel.  You need to stitch the upper edge.  I made sure it was lined up with the rick rack on the front and stitched from the front side.

Now finish the other edge of the towel, turn under ¼” and stitch.  Then turn under ½” and stitch.
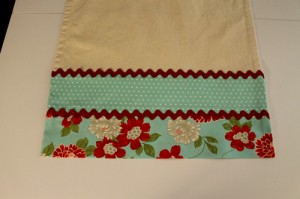
DIY Tea Towels, Moda fabrics
Almost Done!

Make appliqués and attach.  I use Heat n Bond Lite for my appliqués.  I buy it at Walmart and it’s easy to use.  Just follow the instructions on the package.  I also use a satin stitch on my machine to sew around the appliqué.  Every machine is different so just look it up in your manual.  This was probably the hardest part because I made those little handles.  Next time I’ll pick something easier! Like hearts!
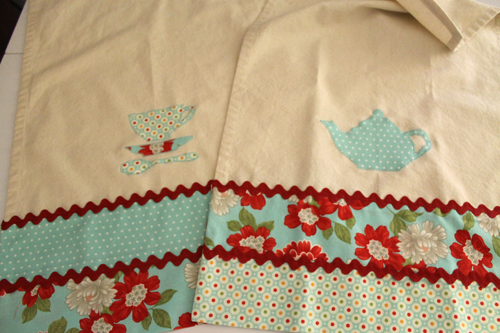
DIY Tea Towels, Moda fabrics
All Done! Now I just need to make some matching potholders and an apron!  I think I’ll be making some of these as hostess gifts, too!

If you like these tea towels, check out my other posts:   Geo-Heart Tea Towel and More DIY Tea Towels.

Geo Heart Tea TowelsButterfly tea towel

DIY Expedit Box

So does everyone love Expedit shelves from Ikea?  If you don’t know what they are, just do a search on Expedit on Pinterest.  There are so many good ways to use these shelves.  Terry has an Expedit shelf and desk, I have two in my laundry room, and two in the second guestroom–aka grandkids’ room.  And that’s what this post is about.  Making boxes for the lovely Expedit.

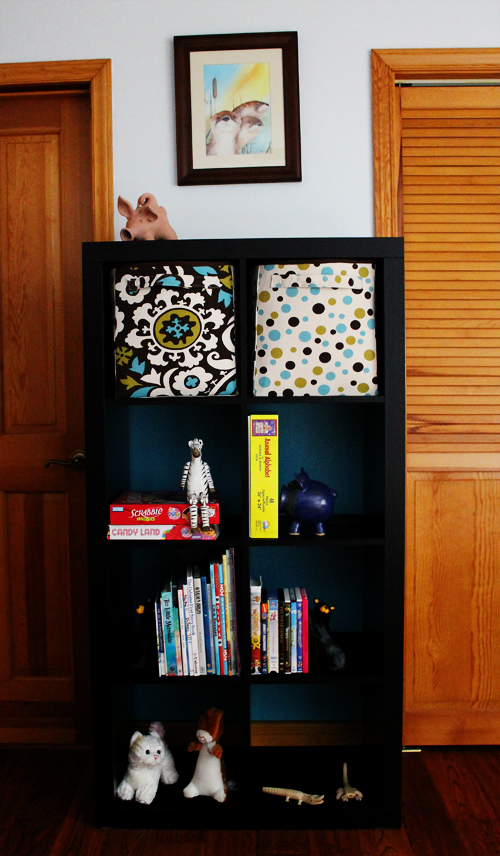
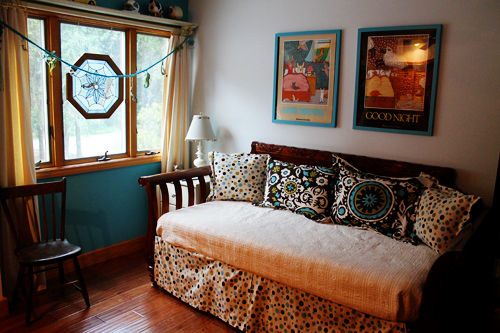
Here’s the expedit in the guestroom.

DIY Expedit Box
This is an expedit shelf. I painted the wall behind it a coordinating color.  And I’m eventually going to tell you how to make the boxes that are in the first two cubbies.

But while I’m in the guestroom, I thought I’d give you a little tour…

DIY Expedit Box
Here’s the daybed that turns into a king size bed when the trundle is raised and secured with enough bungee cords and a king-size mattress pad, sheets, etc., But no guarantee it still won’t roll apart. If you are lucky enough to stay in the twin size beds, one has mermaid sheets and the other has Dora.


DIY Expedit Box
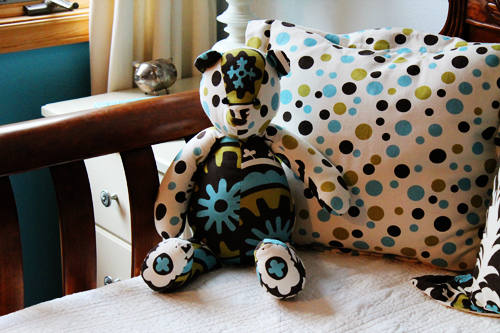
Here’s a bear….
DIY Expedit Box
And two more bears!
DIY Expedit Box
And two scary dolls, one of my sewing failures. Both Piper and Andrew are afraid of these dolls.

So back to the Expedit Boxes.  I had a wee bit too much fabric left after sewing the pillows and bed skirt.  So made a bear.  Then a tote.  Then an iPad cover.  Still had some left.  Time to make storage containers.  And that is the end of that fabric!

Now, all you that don’t sew can go check out another blog, because here are the instructions!

First, I used Pellon Peltex 71F.  It’s “single-sided fusible ultra firm stabilizer”.  And it’s expensive.  $8.99/ yard and I needed two yards per box because it’s only 22″ wide.  What is this stuff made of?  I used a 50% off coupon plus another coupon that took 10% off my entire purchase.  I probably wouldn’t have bought it except I wanted to try something new.  Plus I already had the fabric and the muslin that I lined it with.  Using the stabilizer also made the project difficult because it was just so stiff.

DIY Expedit Box
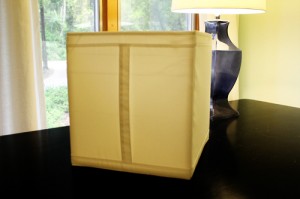
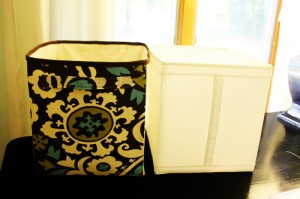
This is the box from Ikea that I was copying.

The finished box is 13” high and 12” wide on front and back, the sides are 13” high and 13” wide.

DIY Expedit Box
Premier Prints Fabric that I ordered from www.fabric.com.

Cut from fabric

3          13″ x 14″

2          14″ x 14″

1          10” x 3” for handle

Cut from lining (muslin)

3          13″ x 14″

2          14″ x 14″

Cut from Pellon Peltex 71F Single-Sided Fusible Ultra Firm Stabilizer

3          12″ x 13″

2          13″ x 13″

Center Peltex on wrong sides of side and bottom pieces and attach per instructions that come with the Peltex.  There should be ½” open on each side.

All seams are 1/2″

 Create Handle 

Fold wrong long sides together, press, stitch ¼” from edege on 2 sides—leaving one narrow end open.  Turn right sides out.  Tuck in raw edges of open end.  Topstitch close to all edges 

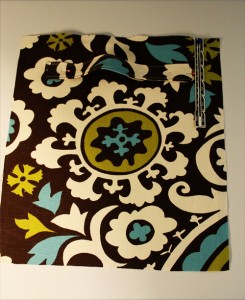
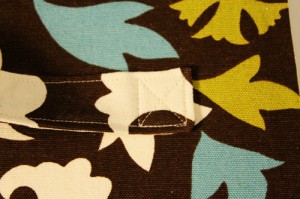
Pin handles 2” from top, 2” from each side.  Attach each end by sewing a one inch square then end with an X to make handle secure.

DIY Expedit Box
Handle
DIY Expedit Box
Handle detail

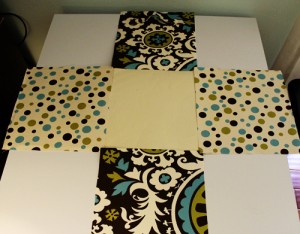
Attach sides to bottom, leaving seam allowance (1/2”) open on all ends.

It will now look like a giant plus sign.

DIY Expedit Box
Looks like a big plus sign when all the bottom edges are sewn together.

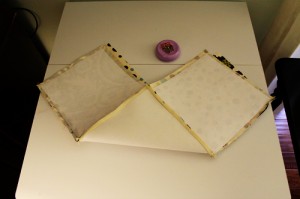
Fold the plus sign, and sew two sides…

DIY Expedit Box
This is a little confusing…fold the plus sign in half and sew the two bottom sides.

Open up and sew other two sides.  Turn right side out.

DIY Expedit Box
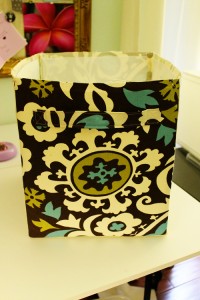
It’s a box!

Now sew the lining together using the same method.

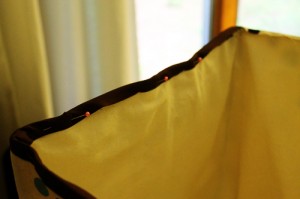
Put the lining inside of the box, wrong sides together.  Stitch together along top, ½” seam. Trim close to top seam.  Attach matching bias tape along top.  Stitch down. 

DIY Expedit Box
Pin on the bias tape. And sew!

Done!

DIY Expedit Box
Just like the Ikea box–but it matches the bedroom!

I have recently created a BETTER and less expensive way to create Ikea boxes.  Check it out:  DIY Expedit Box–Part II.

Adventures with Michelle, DIY Chandelier

I get myself in trouble surfing the net for cool ideas for the house – really, just great ways for other people to separate me from my cash! Nearly every new remodel I see has some romantic little chandelier hanging somewhere, usually over a lovely tub. So I’ve had this idea floating around in my head for a very long time. Since we remodeled our master bathroom some time ago I, naturally, had it in my head to incorporate one. I’ve got one of those ginormous tubs – why not? Oh, building codes….yeah. Well, ‘code’ says that we can’t put electrical over a tub (but it’s ok to have a light in the shower – don’t get me started). That leaves a ‘candelier’. Only, hanging it beyond the tub means lighting them will be a pain and will probably never happen. Not to mention they’re hard to find and even those are not what I wanted. OK, the search gets a bit more narrow. Meaning, now they need to be LED candles that I can operate by remote. Hmmmm. Wow those pillars are pricey!! And I still can’t find anything to put them in. Everything sold for a garden is cheesy, and then there’s the cool modern ones, or maybe a trendy French one with little wood ‘crystals’ – ouch, how much?! And then I need to rip it’s electrical guts outs? Ugh. Now fast forward to our little trip to Renningers Antique Extravaganza and that monstrous brass 10 light chandelier I picked up for $20…oh, yeah…that’ll do. Jesandy Jubilee Countdown!

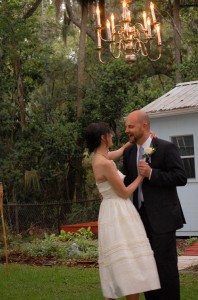
But first I lent it to the Jess/Andy Jubilee (my cousin’s outdoor wedding at Perfect in April). I spray painted it with a mirror finish that made it look silvery and it lit up the dance floor.

JesAndy Jubilee

Now that the party’s over, it needs to go back to being what I’d bought it for in the first place. (no, it won’t fit in the newlywed’s Brooklyn apartment – this thing is big – unlike NYC real estate!) Let’s see what I came up with:

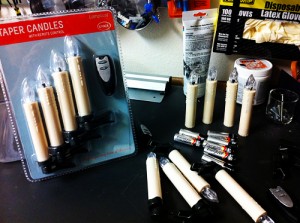
Step 1: Find some replacement lights. The fixture will need to be un-electrified so they’ll need to be those LED candles. My friends at Amazon had just the thing. These little numbers are for Christmas trees. They come battery operated, with a remote, and a little clip assembly to hang them on a tree. And now that I see them, I may need to get another set for December’s decorating.

Adventures with Michelle, DIY Chandelier

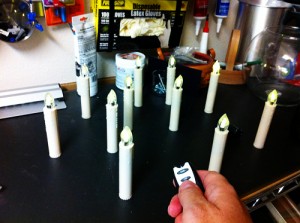
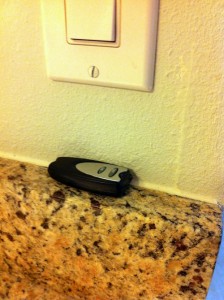
Step 2: Gotta test em – look how cute! They flicker like candles and everything, and I love that tiny remote.

Adventures with Michelle, DIY Chandelier

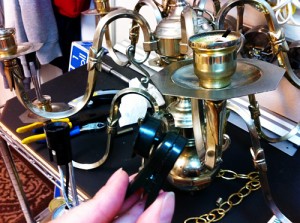
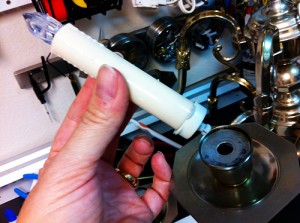
Step 3: Get out those tools and cut away the bulb assemblies. I left the wires intact enough that, if for some reason later, it can be re-electrified. And here’s the little clip that came with the candles. This we’ll pull apart so that it can be the base for the light. That way the candles can easily have the batteries replaced.

Adventures with Michelle, DIY Chandelier

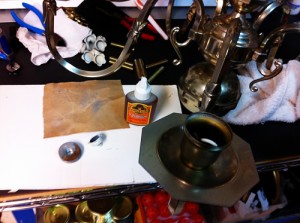
Step 4: I found big washers holding the other assembly in place, so we’ll keep those. I need to give the candle base something to glue to, as well as hiding the wires . But first the sconce and little cup have to go back together and they need a threaded rod to hold them in place. I found some old lamp pieces in the nuts-n-bolts stash and cut them down to fit (this was not fun – many bandaids were in my future) Then I tucked the wires inside the rod, sconce and little cup and replaced the nut and washer holding them all on. Then back to those big washers and some Gorilla Glue. I tucked the wires beneath and glued the edges lightly. Now, gluing steel doesn’t always turn out well. This is no weld and I know it may come apart someday, but the way my test held, I won’t be worrying about it. I let it set overnight just to be sure.

Adventures with Michelle, DIY Chandelier

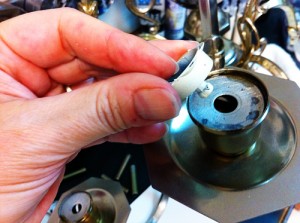
Step 5: …and the next day… Remember those clips? OK, the top holders are a swivel so they just popped right off. A little spray paint to make them off-white like the candles, good to go. Although, that piece sticking out had to be cut off as some of the wires took up too much space inside the little cup. Just a pair of wire cutters and no band-aids this time!

Adventures with Michelle, DIY Chandelier

Step 6: A test to make sure they all still fit nicely. Then I glued them in place with Gorilla Glue too.

Adventures with Michelle, DIY Chandelier

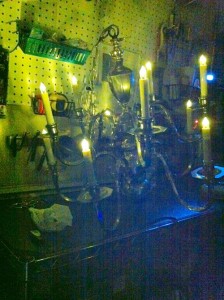
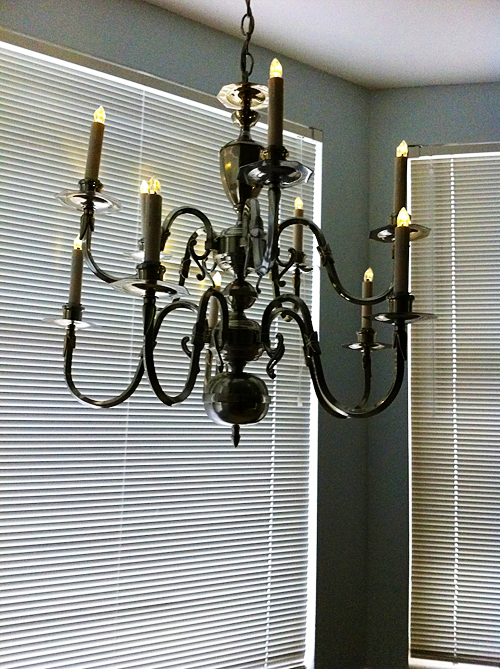
Step 7: A little later I couldn’t wait so I turned out the lights and there it was. Like fireworks inside, I was ooooing and haaaaaing! About that time my neighbor came in and wondered what the heck I was doing and where’d I get a sterling silver chandelier – yeah, the color is that close! (I can’t stand it) “Honeeeeeey!!! Come hang this for me!! Pleeeeze”

Adventures with Michelle, DIY Chandelier

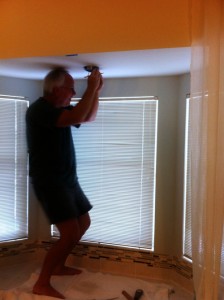
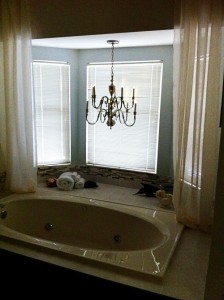
Step 8: Since this is a 10 pound piece of metal over my cost-too-much-to-replace tub, and new tile work, I opted to use something designed for a real light and not just a glorified cup hook! Besides, maybe they’ll change the Code one day and someone (not me) will put up another fixture and be so happy that those Beals were so ahead of the curve to install a cut-in box for them. (you’re welcome)

Adventures with Michelle, DIY Chandelier

Step 9: Thank you Honey – I love it! (now I have to decorate around it….and no, it doesn’t match my other lights) Hmmm. But I’m luvin’ that tiny switch, it works great!!! A little click and they come on and flicker away.

Adventures with Michelle, DIY Chandelier

It needs a bit of adjusting. It’s been though a lot! I mean, can you believe that this POS that had been hauled around from who-knows-where in some guy’s station wagon to be sold in a field antique fair for a twenty could be so cool ?! So romantic – where’s my bubble bath!? Adventures with Michelle, DIY Chandelier

Finale: Here’s a shot of it on a cloudy day. I did actually take a little movie of it flickering at night, but it’s a big file and kinda dark.

Adventures with Michelle, DIY Chandelier

Michelle Beal @ www.badzoot.com