Works in Progress, January

Terry and I have moved a lot over the years.  Every time we make a move, we get rid of all the extra crap in the cupboards, closets, and all the other storage spots.  But we’ve had this house for 11 1/2 years and things have accumulated.  Way too much “stuff”.  it’s time to get rid of some things. 

(Otherwise I can’t buy new)

I’ve been clearing out junk from all the nooks and crannies that I cram things into. With no basement or attic storage I have become very creative!  (Okay, I do have an attic but things tend to melt up there and the steps leading there are very wookity.) 

So I haven’t been sewing much lately and I have no project for today. 

I did get a bunch of fabric, though.  Fabric.com gave me a 20% off coupon for my birthday so I waited until some of the stuff I need (want) was on sale at 15% off and ordered a bunch.

Here it is…

fabrics
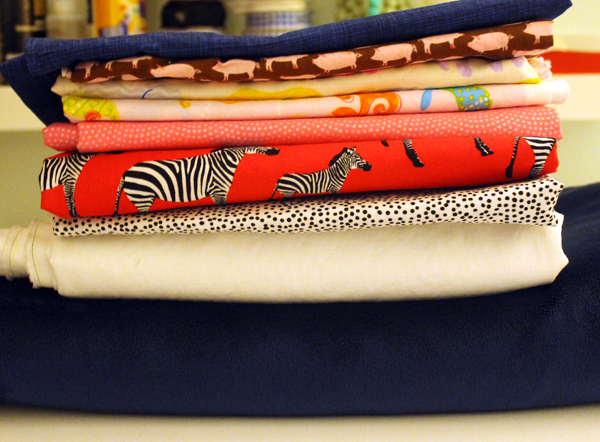
Other than the top and bottom blue fabrics which are going into a quilt, I don’t have any real plans for the rest.

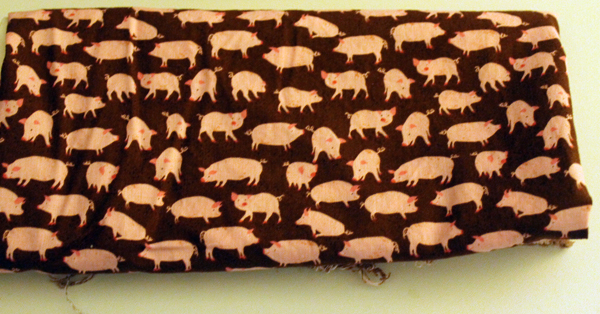
Since her room is pink and brown, I thought I might make something for Piper out of this piece but then decided she might not like those pigs.  I can just hear her saying “Pigs are for boys”.

pigs
But it’s adorable!

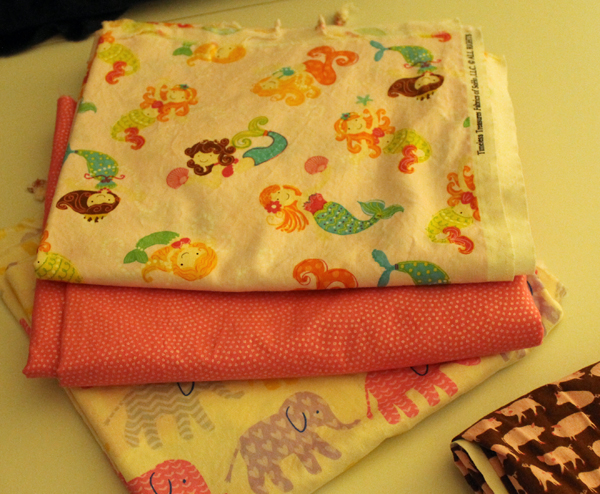
This will probably turn into something for a couple of the granddaughters.  Pillow cases?

girl fabric
Love those elephants!

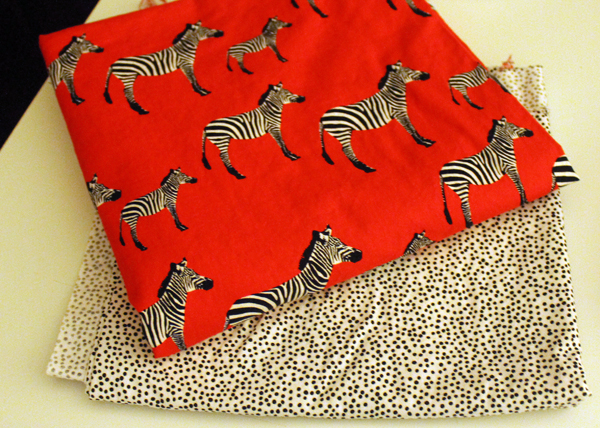
And I had to have these zebras.  Pillow? Tote?

zebra
The dotted fabric may or may not go with the zebras. I do have some black and white stripe tucked away.

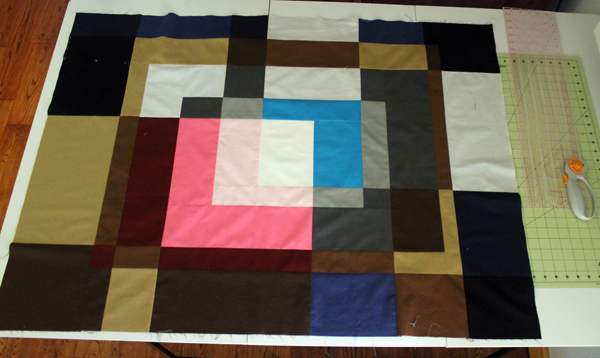
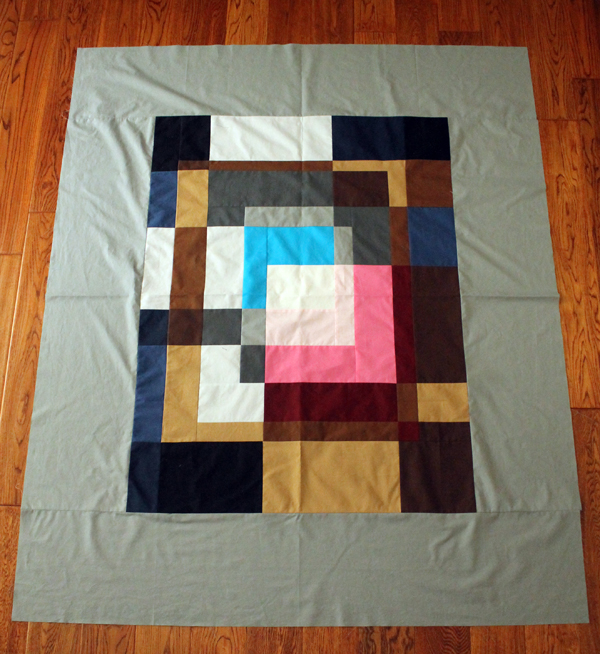
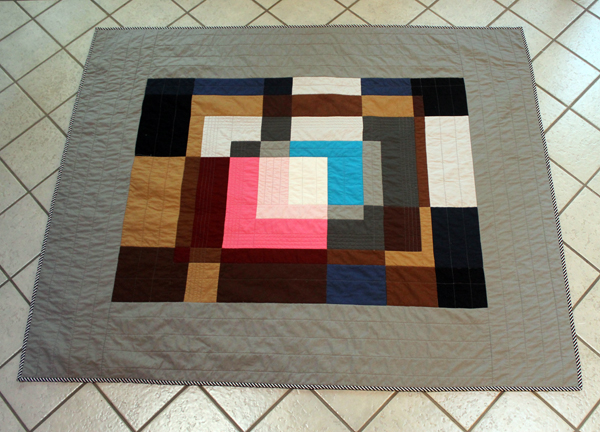
The one project I am actively working on is a denim quilt for Riley. I’ve been saving old denim plus Lauri gave me a bunch of Riley’s old jeans.  I’ve “pinned” several denim ideas but decided that I didn’t like any of them.  I finally designed this block which I’m happy with.

Denim Block

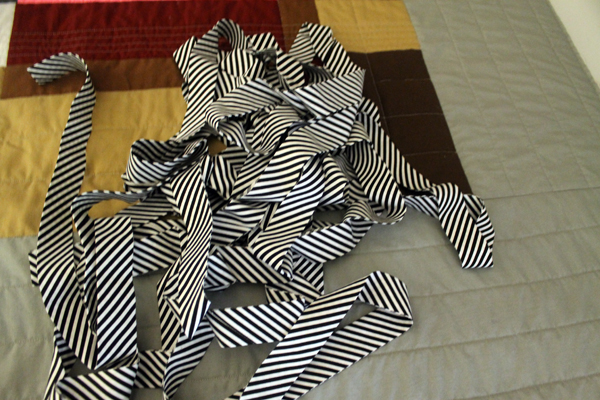
There will be 1″ black sashing between all of the pieces and it will end up being a 20″ block.  The entire quilt will be three of the 20″ blocks across and four 20″ blocks down.  The back will be navy blue minky and the binding will be a navy blue cross hatch. 

Well, that’s my plan today.  Could change.  And could take a very long time to finish because it’s not as easy to cut the denim up into the correct sized pieces as I thought it would be. 

And I still have a lot of cupboards to go through! 

DIY Heart Tea Towels

 DIY Heart Tea Towels

I’ve been tossing out a bunch of old stained or worn out linens. I was thinking about hitting some sales to pick up more dish towels then it struck me “hey, I make tea towels!, why don’t I just get into my fabric stash and whip up some towels for myself!” So far I’ve given all of the tea towels that I made away.  This would be a good method to find out how those towels hold up under regular use!

I had some red and white fabric left from Christmas which is perfect for a Valentine’s project! And that holiday is just around the corner! I found three pieces that didn’t have any snowflakes or other holiday themed objects on them.  I had one piece of the red and white striped material that was 35″ by 4″.  So that’s how I decided what size the color band for the bottom would be. 

I also had just enough of Kaufman Essex Linen Blend White to make three tea towels! 

DIY Heart Tea Towels

I cut the tea towel fabric 17″ x 20″ then hemmed three sides (two long and one short) using the tutorial for clever corners from Sew4Home.com.  The towel was then 16″ x 19 1/2″ with one raw short edge.

I used heat ‘n bond lite on a couple of small pieces of fabric then used a heart shaped cookie cutter for the appliqué.  Just drew around it with a Mark-B-Gone pen.  The blue wipes right off with a damp towel.

cookie cutter for applique

After hemming the the tea towel fabric, it was 16″ wide. I’m using a ½” seam so I cut the color strips for the band at the bottom of the towel 1” wider than the towel–17”.

I cut:

2  strips of the candy stripe 17” x 4”

1  strip of the white and red polka dot 17” x 7”

Pin the two 4″ strips to the 7″ strip right sides together and sew with a 1/4 “ seam.

DIY Heart Tea Towels

Press seams open.

DIY Heart Tea Towels

Center the color band under the unfinished end of the towel fabric, right sides together. The band should be ½” wider on each side than the towel. 

stitch strips together
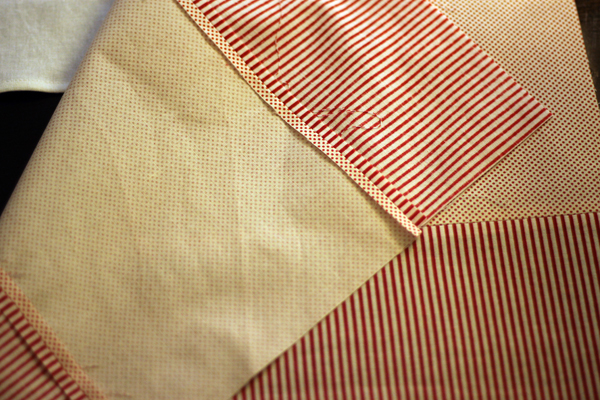
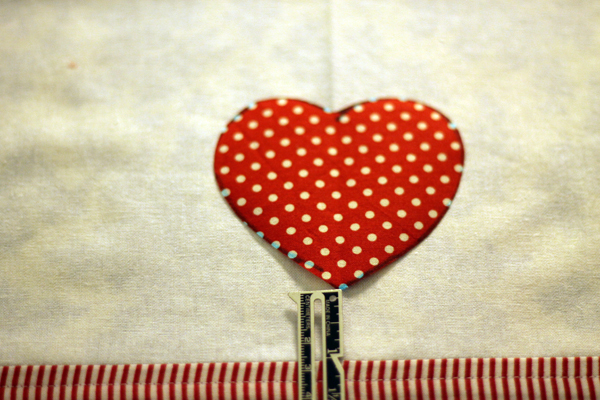
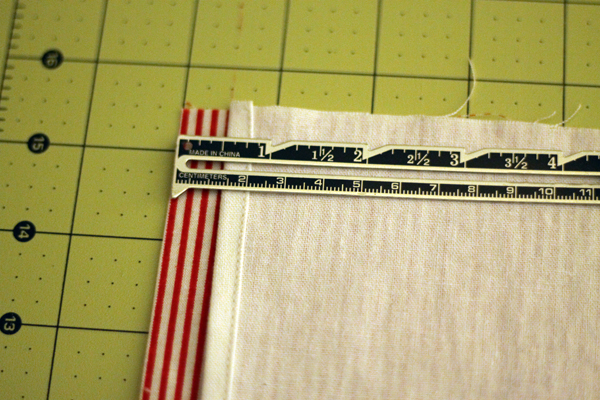
Stitch, press seam down.  Press raw edge of color band under ½”

DIY Heart Tea Towels
The top seam between the strips and the towel is pressed down and the bottom strip is pressed up 1/2″.

Fold color strip right sides together up to meet the seam on the towel.  The ½ “ pressed edge will be on that seam. 

Towel
This is actually the second towel I made but forgot to take a picture of this step and thought it was important.

It’s very important that the seams on the color band line up. You might be able to see in the above picture that I have pins on that seam. Sew ½“ seams along edges of the color band, making sure not to catch in the towel sides.

Clip corners.  Turn strip right side out and poke the corners out so they are nice and sharp.  Press.  

On the back of the towel, the pressed under edge should be right on the seam between the strip and the towel. 

back of towel
This is the back of the tea towel with the color strip turned right side out and along the seam edge.

Stitch 1/4″ away from that edge.  I did this from the right side of the towel because I wanted to make sure it looked good.

I did a “stitch in the ditch” on the middle seam  of the color band then some top stitching 1/4″ away on both sides of that seam and along the bottom. 

I centered the applique on the towel, 1″ from the color band and pressed it–follow the instructions that come with heat ‘n bond lite.

applique

Then I did a little zigzag stitch around edges of the appliqué.

First towel
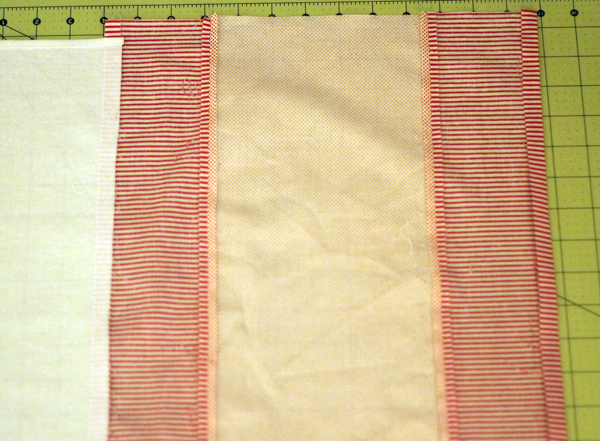
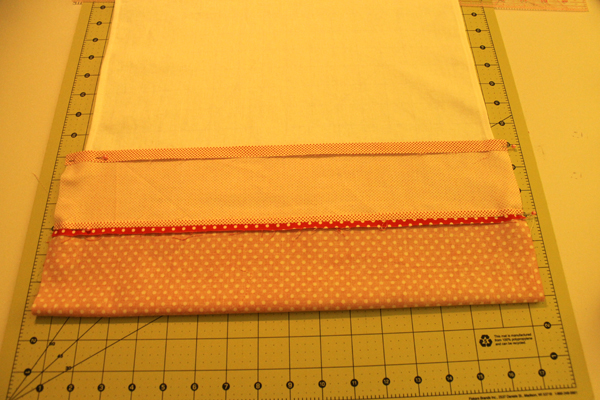
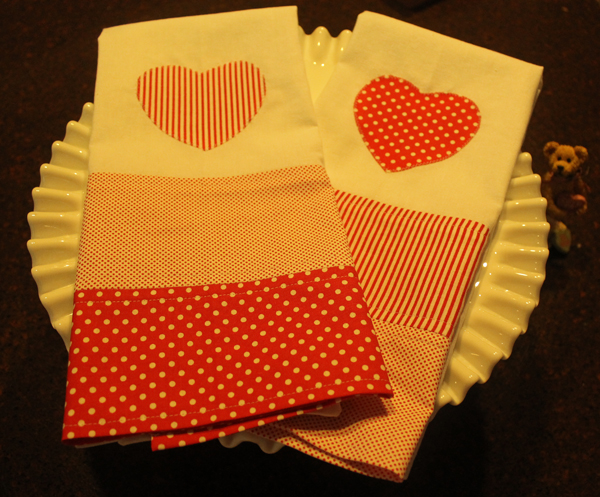
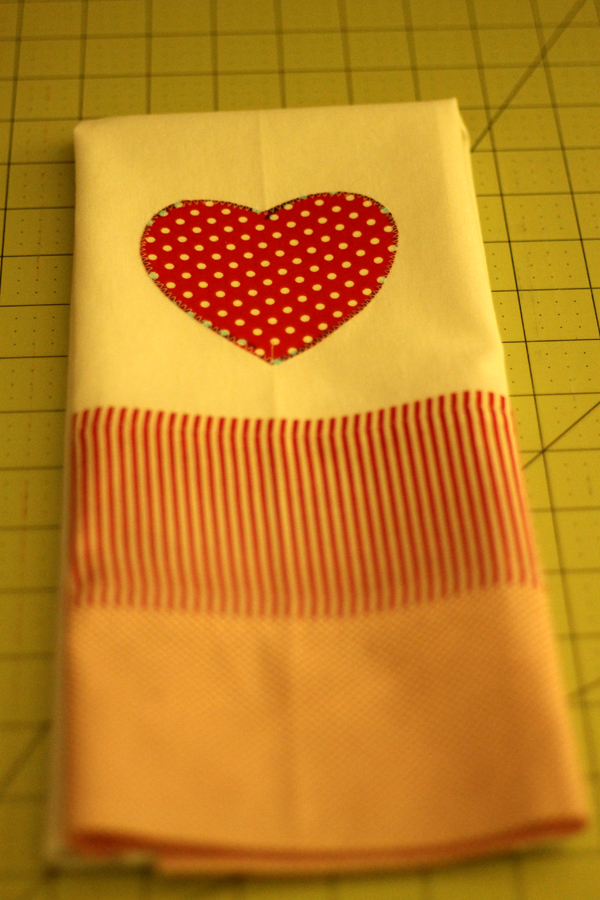
And I had enough of the two polka dot fabrics to finish a second towel.

Tea towels
Ready to be put into action!


 Now I have to decide how I’ll make the third towel.  Two heart towels are enough for me!

Quilt of Many Colors

I’ve been planning to make a modern quilt since way back when I first got bit by the quilting obsession bug.  But I had too much going on–sewing and otherwise.

I don’t like unfinished projects.  I’m okay with two sewing projects going on at the same time.  One that’s hard and will take awhile to finish–like a quilt.  And an easy one–like tea towels.  But before I start anything new, one of those has to be completed.  So it was a while before I got to start on the modern quilt. 

But I was looking for inspiration and designing it in my head way back in September.

I love the Hopewell Quilts with their simple lines, large blocks of color, and striped binding.

Hopewell Quilt
Hopewell Quilt, 40 x 60, $365


I found this quilt on Pinterest.  Not a Hopewell Quilt but again, solid colors and straight-line quilting.

Modern Quilt
I followed the link on this quilt but it eventually took me to a website that had Asian characters so I’m guessing the website got hacked. I think the design is from a textile design school in Holland.

I decided to design my new quilt following the above style because I wanted to pull all of the colors out of my bedroom into one piece.  And there are a lot of colors in there.  Pinks, grays, blues, golds, browns.  Plus every piece of furniture is a different wood or metal.  I love it. It’s very homey and cozy and dark and full of things I love. And mine.  But I’m not ready to show it to you.  Maybe someday.

And here’s the finished quilt:

Quilt of Many Colors

Since I was keeping this quilt and didn’t have to worry about screwing it up, I wanted to try some different methods. I used Mar Bella Minky Cuddle Plata from Fabric.com for the backing.  I love the softness of Minky but I’ve had issues with it before–it’s very slippery.  I was expecting it to be hard to work with but it was wonderful!  Easy to quilt, forgiving, and made the quilt extra cuddly.

Quilt of Many Colors
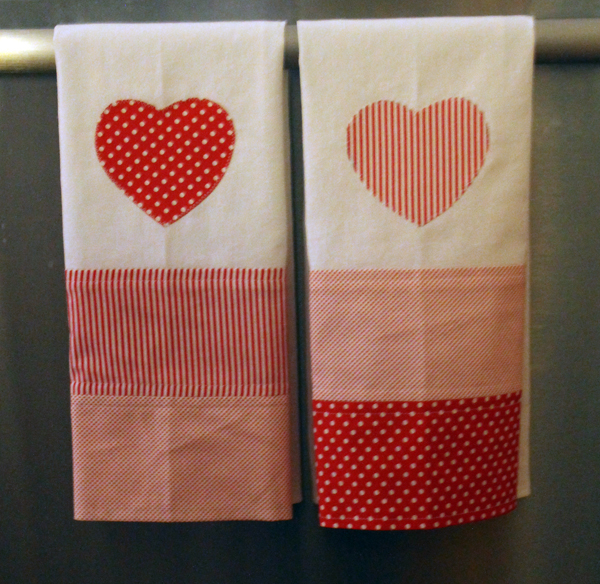
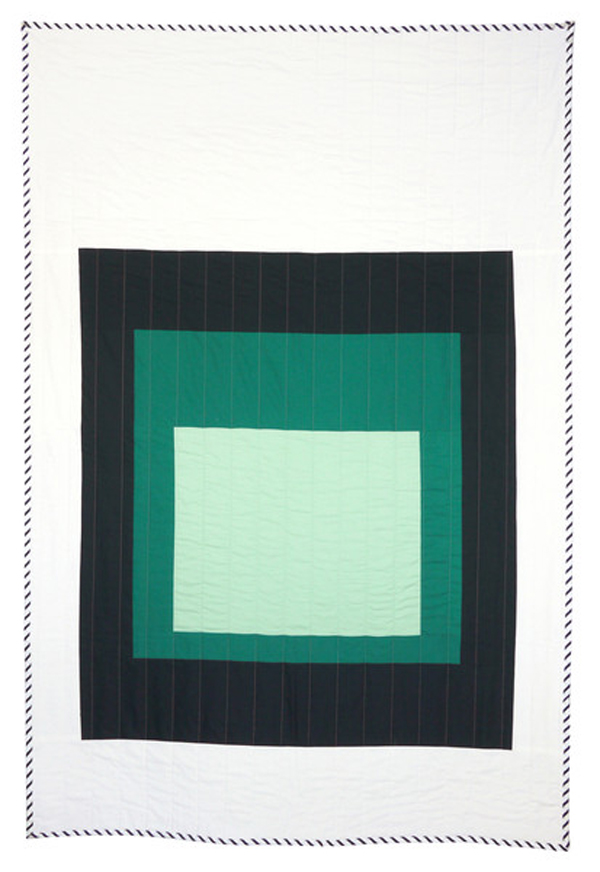
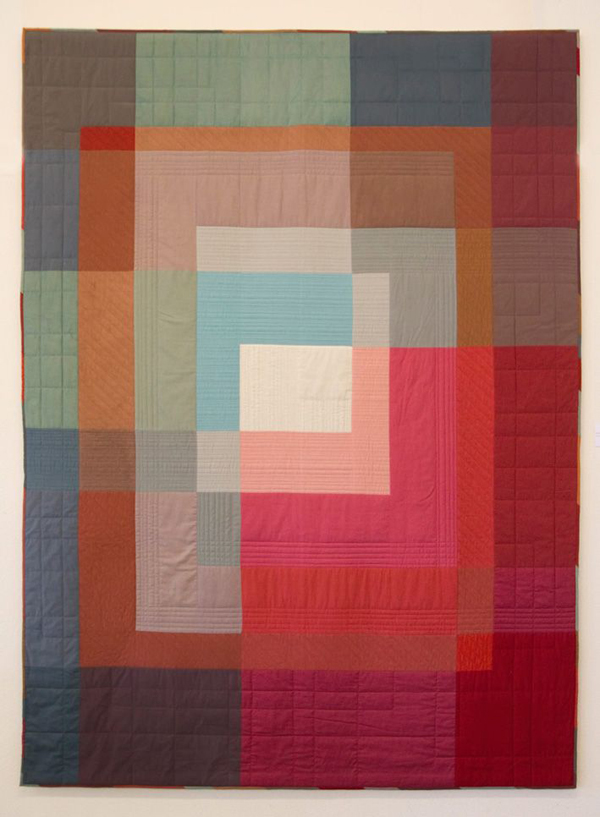
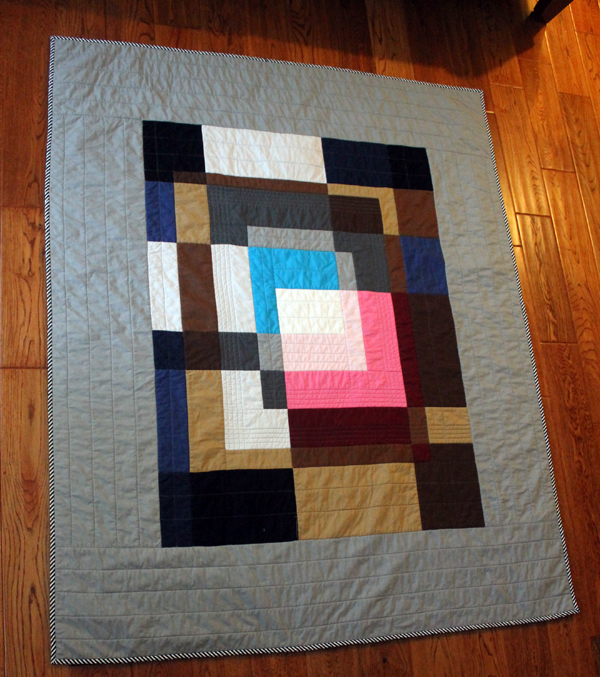
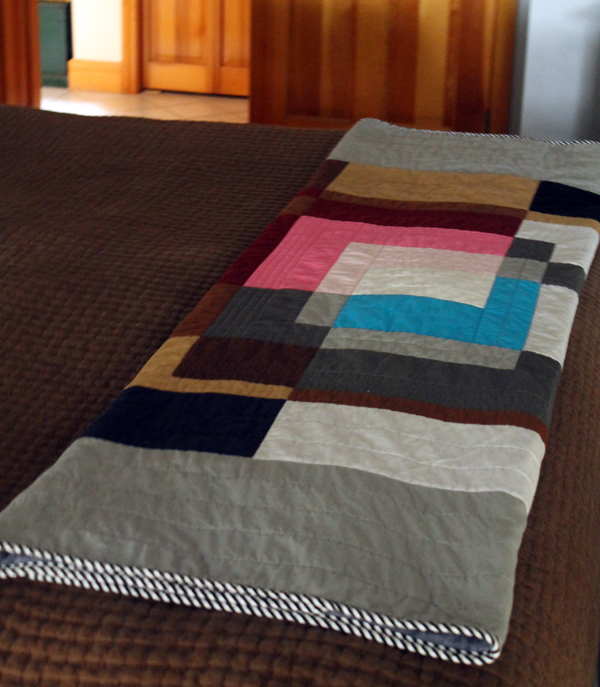
Most of the dark fabric on the front of the quilt is Moda Bella Broadcloth that I also bought from Fabric.com.  The happier colors are from “American Made Brand” that I picked up at our local quilt shop, Tomorrows Treasures

Quilt of Many Colors
Pieced together but no borders yet.

I wanted the quilt to be “nap size”. It’s just too difficult to make a larger quilt with my sewing machine.  Maybe after I get more skilled I’ll be able to handle a bigger size. I made a rough draft and then used graph paper to get the correct dimensions. The finished size was 62 1/2″ by 50 1/2″ 

Quilt of Many Colors
Borders on.

I really wanted black striped cut on the bias for the binding.  This appears to be a very popular choice for quilters but not readily available.  I eventually backordered the perfect black stripe designed by Timeless Treasures from Hawthorne Threads.  It arrived in just a few weeks.

I tried a different method to attach the binding but wasn’t pleased with it so will go back to the old way.

Binding

 Quilt of Many Colors

While I designed it for my bedroom…

Quilt of Many Colors
Here it is at the foot of the bed….

it is so soft and comfortable, that it’s usually on the sofa.

Quilt of Many Colors
Nap time!
Quilt of Many Colors
TV Time!
Quilt of Many Colors
Maggie Time!