
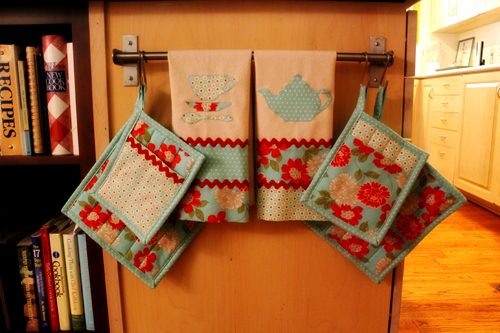
Here’s the potholders I made to go with the tea towels from last week:
As usual, I perused Pinterest before designing my new potholders. I followed the directions from sew4home.com’s Quilted Hot Pads. I also used their tutorial to make the faux mitered corners on the potholders. These instructions are very clear—although I did make a few changes.
First, the instructions say to use a “walking foot”. I don’t have one. Many of my sewing projects suggest using a walking foot so I finally stopped at our local quilt store, which also happens to be a Bernina dealer, to ask them about the walking foot. It’s $199. Wow. Just to sew potholders! The woman that works there told me I should ask for it as a gift. Like for Christmas. And all I could think was if I was going to ask for a $199 gift, it would be a new camera lens. (Or maybe a down payment for one.) Anyhow, I still don’t have a walking foot but it would make sewing through several layers much easier .
The instructions say to use a single layer of insul-brite but I used a double layer just to make sure no one gets their hands burnt on Cookie Day, the most happiest day of the year.
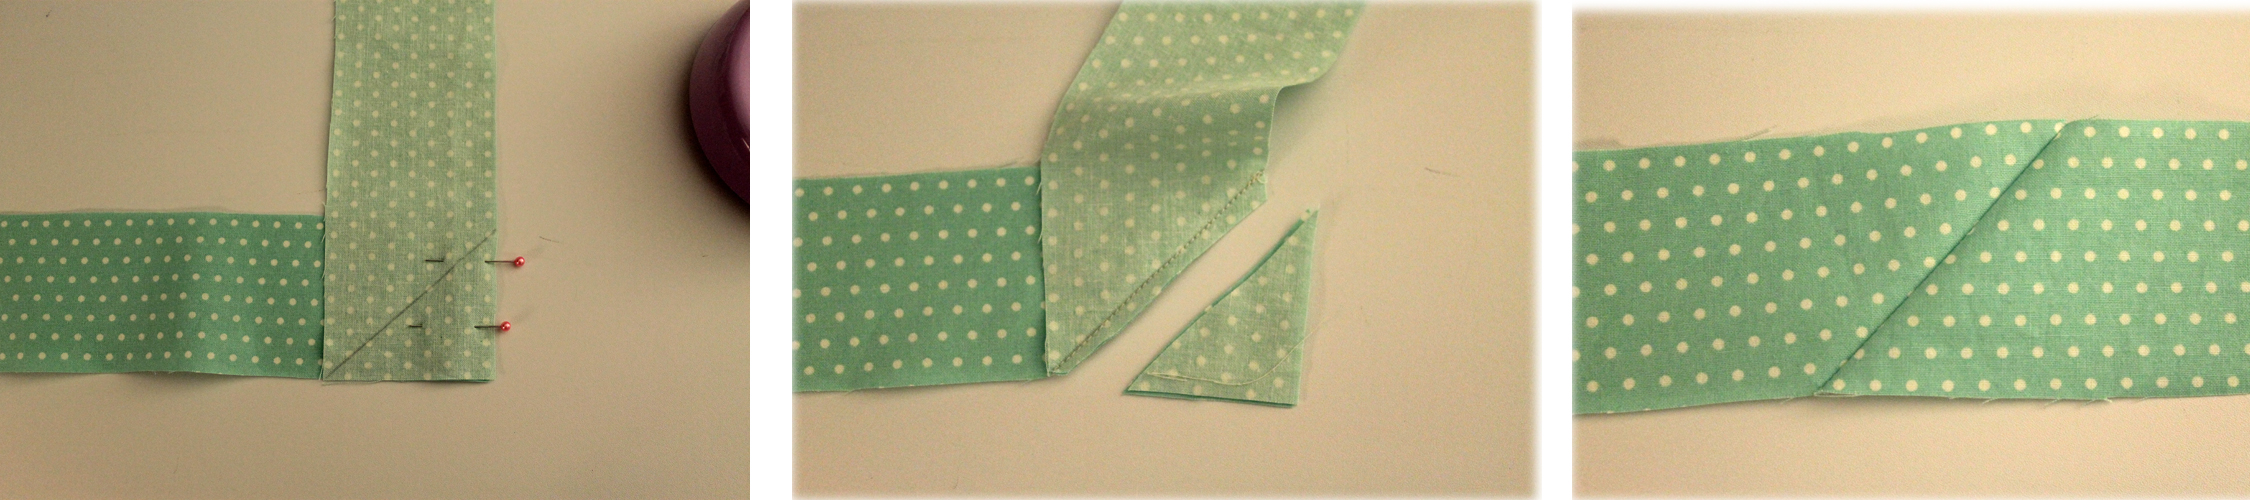
One of the steps on the instructions is to cut a 2” strip for the binding that is the width of fabric which is usually 45”. That would be perfect for a 10” square potholder with a 5” loop on it. But my fabric was 42”—must have shrunk. So I had to piece my binding together. That’s really easy and here’s a picture of a nice and neat way to do it….
Another change was that I made my binding strip 2 ½” rather than 2″ because I doubled the insul-brite layers.
How cute are these potholders?
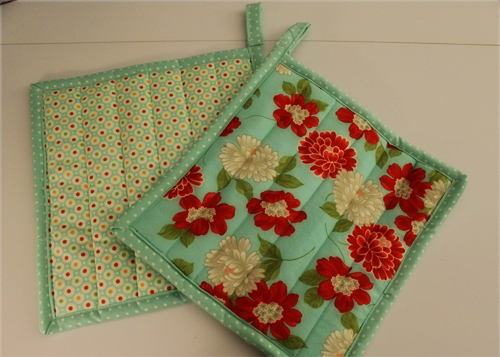
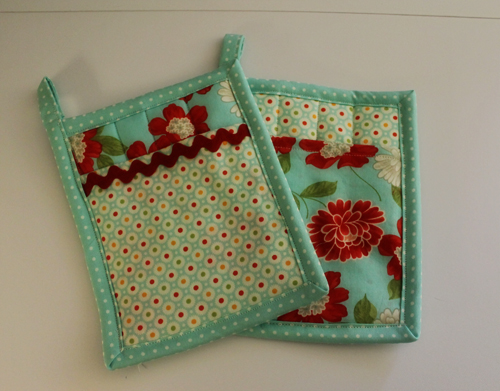
But I thought they were a little large so I made some smaller ones with a pocket in them.
You will still follow the above sew4home’s instructions but you will need the following:
8” x 6 ½” Pot Holder with a pocket:
1 7” x 6 ½” piece for pocket
2 8” x 6 ½” pieces for front and back
2 8” x 6 ½” pieces of insul-brite
33” length of 2 ½” fabric.
Turn under ½” on top of pocket, turn under another ½” on pocket. Stitch
I had a 6 ½” piece of rick rack left so I sewed that on one of the pockets.
Make “quilt sandwich” w/o pocket.
Quilt.
Place pocket on front and stitch around the edges. Sew on binding. I made a 4” loop for this potholder rather than 5”.
Easy Peasy!
Hmmm, think I might need a matching apron! Next Week!