Adventures with Michelle, A Chair Affair

Every DIY’er knows that there comes a time when one has to stand back and call in a professional. In my world that’s usually when there’s fabric involved. Yes, I can do smooth-finish drywall, but I have been known to pay someone to hem a pair of pants! That said, I haven’t always been afraid of fabric. There have been times that I’ve had to be ‘creative’ in a moment of desperation. Like when my sister had bestowed upon me the most comfortable and ugliest swivel chair ever! If you know her, you know her décor taste can run way off the sidelines into a style we call ‘pre-dumpster’. Did I mention that beast was heavy too. I mean, like get two grown men and a six-pack heavy! Ugly, like something tossed off the back lot from a Mad Men set – 1960’s turquoise polyester burlap. But it was a dream to sit in. Now that I think back, I’m sad it was lost along the way. That old thing taught me to not give up on a piece just on it’s looks. Now, if it smells – oh, no – those go to the curb. One day I had a revelation as I tried to cover it with a sheet, “Too bad this doesn’t stretch…” Later on I stumbled upon a piece of dark green thick stretchy knit at a fabric warehouse I used to haunt. Cheap, attractive, and it stretches ( no, it was NOT velveteen! ). Yes, you guess it. I completely recovered that chair with nail-head trim tacks, and my trusty staple gun! It was great for years!! You could sit in it and the knit would just bounce back. Ahhh, the old chair.

Now, mind you that really is the limit for me. OK, I did redo my dining room chairs, but those were just seats that I covered over with some awesome Pottery Barn fabric.
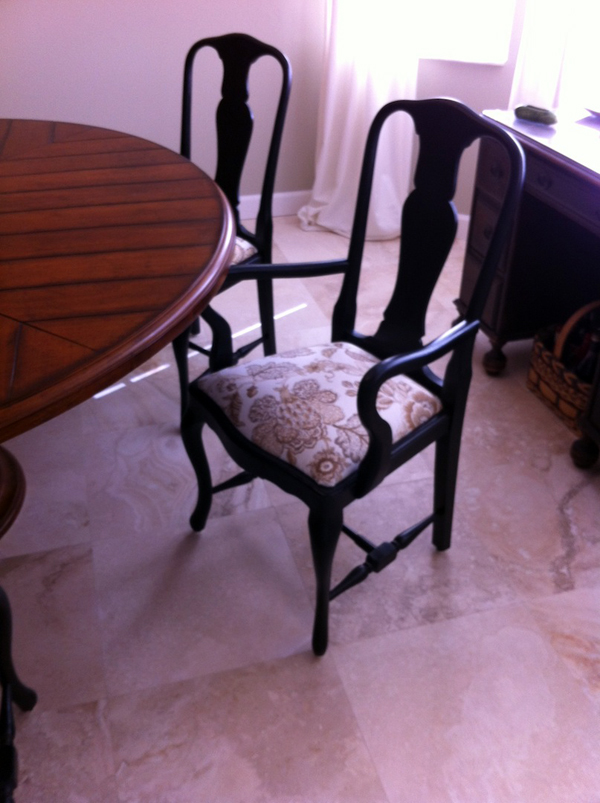
Dining Room Chair Upholster
Hmm, I may have to post that redo later. Now, about my affairs with chairs….

Much in the way I’m drawn to old cookie jars, I love a good chair. Seriously. I don’t care where I find it, if it calls to me, I come running. That said, on a stop at my local Salvation Army to drop off a donation (they get big stuff and Goodwill gets the clothes) a few weeks ago, I spotted a lonely chair calling me. The line that I was waiting in was long, and that old guy that just stepped in front of me, put it right in my line of sight. Awww, poor thing. Did that sign say ‘extra 25% off’…who knew the thrift shop had sales?! Wasn’t this stuff already super cheap? That chair was a whopping $25, and it even fit in the car. See, it loves me already. Of course, when I brought it home, my husband was all, “You went in with an old laptop and come back with a chair?!” (hee, hee)

OK, what to cover it with? In previous posts I mentioned redecorating the master bedroom in a Restoration Hardware style and those people have some serious chairs. Naturally, they come with serious price tags. The big trend there is belgian linen. Uh, yeah right – NOT. I thought of numerous ideas, from a lovely ikat with grey tones (that my uber-fashionable auntie gave a thumbs up to), to a crazy thought of either eggplant velvet, or a sexy grayish python print. Yes, I said python. I’m a trend setter – you’ll see! OK, so I chickened out on the wild stuff and went with my original thought. But I can’t afford linen. However, I can afford muslin, which is popular too and super cheap! Yes! Jo-Ann’s here I come with my coupon and measurements. Unfortunately, muslin isn’t exactly upholstery weight fabric, but this isn’t my first rodeo with unexpected material uses.

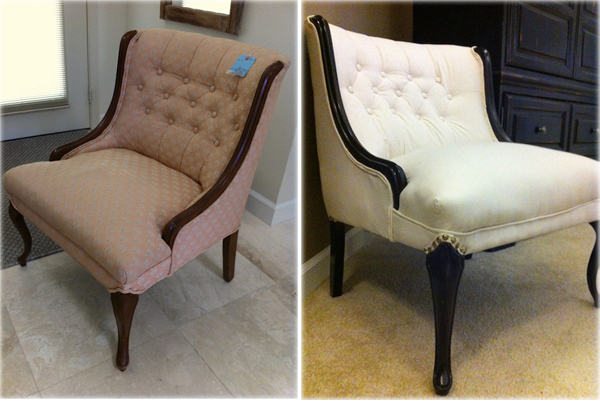
Before and After Chair upgrade
Before and After

My poor upholstery guys, I’m always bringing them trash and asking for miracles. But Sam and Zolton at Hernando Upholstery already know what they’re in for when I pull up. This time I’d done prep work. Check it out.

Step 1:

Step 1, Chair Affair
Get the old thing in the garage and find out what you’re working with. Before staining the wood, I need to remove the trim because it’s glued in. I’m not pulling off all of the fabric because I want my guys to make it exactly as it was…only pretty.

Step 2:

Step 2, Chair Affair DIY
Keep pulling – oops, it’s stapled too. Be careful.

Step 3:

Step 3, Chair Affair DIY
Well, not really a step, more of a step back. These are my weapons of choice for this adventure. A 5-way (or whatever they call them now) to pry with, some pliers, because I have weak girly hands, a carpenters knife, and blue tape. Also, a sanding block, chip brush, and my old friend Minwax Express Finish.

See how the piping trim is gone, now I can stain the wood and make sure I get all the nook and crannies. I’ve taped off the areas where the wood meets the fabric because I don’t want any of the stain soaking into the stuffing.

Step 4:

Step 4, Chair Affair DIY
See the difference in the wood color? It’s gone from 80’s medium oak to a fashionable 2013 espresso. Did I say wood? I found that the front legs were actually plastic! Yet another reason to use the Minwax product. Now, give it a coat of Polycrylic ( it was late to the photo shoot). Let it dry and off to the upholsterers we go.

Finale:

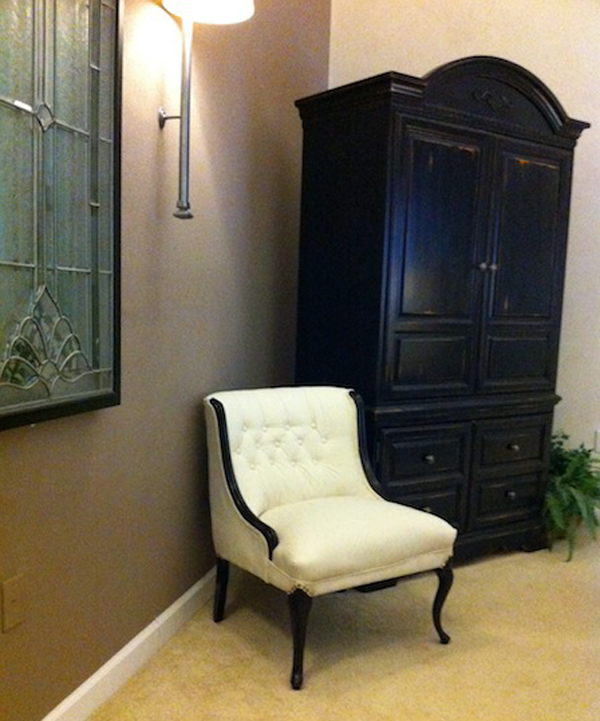
Chair Affair DIY After

There it is. Fabulous. It’s not a bright white, it’s a creamy off white with flecks of brown and black. This is why you don’t DIY this one – look at all those buttons! And I love the nailhead trim around the legs…very Resto! I’ll give it a shot of 3M Scotchgard and won’t worry about the cat sleeping on it. I confess, this isn’t the most expensive job, so I do find a few flaws. But honestly, where do you get a chair like that for under $200? Yes, that’s the whole bill – chair, fabric, and recovering.

Maybe I’ll find some of that sexy python fabric and make one of those envelope pillows, that Kathy posted a ‘how to’ not long ago, to put on it. I’m a trendsetter – you’ll see. 😉

Michelle Beal

Adventures with Michelle, Pet Lettuce!

Raise your hand if you’ve ever either fallen or almost fallen for one of those stupid internet/Pinterest DIY gags? You know, like the water marbles on Pinterest. Yes, I too thought that project was just too cool. Then I spent wasted 10 minutes looking over the step-by-step. Now, I’m no rocket scientist, but that kitchen chemical concoction simply couldn’t work. So I spent wasted another 6 minutes Googling anyone who’d done it before spending wasting money on materials to try it myself. Turns out it’s a hoax…can you believe it, there are people on the internet posting things that aren’t true! (gasp!)

So if you can imagine, when I spotted some off-the-grid prepper-freak posting how they re-grow lettuce in a jar on their window sill, I just went “Yeah, riiiight! Moving on..” Turns out it’s not a hoax. One day in my very grid-dependant and non-prepper-like kitchen (I keep the prepper stuff in the big pantry and the hand tools for the zombies in the garden shed…just in case), I was cutting a salad. When I was finished, my little DIY Demon that shows up from time to time to get me into all sorts of mischief says, “Remember the prepper-freaks? …Try it…You’re just going to toss it anyway…The septic tank bugs don’t need that…it was organic…someone loved it…. “ SHUT UP!!! Ok, ok… I took the butt ends and just sat them in a water filled plastic container. I placed them outside my kitchen door behind the recycle tub, so that the blazing sun wouldn’t cook my new project…and mainly so my husband wouldn’t see it. I could just hear him, ‘How exactly do you miss the trash can by that much?’ Turns out he did see it. A couple of days later he mentions it to my sister visiting for dinner in part of a casual conversation, “…oh, no she has her pet lettuce too…” Yes, I have Pet Lettuce. What?! I had a pet rock when I was a kid. Then I had to bring the little box in to show them what I was up to and it was so cute…it’s little leaves were just coming up and happy as can be. Awwww. Like the alien in Men in Black – it’s head grows back!!! Now what are the Vegans going to do – ‘You mean it’s NOT dead!?’ (It’s simple hydroponics – but I can be a bit simple at times) Then my sister says, “But there’s only two, it’s going to take a while,….now had you started a few weeks ago, then maybe planted one every week then you’d have them staged…” Oh no, don’t tell me, – free lettuce! That’s when the combined look of terror, exasperation, with a pinch of don’t-you-dare comes over my husband’s face as he envisions explaining to the HOA about my tubs of lettuce stubs. No, Hon you’re safe. It’s just my Pet Lettuce (for now), but if they get lonely they might need celery and onion friends too.

Michelle grows lettuce from old romaine

Michelle


The Music Room, almost done!

I completed a couple more projects in the music room–updated a floor lamp so I have lighting while practicing the piano or banjo and made a dog bed for Maggie.
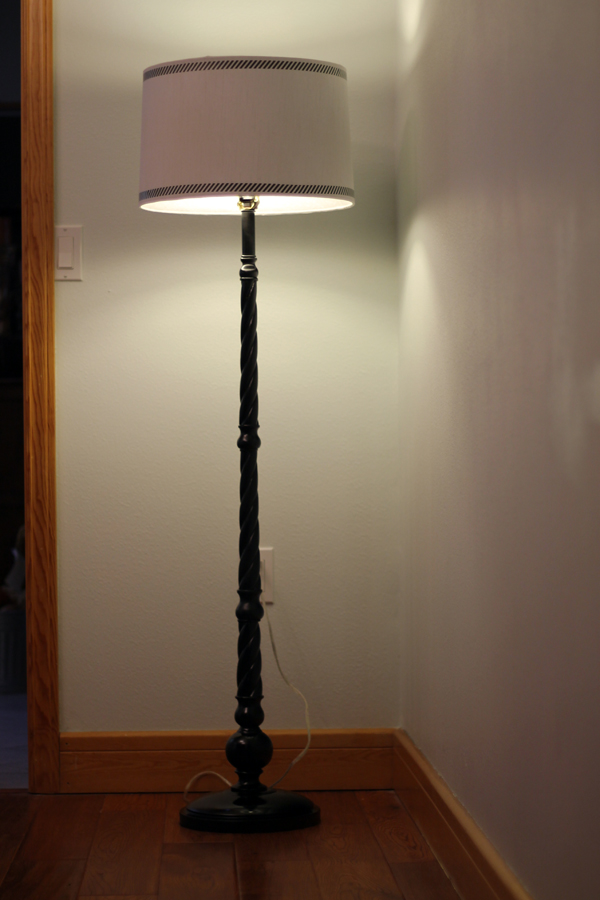
DIY, Updated lamp with spray paint and washi tape
Why don’t we every see the cords in the designer magazines or tv shows? What do they do cut them off for the photo shoot then put them back afterwards?

Both of these projects were easy peasy.  The same semi-gloss black spray paint that I used for the chandeliers renewed the old brown floor lamp.

I also spray painted the off-white lamp shade with white in satin and added washi tape that I bought from Pick Your Plum.  (If you aren’t familiar with Pick Your Plum, you should check it out.  Michelle told me about their daily email and I’ve ordered several inexpensive items from them since.)

Updated lamp shade with spray paint and washi tape

As I mentioned last week, Maggie needs a bed in every room.  But she’s not picky.  If you leave a towel on the floor, she’s happy with that.
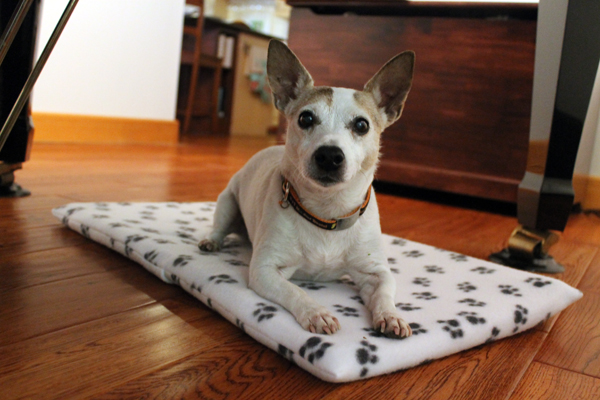
Maggie's new dog bed, Easiest DIY envelope-style pillow cover ever!

And this was the simplest cheapest bed ever!

I picked up a 1/2 yard remnant at Jo-anne’s of a fleece fabric that I thought Maggie would like.  Remnants were on sale when I was there for 50% off their already low price.  Cost, $2.03. Fleece is not only Maggie’s favorite blanket material, it doesn’t unravel.

I also had one last piece of 1″ thick foam in storage.  27″ x 14″.  Perfect for that small remnant.fabric for dog bed
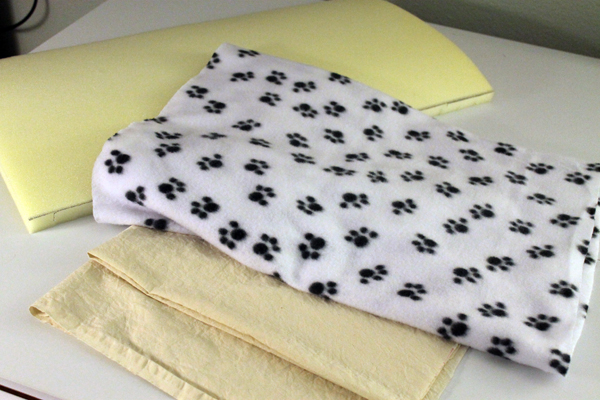
I made a little pillow case for the foam with muslin which was totally unnecessary.  It just makes it easier to slip the foam out of the fleece slip cover and provides a little more protection from dog drool.  Not that Maggie drools.

The fleece was 60″ wide and I had about 18″ of length which I cut down to 17″. (Foam is 14″ + 2″ for thickness of foam + 1″ for seams). Turned under the short ends 1/2″.  Fleece doesn’t fray so I really didn’t even need to do that.  I mostly did it because you could see the words on the selvedge.  (Oh yeah, you are never supposed to use the selvedge which is the very edge of the fabric but this is a dog bed) I then placed the center of the foam onto the center of the fabric.

Creating envelope style cover for dog Bed for the Music Room
I did not take a picture of this so am recreating with another one of Maggie’s blankets.

Folded up each side and then marked with a pin.
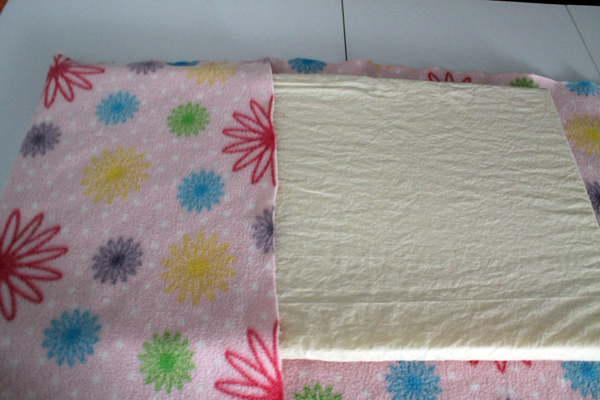
Creating envelope style cover for dog Bed for the Music Room
Fold up first side


Took the foam out and folded over to where I had pinned.  Sewed up the top and bottom.  Turned right side out.  Envelope style pillow case!  So Simple!
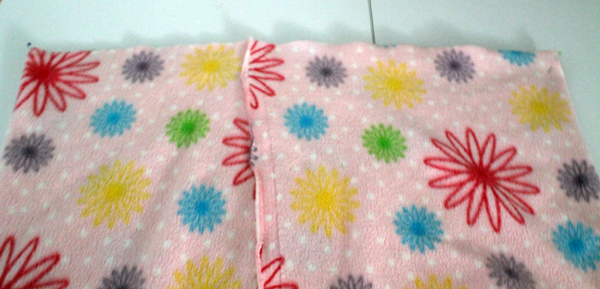
Creating envelope style cover for dog Bed for the Music Room
Here both sides are folded back up to the pinned line after the foam was removed. Just sew along the top 1/2″ and the bottom 1/2″.

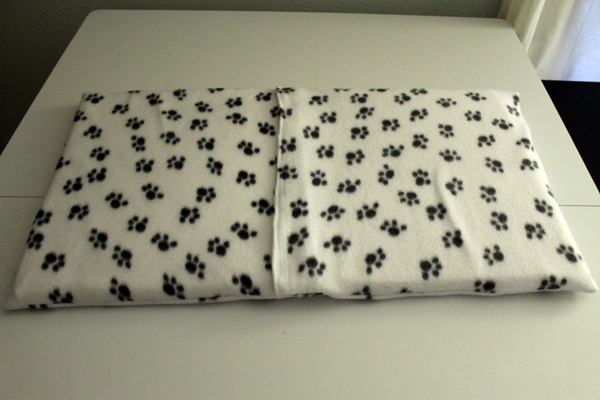
Here’s the actual envelope-style slipcover.
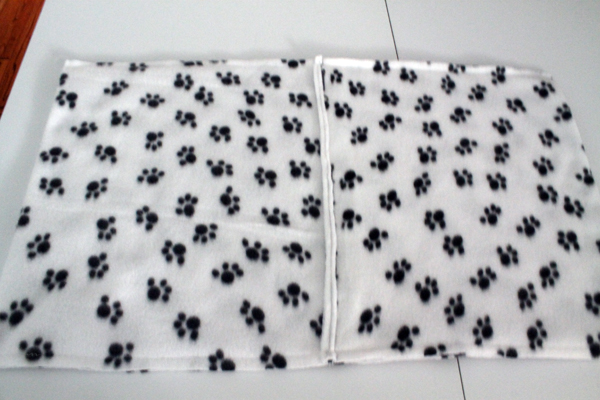
Creating envelope style cover for dog Bed for the Music Room

Creating envelope style cover for dog Bed for the Music Room
The back with the foam cushion


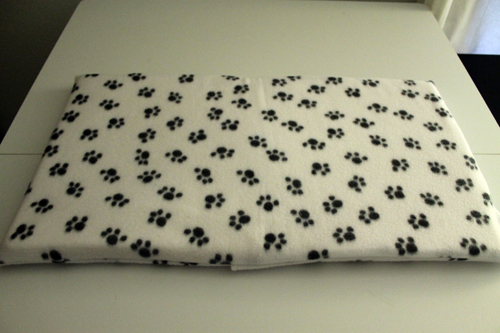
Creating envelope style cover for dog Bed for the Music Room
And the front!


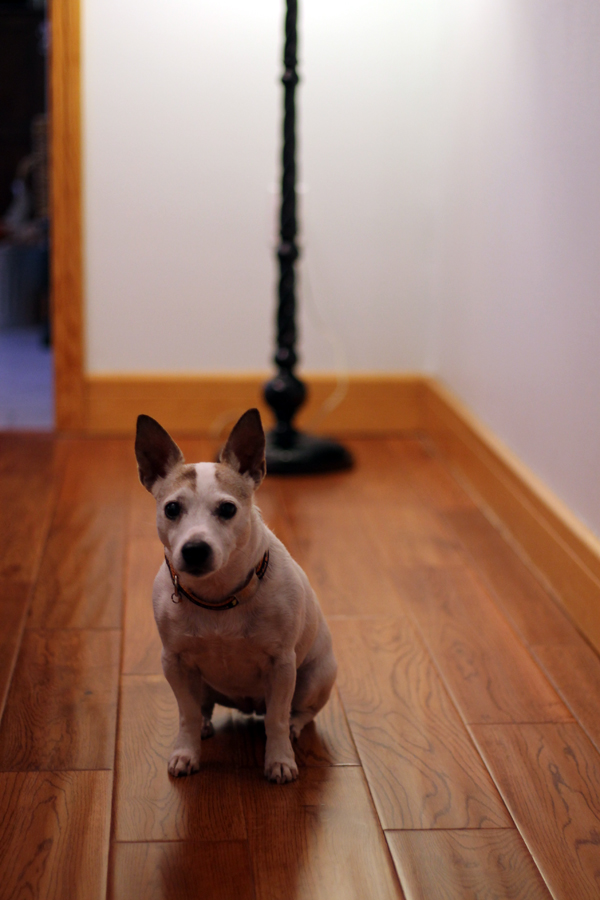
Maggie posing in the music room.
What’s next?

One last change for the music room is an art project.  That might happen next week.  Or I might move onto my office where everything from the former dining room was dumped.  That room desperately needs some organizing and prettying up right about now!

The music room renovation was incredibly cheap.  A bunch of the stuff I already had.  And I used a lot of spray paint.  The stencil from Martha Stewart was probably the most expensive item I bought and I’ll be using that in future projects.

Next week–more fun projects!