JesAndy Jubilee, The Photo Booth!

Every restaurant and attraction in Homosassa has a picture that’s been turned into a photo opportunity.  Why not one in our back yard?  Trying to sneak the one from Homosassa Springs Wildlife Park out could be difficult, so we turned to Michelle and Jon to create something even better!

JesAndy Jubilee Photo Booth
The original idea with sweet Addison hanging out!
JesAndy Jubilee Photo Booth
Jon at work
JesAndy Jubilee Photo Booth
Always helps to have an artist in the family!

JesAndy Jubilee Photo Booth

JesAndy Jubilee Photo Booth

JesAndy Jubilee Photo Booth

JesAndy Jubilee Photo Booth

JesAndy Jubilee Photo Booth

JesAndy Jubilee Photo Booth

As I mentioned yesterday, I didn’t get any photos at the wedding, but the clean-up crew made full use of the photo booth the next day.

JesAndy Jubilee Photo Booth
Pretty Piper Peterson in Purple
JesAndy Jubilee Photo Booth
Jon and Michelle
JesAndy Jubilee Photo Booth
Alan and Lauri
JesAndy Jubilee Photo Booth
Darin and Kathryn
JesAndy Jubilee Photo Booth
Andrew and his dad, Phil
JesAndy Jubilee Photo Booth
William and Riley
JesAndy Jubilee Photo Booth
Terry, me and Kathryn

More party pics tomorrow!

Log Cabin Pillow Cover

I pinned this from Marthastewart.com months and months ago:

Log Cabin Pillow Case

And I had it repined 404 times. My most popular repin as Pinterest likes to tell me in those emails it sends me so I feel special.

I’ve been saving old denim jeans and bits and pieces of denim for years.  And I had a big project that I did recently involving denim.  So I had lots of small slices of denim.  Also have a pillow form just waiting to be used.

So here’s what I made:

Log Cabin Pillow

I’m not a quilter but this is really easy.

I went out to Martha Stewart Living for guidance, you can click here for instructions.  After reading them, I decided I could do it easier.

My pillow form was 24” square.  Since I wanted the pillowcase to be a little tight, I made the case 23” square with a 2” flange.

I decided to make  4” logs.  So my first piece was a 4 ½” square. 

I used ¼” seam allowances. 

Cut

2          4 ½” x 4 ½”

2          8 ½ ” x 4 ½”

2          12 ½”  x 4 ½”

2          16 ½”  x 4 ½”

1          20 ½”  x 4 ½”

I finished it with a 3 1/2” border

2           20 ½’  x 4”

2           27 ½’  x 4”

Then just pieced it together.

Log Cabin Pillow

I quilted it “in the ditch” on to a piece of fleece.

Log Cabin Pillow Case

Then used denim for the back.

         28″ x 17” pieces of fabric

Made a slipcover style pillowcase following my instructions here.

Sew 2” from all sides to create the flange.

Insert pillow.

Log Cabin Pillow
This pillow is really big! I plan to make another that’s a bit smaller.

iPad Case

I’m headed out on a trip this weekend!  Terry and Maggie will be fending for themselves–probably eating pizza while watching a golf tournament.  I finally get to use the overnight bag that I made several weeks ago.  You can check it out here.

So I decided I needed to make an iPad case to match my overnight bag.  Won’t that impress my fellow passengers? Didn’t take long since I have everything I need and had already made it before.  What took long was documenting the steps just in case somebody else would like to make one.  Writing clear instructions is much more difficult than sewing! (Not saying that these are clear instructions.)

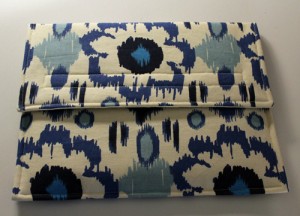
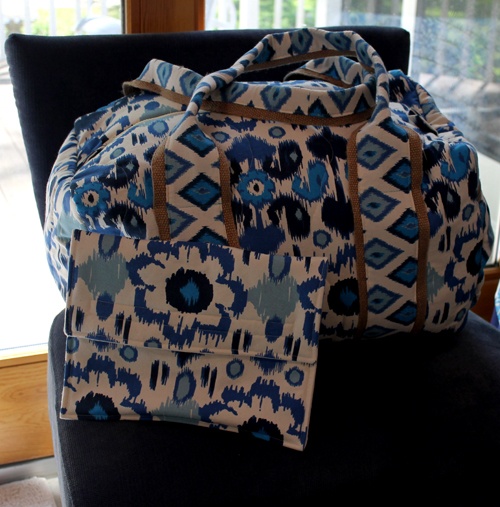
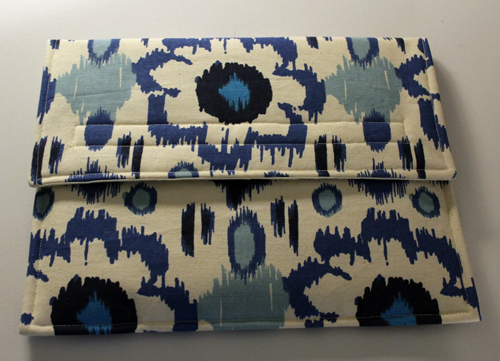
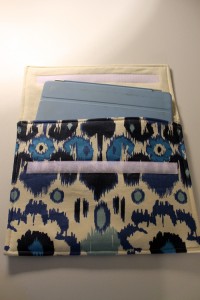
So, for those whose eyes roll up into their heads when they see my sewing directions,  here’s a pretty picture of my new lovely iPad case and matching overnight bag.  So pretty.

iPad Case

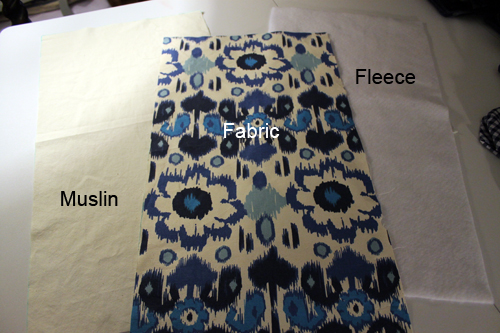
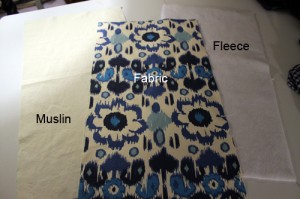
First you’ll need 2 different fabrics–one for the outer and another for lining.  I used an upholstery weight fabric that would be suitable for pillows from Premier Prints for the outer fabric. The last time I made the case I used denim for the lining but my heavy duty sewing machine could barely get through all the layers, so this time I used muslin for the lining. You will also need fleece and Velcro.

Cut the outer fabric, lining, and fleece 12 1/2 “ wide by 24” long. 

iPad Case

Baste wrong side of outer fabric to fleece, ½” from all edges.  Trim fleece.

With right sides together, stitch lining to outer fabric, leaving about 4” for turning.

Trim corners .

Turn fabric right side out.

Press.

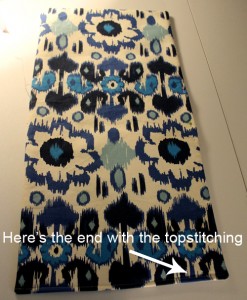
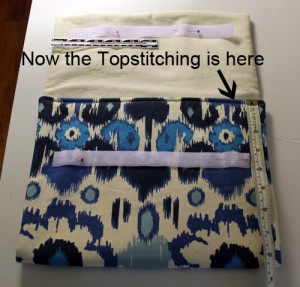
Topstitch ¼” from edge on one of the narrow ends, this will be the top of the interior pocket.

iPad Case

Cut 9 ½” of Velcro

Stitch one side of Velcro,  1” from all edges, on the lining side, opposite end that you just top stitched.

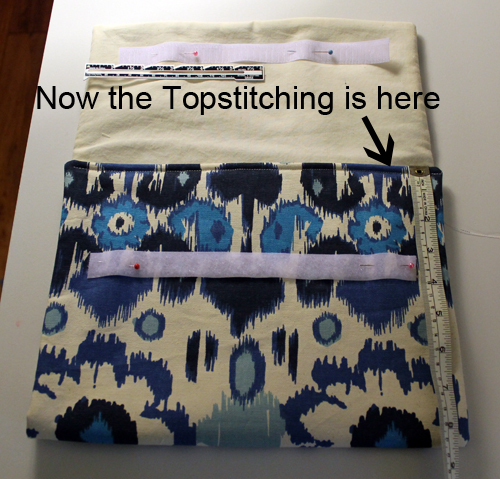
Stitch the other side of the Velcro on the right side of the outer fabric, 3” from the edge that you top stitched.

Turn the topstitch side up 8 ½” for the interior pocket.

iPad Case

Topstitch ½” from all edges, make sure that you catch in the section you left open for turning.

iPad Case

Easy Peasy.

While this gives my iPad a little bit of protection, it’s mostly for pretty.  I wouldn’t drop it and expect the iPad to survive!  That’s just my little disclaimer!

iPad Case