DIY Chalkboard Table and Chairs

Years ago we purchased an unfinished table from Ikea to serve as a coffee table in our TV room.  Three houses later, that little table moved out to the screen room and I added two kid-sized chairs.  Voila–instant child-size table set!

But many years went by and the set was looking pretty sad.  While the screened room is a covered area, rain still comes in when we have one of our typical Florida summer afternoon storms.  Another problem was that the table really wasn’t high enough for the chairs.  As the grandkids get bigger, they all had the same complaint–their legs didn’t  fit under the table.

DIY Chalkboard Table and Chairs
This chair had seen better days!

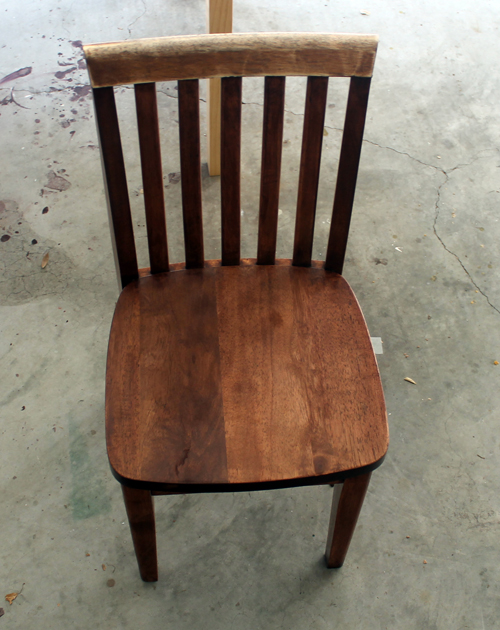
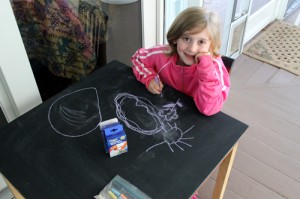
So I went to my wizard and told him about the short legs.  Terry bought a cheap piece of pine 2×2 at Home Depot and cut it up to make new longer legs and replaced the short ones.  He liked the contrast of the natural legs with the darker table so we decided to go with it.  I’d been planning on painting a checkerboard on top of the table but then a lightbulb went off in my head!  (Hey, I didn’t even look at Pinterest to get this idea but I’m sure that it’s out there.) Finish the top with chalkboard paint!  The kids can draw or make their own checkerboard table!  Even better, I had plenty of paint left from the chalkboard I made for my kitchen!  DIY Chalkboard Table and Chairs

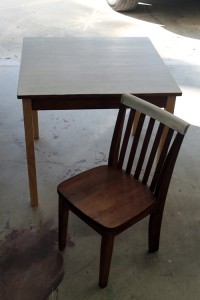
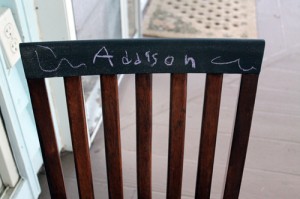
I just followed the directions to paint the top of the table and the top section of the chairs with the chalkboard paint.  Also refreshed the dark stain on the chairs and table sides with Minwax gelstain.  Put some golden oak stain that I had left over on the legs and followed up all the stained areas with a couple coats of Minwax Polyacrylic.

Addison was visiting during the refreshed table debut.  It was a hit!

DIY Chalkboard Table and Chairs

DIY Chalkboard Table and Chairs

DIY Chalkboard Table and Chairs

The table is so tall now, even Grandma can use it!

DIY Overnight Bag

For Christmas presents in 2012 I had planned to make a bunch of totes.  I finished most of them but had one bag still cut out after the holidays and waiting to be created!  And even though I really didn’t want to do any more sewing, I hate to start a new project until the previous one is finished. And there are so many things I want to do! So back to the sewing machine.

This bag was different than my typical totes.  (The instructions for my shopping totes are here.)  I first saw this bag on Pinterest and thought it would be fun to make.

DIY Carryon
This bag on Pinterest was from StudioCherie.

I found the pattern for the same bag by Simplicity.  It’s also from StudioCherie but on sale at Joann’s.

DIY Overnight Bag

This project started out with a strike against it.  It called for batting which I really HATE to sew with–probably why I don’t make quilts. Batting just wants to move around the whole time I’m sewing.

I also had trouble finding “jute webbing” for the handles.  The first place I checked was at Hobby Lobby and the sales lady showed me cotton belting–the same stuff I use for my other totes.  Not wide enough.  I asked at Joann’s and the sales lady had never heard of it so in desparation I went through every aisle and found it the upholstery department. It’s cheap and the handles are very sturdy but it has an ugly red pattern on the back.

I also found the instructions confusing–this pattern is not for a beginning sewer.

After cursing at it many times and breaking a few needles I finally finished it.  And it’s really nice.  And it’s really big!  And I’m keeping it for myself!

DIY Overnight Bag
A roomy pocket with a zipper on one end, another open pocket on the side.  I added a pocket on the inside which wasn’t in the instructions.
DIY Overnight Bag
See how big it is! I could put Maggie in it. And my clothes!

I might make it again even though it was difficult, because it turned out really nice.  I love all the pockets and zippers. But I’ll use fleece instead of batting and look for jute webbing that doesn’t have a red pattern.

Now Maggie and I need to plan a trip so we can use our new bag!  On to our next big project!

DIY Carry On, tote, bag
Here’s another version of an overnight bag. My DIY Carry On using a tutorial form sew4home.com


DIY Trays

I love to refinish trays.  They are so useful in any room and I never seem to have enough.  I don’t pay full price for a tray–way too expensive!  I don’t even like to buy them on sale; I either get them at a thrift store or on the clearance rack.  No matter how ugly they are, they can be beautiful.

I posted about this tray back in December.  It’s probably my favorite and I picked up it for $10 and made it beautiful by cleaning those lucite and brass handles and spraying the tray gold.

DIY TrayI found this tray on clearance in a shop at an outlet mall.  It was already on sale then marked down 70%.  Yippee! I wanted to do a stained glass mosaic on it but I was in a hurry.  Plus I’m afraid to get any little cuts on my fingers on the glass grinder right now.  It could ruin my career on the banjo!

DIY trays

Since color blocking is the trend, I painted the tray cream and a shade of blue that matches the guest bedroom.  It’s now a place for my visitors to place their personal items.

DIY Trays

Before I developed the phobia of cutting my fingers on the glass pieces, I made this mosaic tray.

2013_02_15mosaictray

Another finish I like to do with trays is decoupage.  I either create a design or buy a small poster then use modge podge.  These also make nice gifts–put a bunch of goodies on the trays and wrap it up like a gift basket.  Fun, easy, and a personal gift.

So I’ll be on the lookout for trays while I’m browsing Renninger’s Antique and Collectors Extravaganza this weekend!