DIY Picnic Tote and Blanket

I wanted to give something special as a wedding gift for a special couple.  They weren’t registered for gifts at any stores so I decided to create a picnic tote and blanket.

DIY Picnic Tote and Blanket

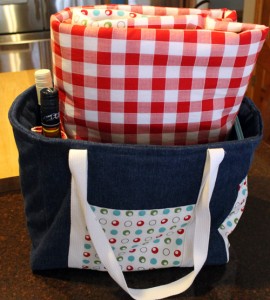
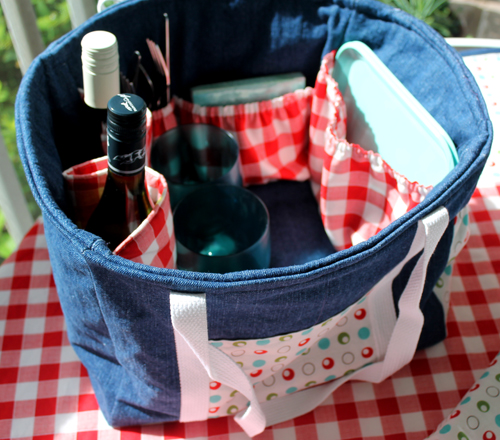
My first consideration was the fabric, I wanted to use a traditional picnic print for parts of the tote and blanket but I wanted it paired with a more modern look.    I also wanted the underside of the blanket to be water resistant so needed either a laminated fabric, oil cloth or vinyl.  The tote had to be roomy, durable, and have a lot of pockets to hold wine, flatware, plates, cups, napkins and anything else that might be needed at a picnic.

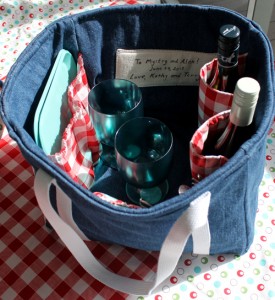
I waited for Fabric.com to have a sale on laminated fabric and did some searching, matching, and designing and decided on the Moda Glamping series.  What’s more traditional than red and white gingham for a picnic? And I thought the matching “Miss Polka Dance” was perfect along with a nice blue denim and cotton webbing for the handles.  I also used insul-bright sandwiched between the layers to provide a little bit of insulation for the bag and wine bottle pockets.DIY Picnic Tote and Blanket
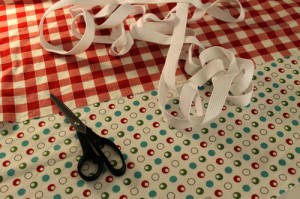
Then to make it even better, I found the perfect matching picnicware at Target.  Love Target!
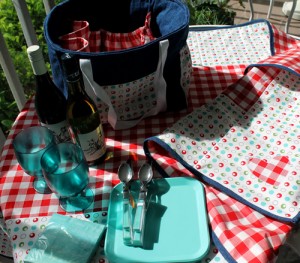
Use Miss Polka Dance old Lace/Barn Red for pockets and wine bottle holders on picnic tote.

I also picked up a couple bottles of wine that had cute labels at ABC Liquor in Crystal River.  Love that store, too.  I especially appreciate that they always have someone on staff to help me pick out a good wine at a good price.  They’ve never steered me wrong.
DIY Picnic Tote and Blanket

DIY Picnic Tote and Blanket

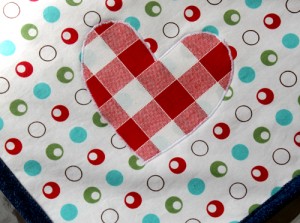
I personalized the blanket with an appliqued heart and the tote with a hand-written appliqued patch.  (My handwriting is so bad that the newlyweds will definitely know it’s handmade!)

I think it turned out really nice. And now I should be telling you how to make it but that’s going to be another day!  I had some issues–like working with laminated fabric is kind of tricky.  And the new design for the tote was a little off.  So I’m planning to make another set to work the bugs out–as soon as Fabric.com puts laminated fabric on sale again!  That stuff is pricey!  And then I’ll have to decide who to give it to!  Decisions, decisions.

But just in case you want to start your own picnic set before I get the next one finished,  here are some websites that I did check out. I also did a search on Pinterest for picnic totes and picnic blankets and there’s a lot of tutorials out there.  I didn’t actually follow any of the instructions exactly, but everything I read did help with the final design.

Amy Butler’s Picnic Blanket

Tips for working with vinyl fabric from Amy Butler

Some help from Sew4home for the blanket

Also from Sew4home, instructions for an insulated tote
DIY Picnic Tote and Blanket

Adventures with Michelle, DIY Candles

I have ruined my love of expensive candles. Not to say that I don’t like candles – I do. I really enjoy them. Problem is, the cost. I like those $20-$25 candles that smell so good. You know the ones. Recently, I burned up yet another $20 wonder and thought, ugh, ‘I’m throwing away another lovely glass jar'(not to mention that I literally burned up a twenty!). We don’t have glass recycling here and that makes it worse. So I sat it aside and enjoyed the smell with the lid off anyway, until I’d decide to toss it.

In the meantime, I found myself at a place called Hobby Lobby wandering aimlessly. I’d driven my Mom to an eye Dr. appointment and had time to kill – a dangerous thing for me. The store is really big – like Home Depot big. Most of the middle isn’t hobby related at all, but that didn’t stop me from looking. In the back I went looking for canning jars (don’t, they’re expensive!) and with them were candle jars. Hmm, never thought of making a candle. Around the corner, you guessed it, candle making supplies….on sale! Well, that did it – I have to try this. For $13.50, I was out the door.

The next day me and my Michael’s Crafts coupon were out picking up a metal melting pot, because the nice lady on the YouTube video said it was a good investment. OK, if they’re too expensive I’ll just get an old pan at the Goodwill and have fun. But turns out it cost a whopping $8.00, had nice tall sides and a pouring lip. Later, I used it to store all the candle stuff in. Now to put it to use.

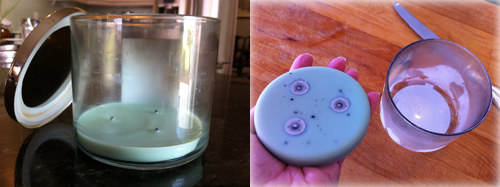
Step 1 and 2: Get the old candle jar prepped. I’m sure there are a dozen warnings against doing this – none of which I’ve actually read. Let’s get the old wax out first – just put it in the freezer. The old wax disc pops right out. Martha taught me that years ago – thank you Martha. Clean the jar out with some glass cleaner and be nice and peel that label off (but not the warning label on the bottom – I need lots of warnings).

Adventures with Michelle, DIY Candle

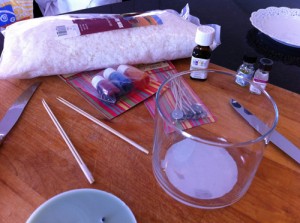
Step 3: Gather the goodies. You’ll need wax (I chose soy wax to be trendy and healthy-like), wicks, color and scent.They didn’t have the scent I wanted at the store and I knew I keep lemon oil at home. Although, I did need some spearmint oil. Off to the cake department. Note ‘oil’ – not extract. There’s a huge difference. And I’m sure there’s yet another ignored warning in there about using oils you can eat instead of the tiny vials on display.

Adventures with Michelle, DIY Candle

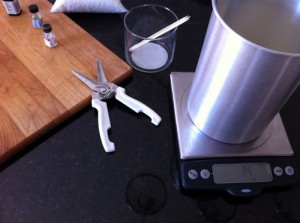
Step 4: Weigh out the wax. It’s a 14.5oz candle jar – so I’m guessing 14 oz will do.

Adventures with Michelle, DIY Candle

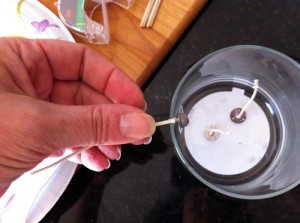
Step 5: (I know at this point we’ve lost Donna – too many steps!) Set your wicks with some hot glue, or those little ‘glue dots’ they sell.

Adventures with Michelle, DIY Candle

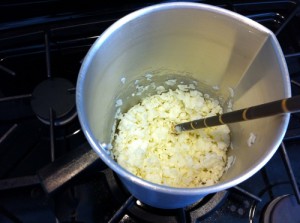
Step 6: Get that wax melting. I used an old paint stick/dowel as not to splash. Oooo, hot molten wax and skin – not a good combo!

Adventures with Michelle, DIY Candle

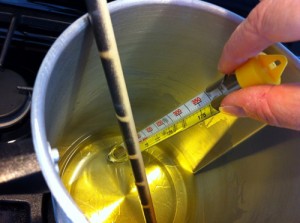
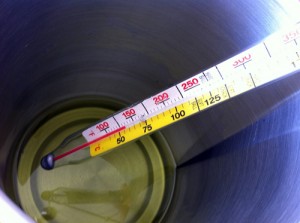
Step 7: Doesn’t look like much – get it up to 185deg. Yes, that’s my candy thermometer – I’ll clean it later.

Adventures with Michelle, DIY Candle

Step 8: Let it it start to cool down and add your color and scent. A few drops of lemon and mint – yummy! The soy is already a creamy yellow so a few drops of blue and one or two of yellow worked fine.

Adventures with Michelle, DIY Candle

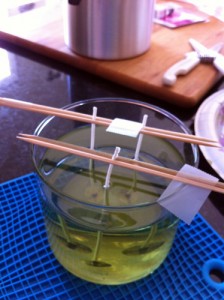
Step 9: I used these skewer sticks to hold the wicks upright. No fancy ‘wick holders’ needed here. Pour in the liquid. And wait – and wait – and wait. Ok, maybe not that long. Go clean up.

Adventures with Michelle, DIY Candle

Do not – I repeat DO NOT pour anything down the drain – unless you’re married to a plumber and really want a divorce. Warm the pot a bit and wipe it out with a paper towel. Then you can wash it with hot soapy water.

Step 10: A couple hours later it’s cool. Trim the wicks and admire – but don’t light it until tomorrow. Yes, it’s still warm inside.

Adventures with Michelle, DIY Candle

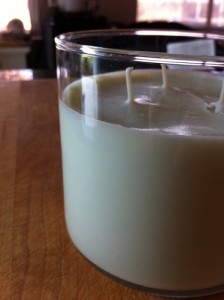
Done: …and the next day… Look at that – a candle. Then my husband shows up and sniffs – “Oooh, I like yours better than the old one – it smelled a bit like a urinal cake.” What??!!! (since I have very little frame of reference to the scent of a urinal cake…I’m going to trust him on this) I like my candle with it’s soothing greeny color, and lemony, minty smell. (very unlike a urnial cake I’m hoping)

Adventures with Michelle, DIY Candle

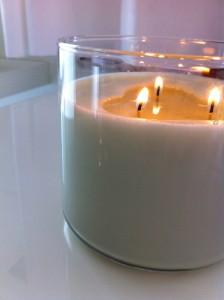
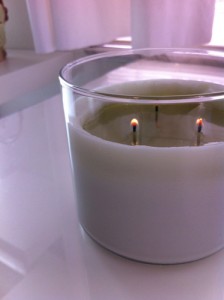
Later: The soy wax burns forever – this is hours later in the afternoon (yes I need different wicks next time). And no smoke or soot. Even if it wasn’t a perfect experiment – I’m going to keep refining this and maybe they’ll turn up as Christmas gifts.

Adventures with Michelle, DIY Candle

The cost, what like, $5 bucks! Now I know how that guy that owns the candle company has all that money!!! I’m thinking I shouldn’t have showed you how to do this cause I need to make candles…I’m obviously in the wrong business!

Michelle @ www.badzoot.com

Bench Update

Our newbee homeowner Kathryn is all about saving money and reusing things. Besides buying a bunch of fun things at Renninger’s Antique Extravaganza in February, she has been hitting garage and estate sales every Saturday morning.  And now she can now add dumpster diving to her DIY resume. When she spotted an old Ikea coffee table in a dumpster, she sent Darin in to retrieve it.

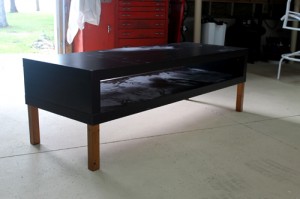
Kathryn wanted to turn her new treasure into a bench for her bedroom plus it would store the required TV electronic paraphernalia. The table was missing  a leg and had a few dents and dings but nothing that couldn’t be fixed by the wizard, Terry.

Kathryn asked me to make a cushion for the bench so we headed for JoAnne’s, and with a few of my coupons, picked up foam, piping, and fabric at a reasonable cost.

Bench Update

Meanwhile, Terry used the old legs from the grandkid’s play table that we had updated to a chalkboard table a few months ago and repaired the damaged areas.

Bench Update
Terry changed out the little stubby legs before I had a chance to get a pic.

Bench Update

I primered with Kilz 1-2-3 and then spray painted the new and improved bench to match their other bedroom furniture

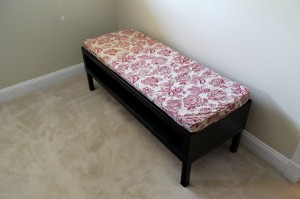
Now came the hard part.  I knew we were going to Tampa that Sunday and I wanted to have the bench finished so we could deliver it.  I think my self-imposed deadline stressed me out and just made everything more difficult.  I’ve made numerous cushions and quite often with piping.  Sometimes it’s easy peasy; sometimes not so much.  This one was a pain in the ***.  And I made a mistake which made my heart sink.  I couldn’t repair it without buying more fabric and piping so I camouflaged it and made that side the one that goes against the wall!

Making piping is simple but boring and monotonous and I usually just want to put my head down and cry before I have enough made.  But I got through all that and then had trouble getting it to wrap around the corners of the cushion.  It’s kind of like sewing blind.  Until you have it finished, you really can’t see if it’s right.  And it was never right!   I was actually planning on creating a tutorial about making piping but after fighting with the bench cushion for a few days, I decided that there has to be a better way.  (Like buying the cushion already made!)

Bench Update

But I finished it by my self-imposed deadline and it was beautiful.  And Kathryn was thrilled.  So it was worth it!

Bench Update

Kathryn and Darin are still renovating the townhouse so I wasn’t able to get a photo of the bench styled yet.  But eventually, it will look like this!

Bench Update

I was really glad when I got that little project finished and delivered!  And this is a little announcement to all family and friends–no more cushions from me–at least until my hair grows back!